Squarespace makes it easy to build a beautiful website. It's built-in form builder lets you add contact forms, enquiry forms, and booking request forms to any page without writing a single line of code.
But when it comes to where those submissions actually go, Squarespace's native options are limited.
By default, Squarespace sends form submissions to your email inbox. That works well enough when you are receiving a handful of enquiries a month. But the moment you need your team to collaborate on responses, filter submissions by type, track patterns over time, or simply keep everything organised in one place, an inbox falls short quickly.
The solution most people reach for is Zapier. Set up a Zap, connect Squarespace to Google Sheets, and submissions flow across automatically. It works, but it adds a monthly subscription on top of what you are already paying for. Squarespace introduces a delay between submission and spreadsheet row, and creates a dependency on a third service that can break independently of both Squarespace and Google Sheets.
This guide shows you a more direct approach. Using Formgrid, you can replace Squarespace's form handler with a custom endpoint and have every submission land in Google Sheets automatically, in real time, with no Zapier account required.
What You Will Need
Before starting, make sure you have the following in place:
A Formgrid account: Google Sheets integration is available on all plans, including free. The free plan syncs your first 10 rows per form. The Premium plan at $12 per month syncs up to 500 rows per month. The Business plan at $29 per month syncs unlimited rows automatically. Sign up free at formgrid.dev. No credit card required.
A Squarespace site with a form: You will need an existing Squarespace form to connect to Google Sheets. Any Squarespace form works, whether it is a simple contact form, a service enquiry form, or a booking request form.
A Google account: You will need access to Google Sheets to create the spreadsheet that will receive your submissions. Any standard Google account works.
How This Works
Squarespace forms support a custom form action URL. Instead of letting Squarespace handle the submission and forward it to your email, you point the form at a Formgrid endpoint URL.
Formgrid receives the submission, saves it to your dashboard, sends you an email notification, and writes a new row to your connected Google Sheet instantly.
The key change on the Squarespace side is a single setting: the form action URL. You point it at your Formgrid endpoint instead of leaving it on Squarespace's default handler. Everything else happens inside Formgrid.
Part One: Set Up Your Formgrid Form
and Get Your Endpoint URL
Step 1: Create a Form in Your
Formgrid Dashboard
Log in to your Formgrid account at formgrid.dev. From your dashboard, create a new form and give it a name that corresponds to the Squarespace form you are connecting. For example, "Contact Form" or "Service Enquiry Form."
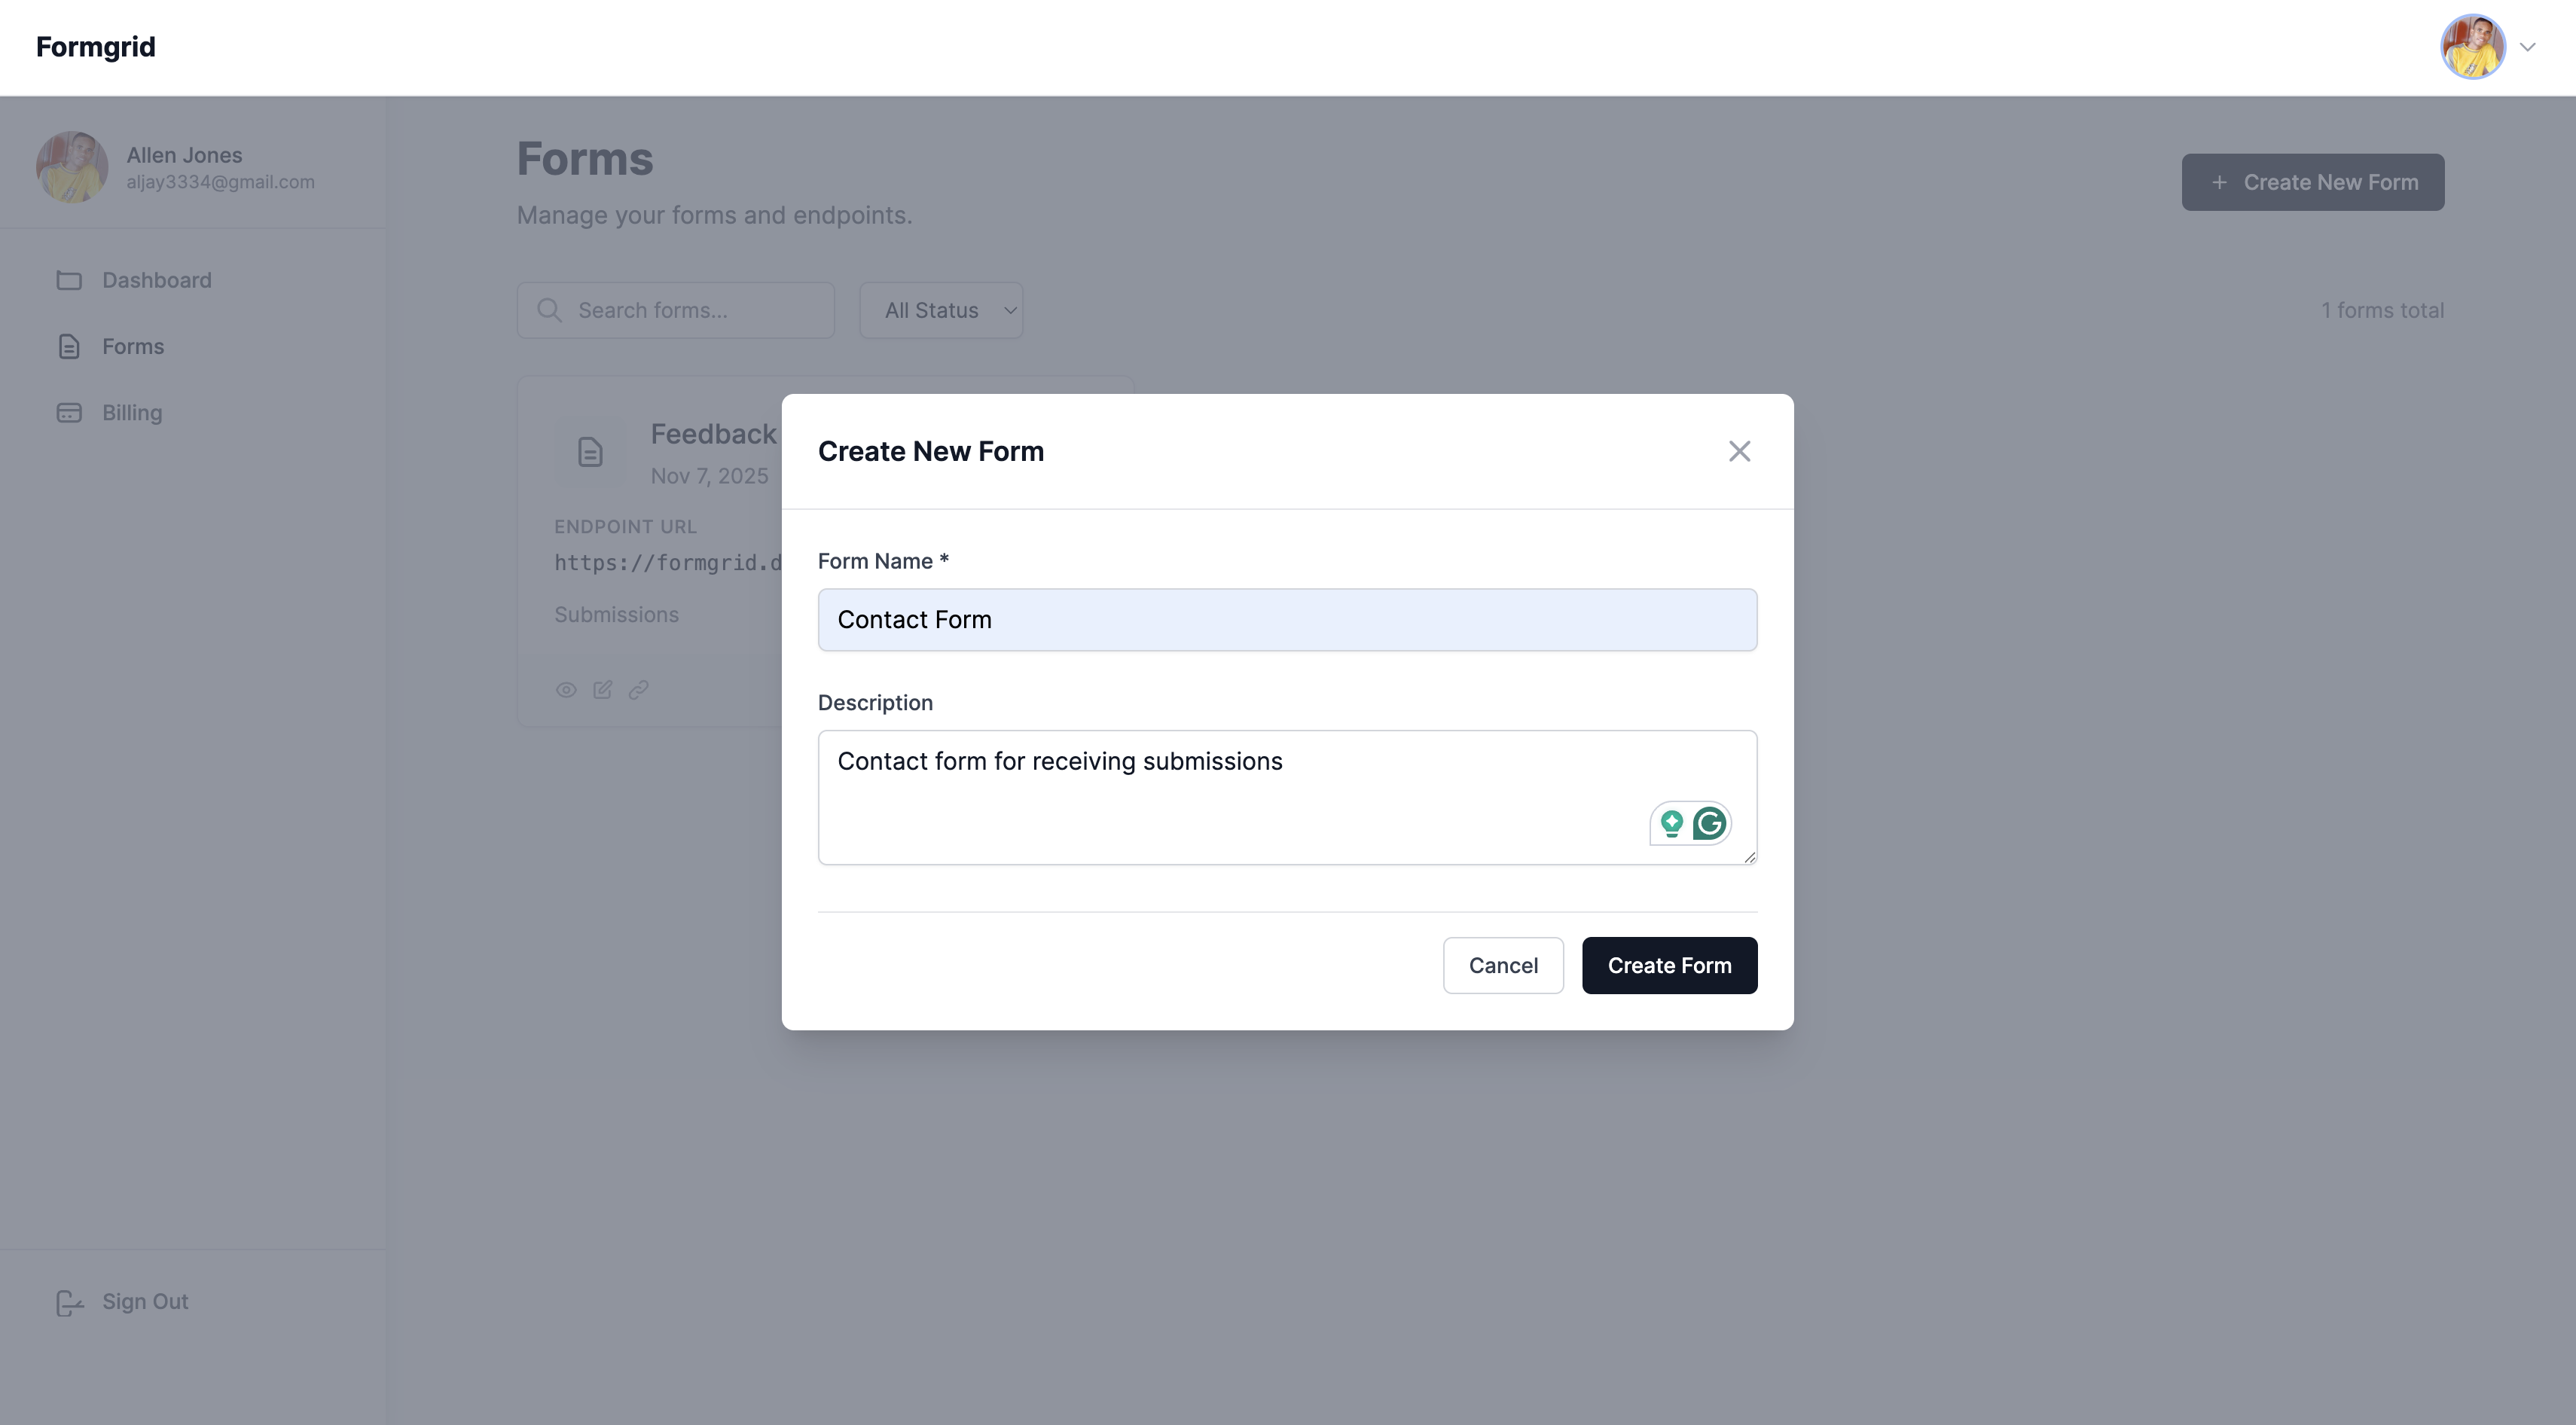
You are not building a form inside Formgrid here. You are registering a form entry in your dashboard so that Formgrid knows where to route the incoming submissions from Squarespace. Your actual form fields remain exactly as they are in Squarespace.
Step 2: Copy Your Formgrid
Endpoint URL
Once your form is created, open it in your Formgrid dashboard. You will see your unique endpoint URL displayed prominently. It will follow this format: https://formgrid.dev/api/f/your-form-id
Copy this URL. You will need it in the next section when you update your Squarespace form settings.
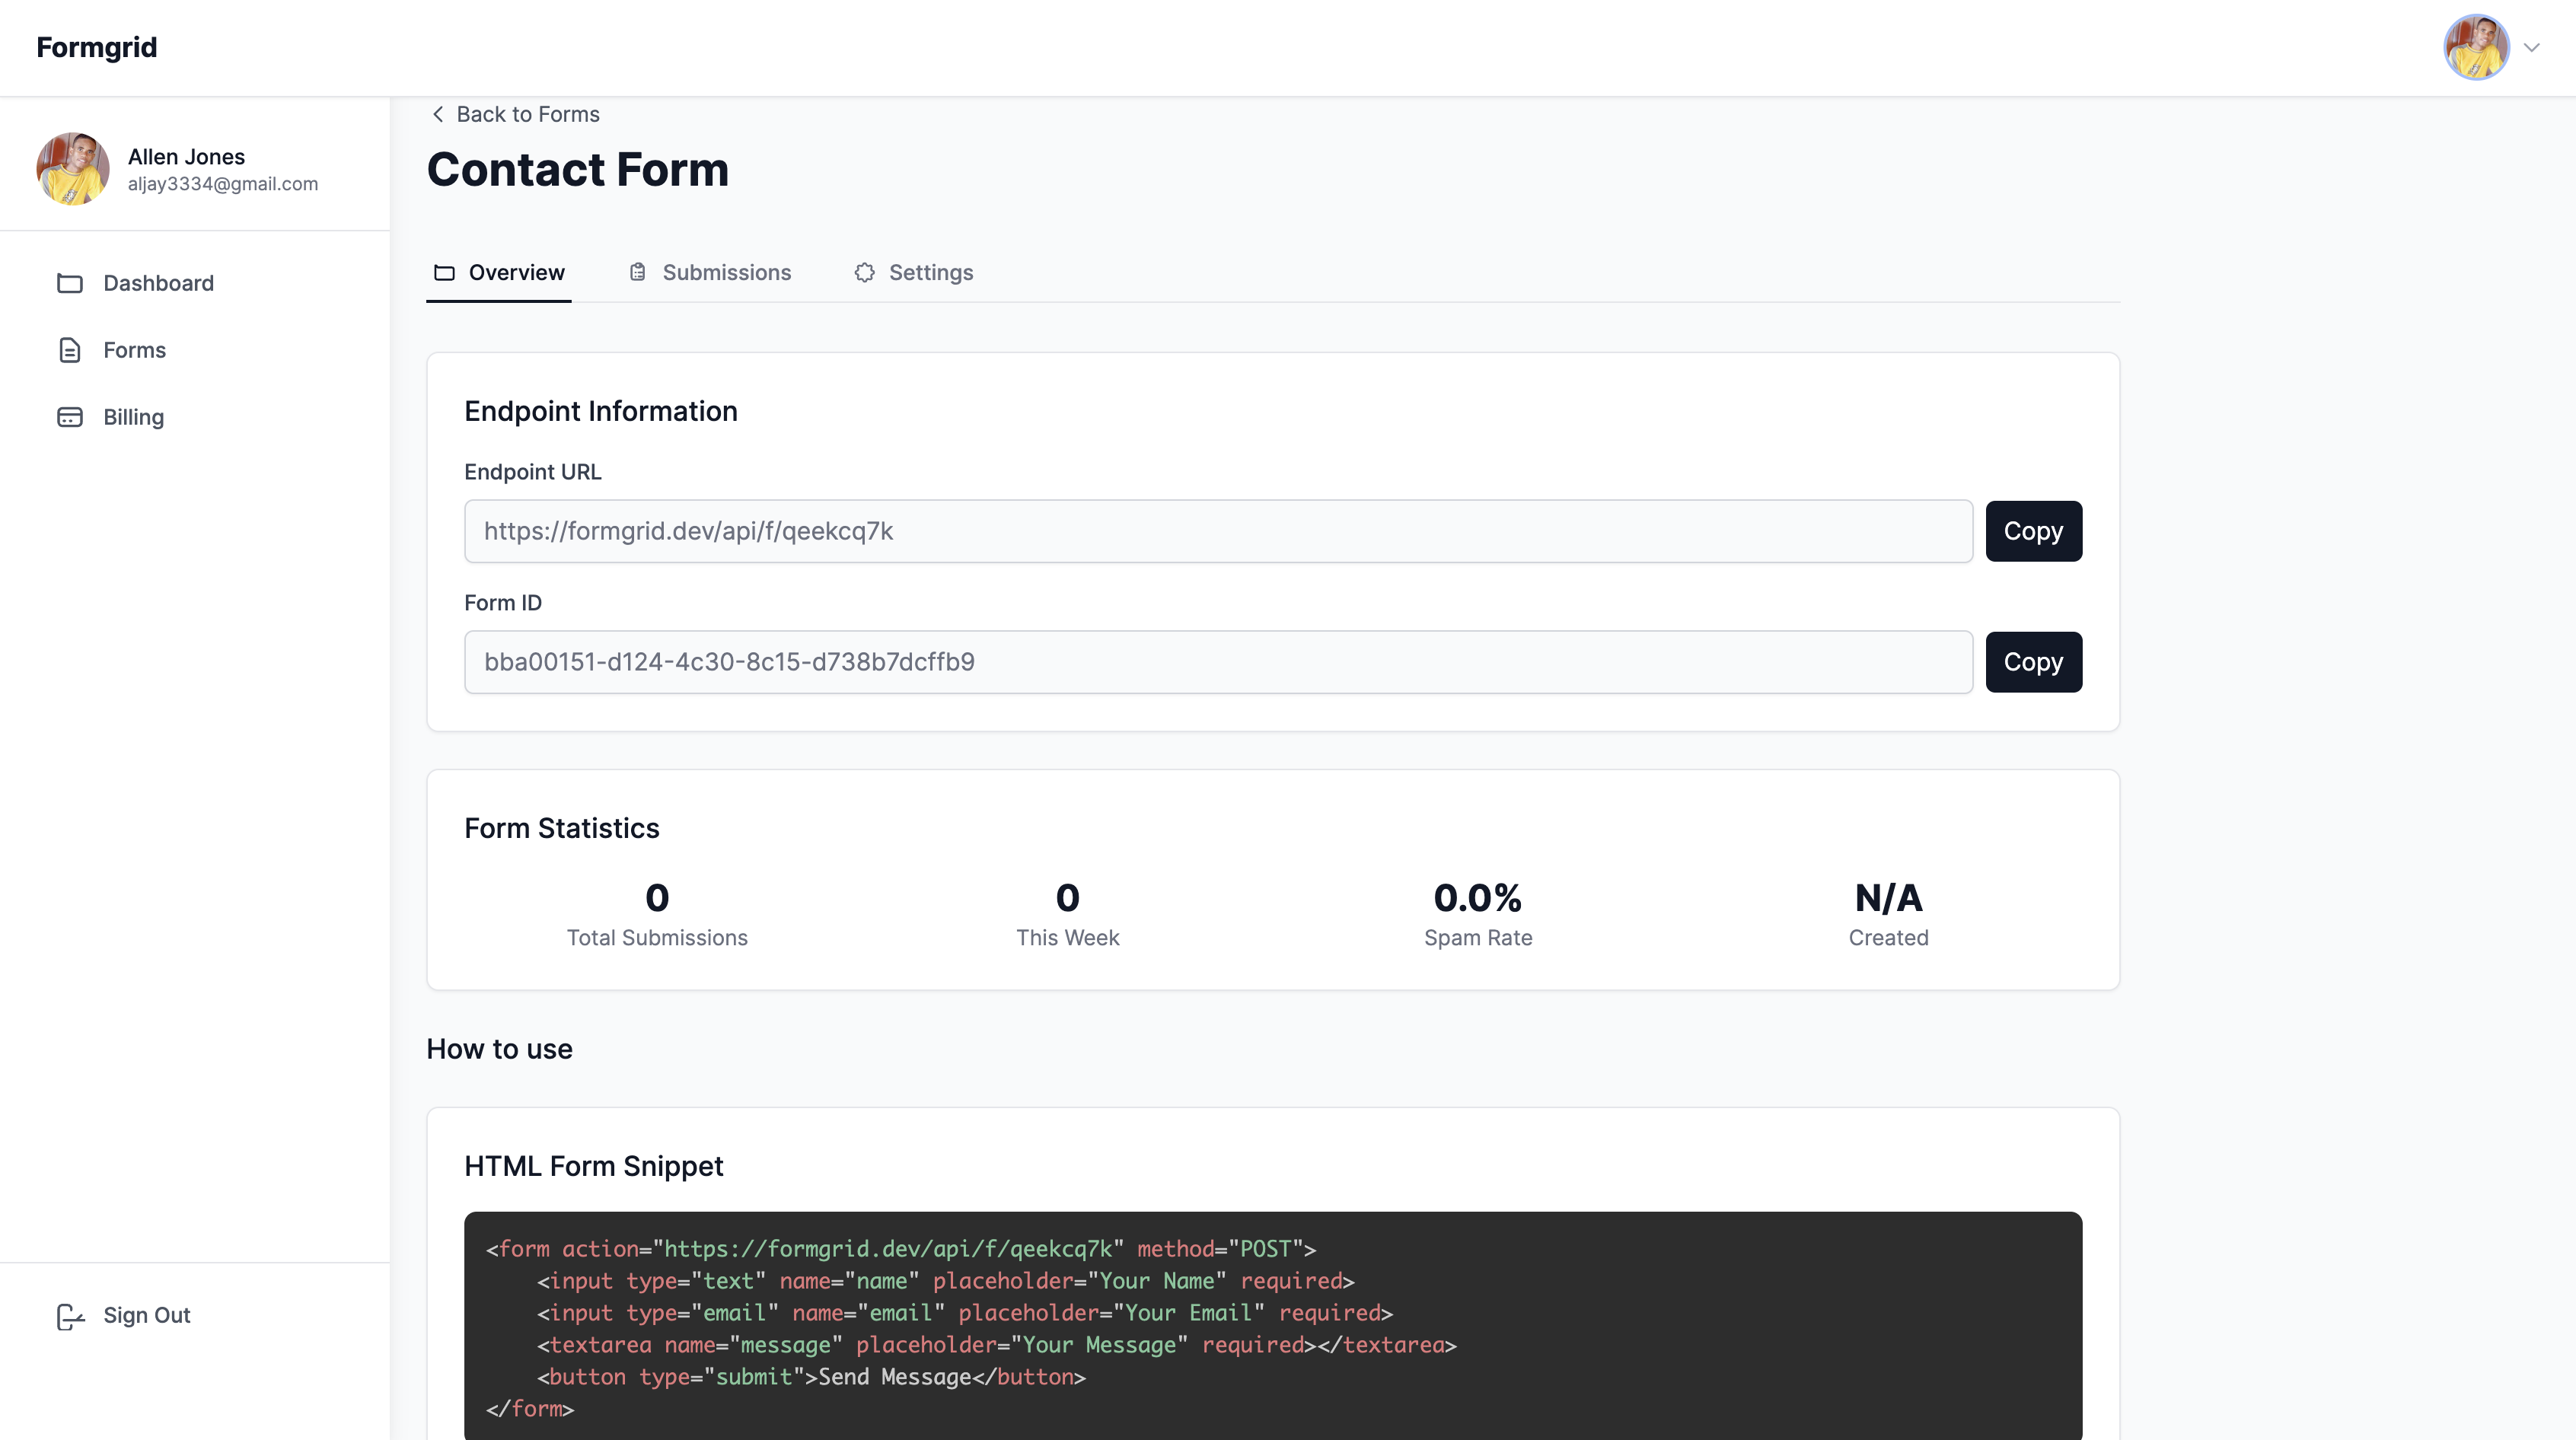
This URL is permanent. It does not change when you update your form settings, connect integrations, or make any other changes inside Formgrid. You set it once in Squarespace and never need to touch it again.
Part Two: Update Your Squarespace Form to Use the Formgrid Endpoint
Step 3: Open Your Squarespace Form Block Settings
Log in to your Squarespace account and open the page containing the form you want to connect. Click on the form block to select it, then click the pencil icon to edit it.
In the form block editor, navigate to the Advanced tab. This is where Squarespace allows you to set a custom form action URL.
Step 4: Set the Post URL
In the Advanced tab, look for the field labelled Post URL or Form Action. This is where Squarespace sends the form data when someone submits it.
Replace any existing value with your Formgrid endpoint URL: https://formgrid.dev/api/f/your-form-id
Click Save or Apply to save the change.
Step 5: Check Your Field Names
Formgrid uses the field labels from your Squarespace form to create the column headers in your Google Sheet. Make sure your form fields have clear and descriptive labels before you connect your Sheet.
Field labels like Name, Email, Phone, and Message will produce clean, readable column headers in your spreadsheet. Review your form fields and update any that are unclear before moving on.
Step 6: Submit a Test Entry
Before connecting Google Sheets, confirm that submissions are reaching Formgrid correctly. Fill in your Squarespace form with test data and submit it.
Open your Formgrid dashboard and check the submissions list for your form. The test entry should appear within a few seconds.
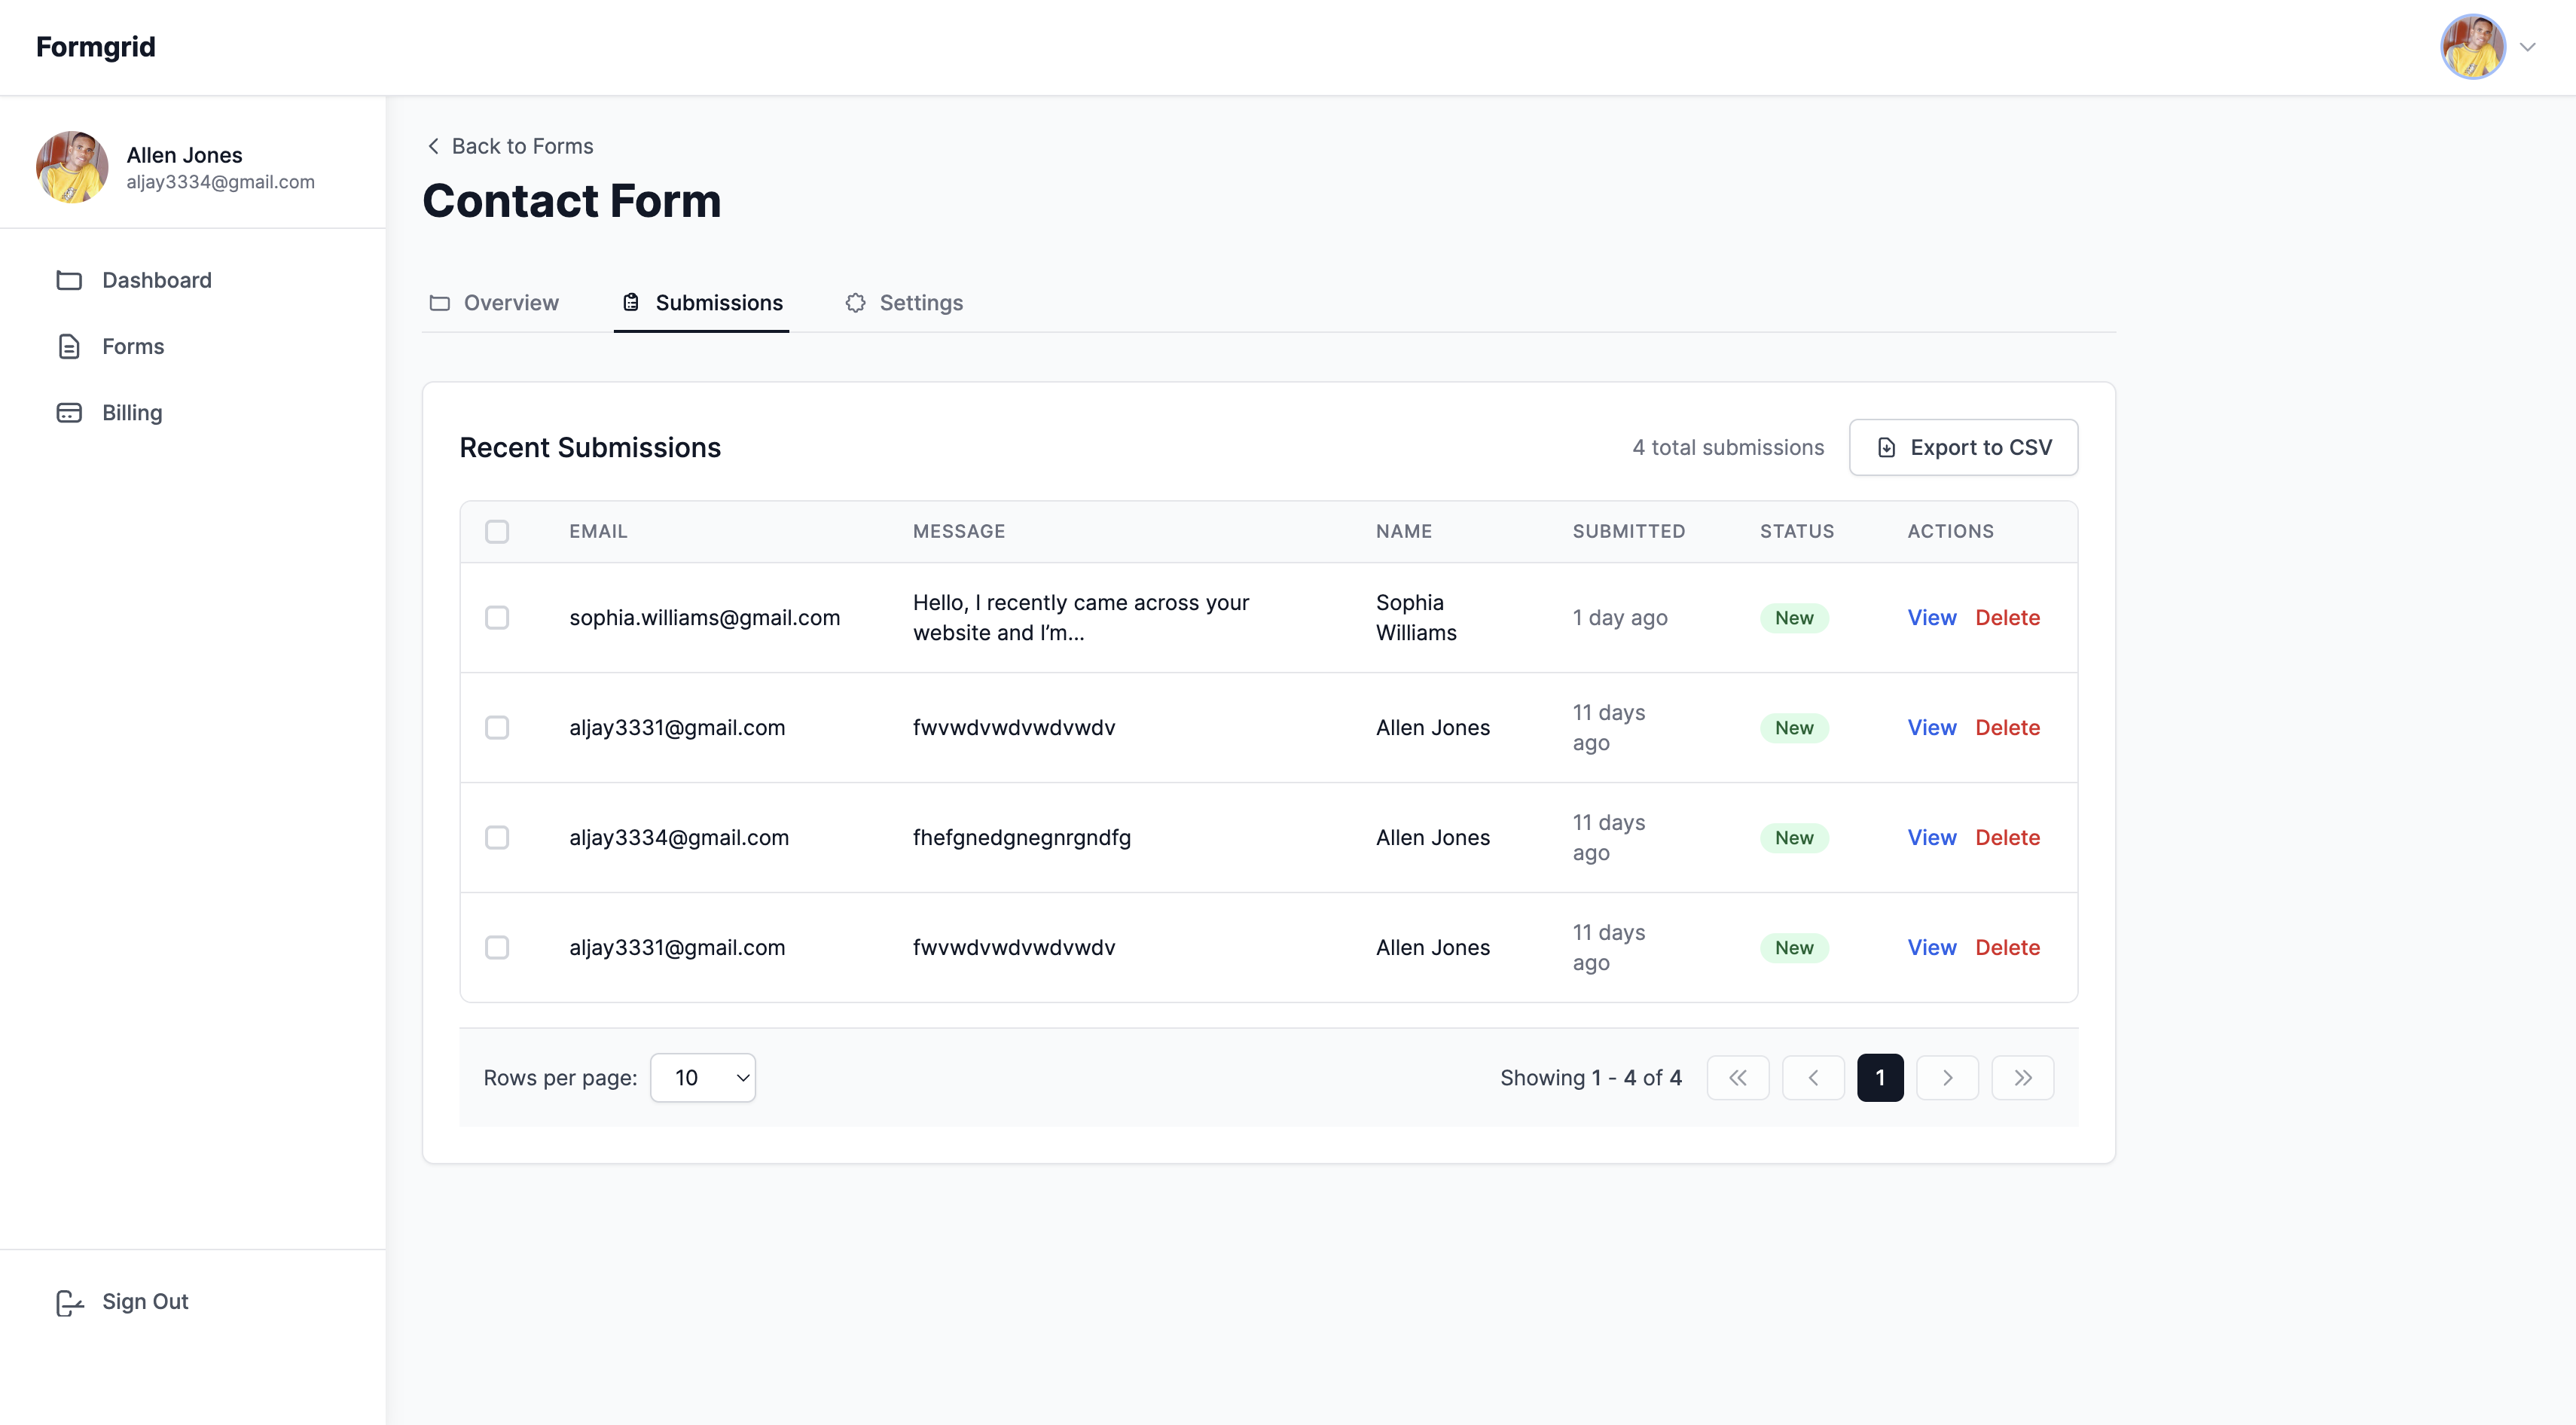
If the submission does not appear, go back to your Squarespace form settings and confirm that the Post URL is set correctly. Also, confirm that you saved and published the changes in Squarespace after updating the form action.
Part Three: Connect Google Sheets
Step 7: Open the Integrations Tab
in Formgrid
In your Formgrid dashboard, open the form you just connected and click on the Integrations tab at the top of the page.
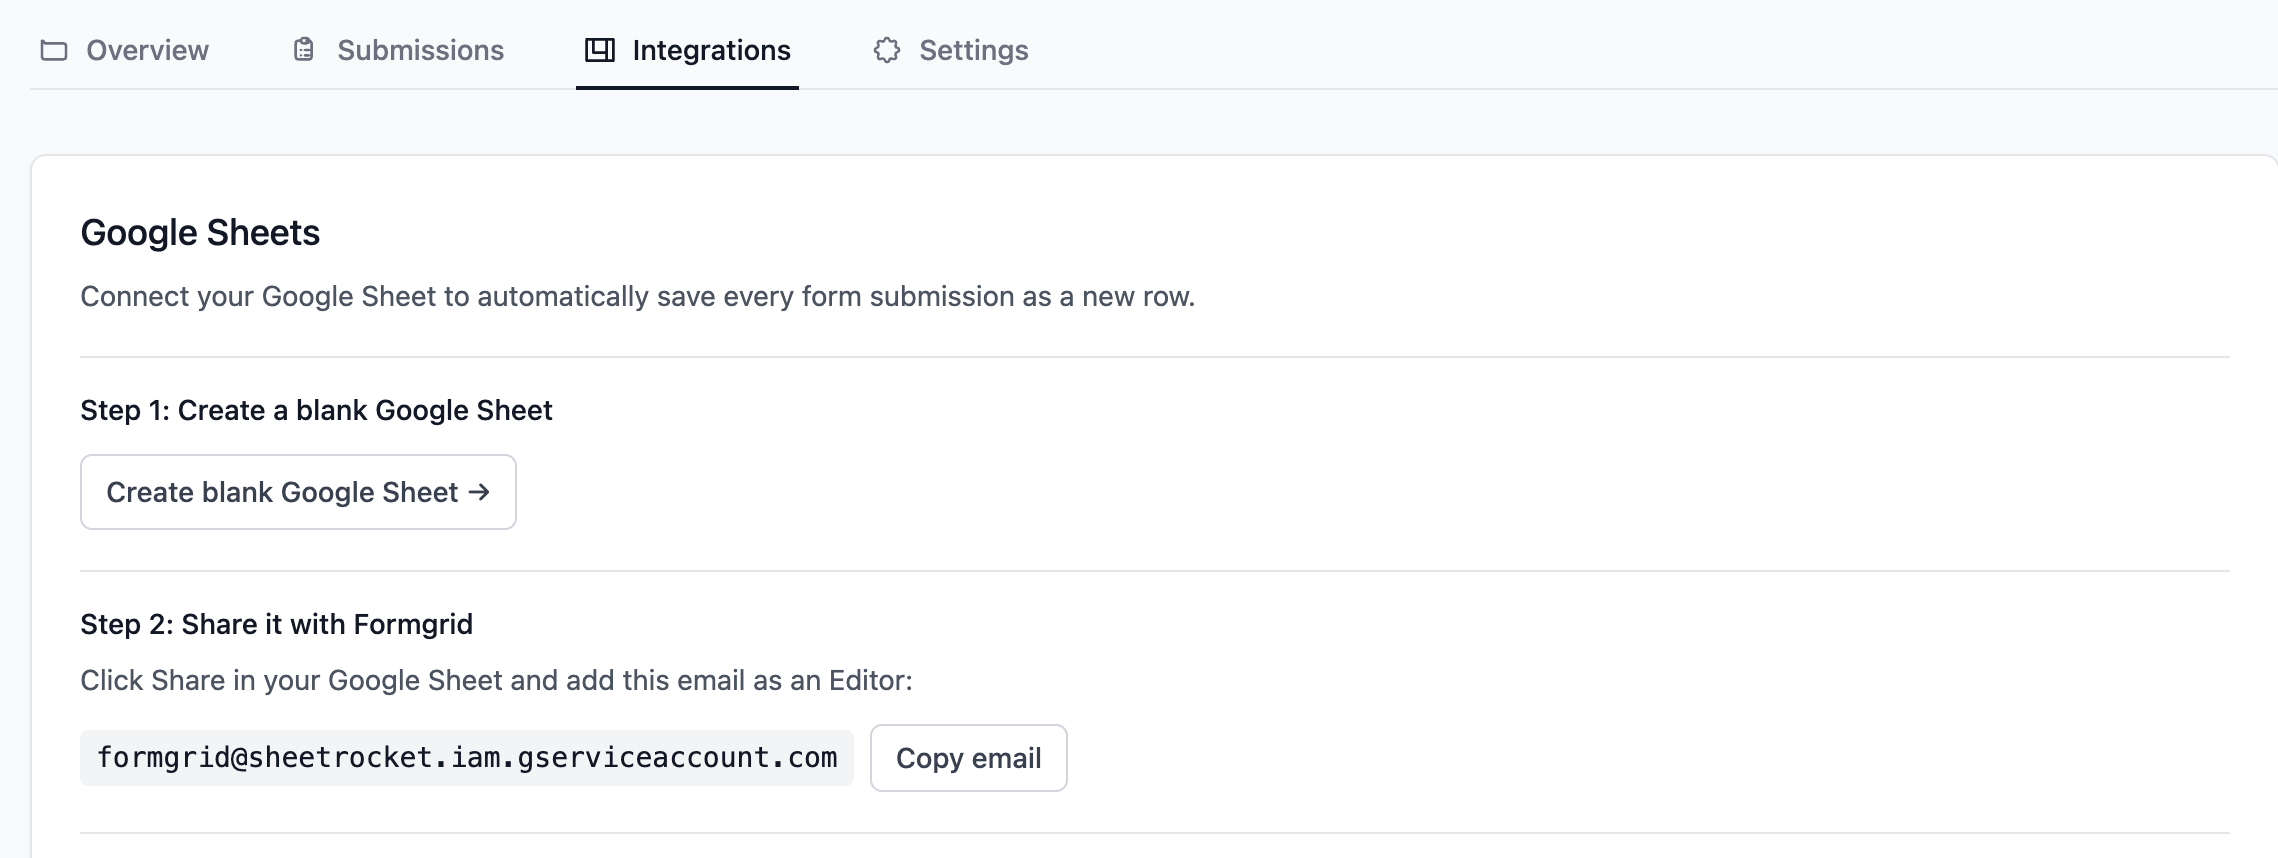
You will see the Google Sheets integration section. If you are within your plan limits the Connect interface, which is active and ready to use.
Step 8: Create a Blank Google Sheet
Click the Create blank Google Sheet button. This opens a fresh blank spreadsheet in Google Sheets in a new browser tab.
Give your sheet a clear, identifiable name. Something like "Squarespace Contact Form Submissions" or "Service Enquiries 2026" works well. If you manage multiple forms and plan to connect each one to its own sheet, a consistent naming convention will help you stay organised.
Do not add any column headers or set up any structure in the spreadsheet. Formgrid creates the column headers automatically from your Squarespace field labels on the very first submission. The sheet should be empty when you connect it.
Step 9: Share the Sheet With
the Formgrid Service Account
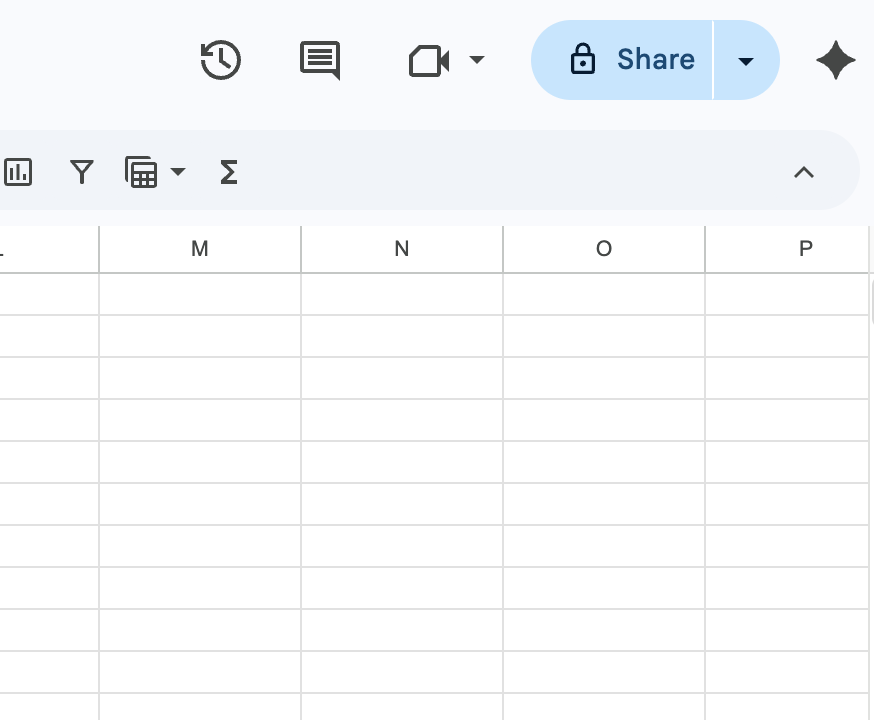
In your Google Sheet, click the Share button in the top right corner. The share dialog will open.
You need to add the Formgrid service account email address as an Editor. Go back to your Formgrid dashboard, where the service account email is displayed with a Copy button next to it.
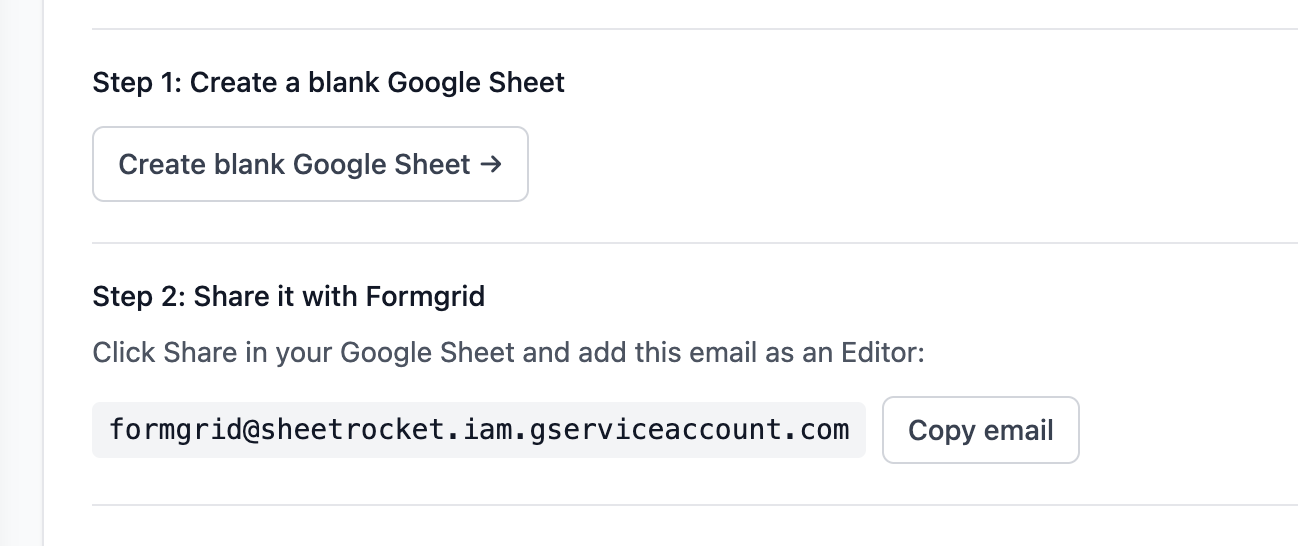
Copy it directly from there to avoid any chance of a typing error. Paste the email into the share dialog and make sure you select Editor access, not Viewer. Formgrid needs Editor access to write new rows to your sheet. If you add it as a Viewer, the connection will fail with a permissions error.
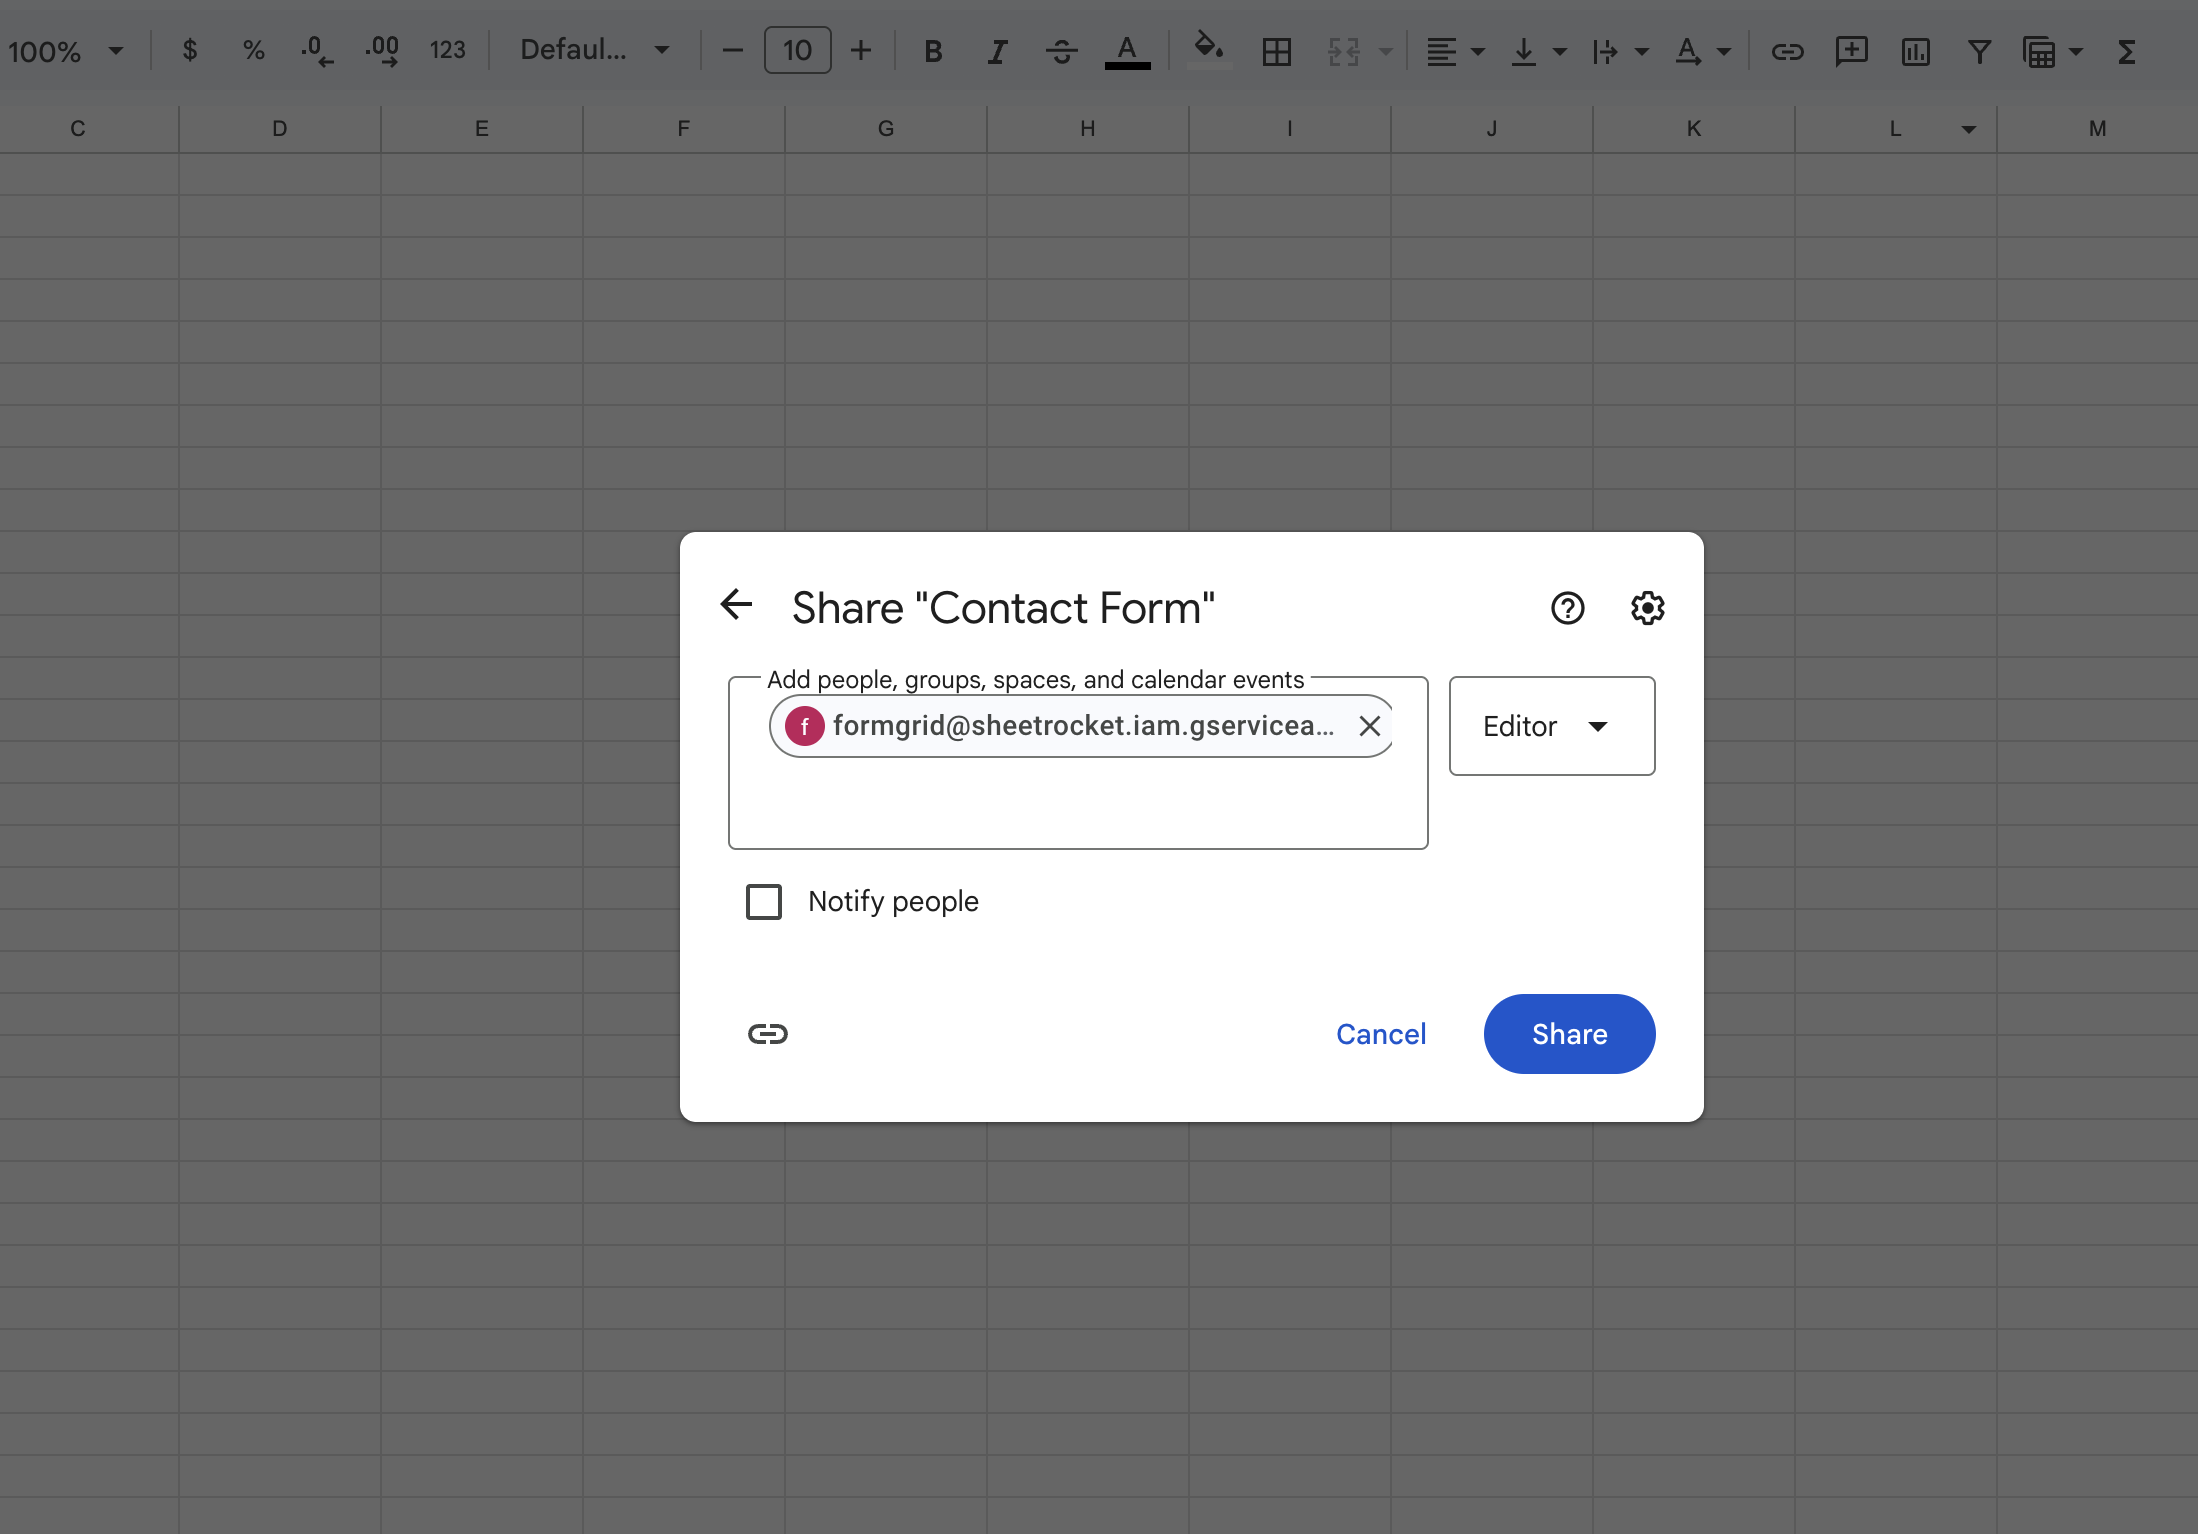
Click Send or Done to confirm.
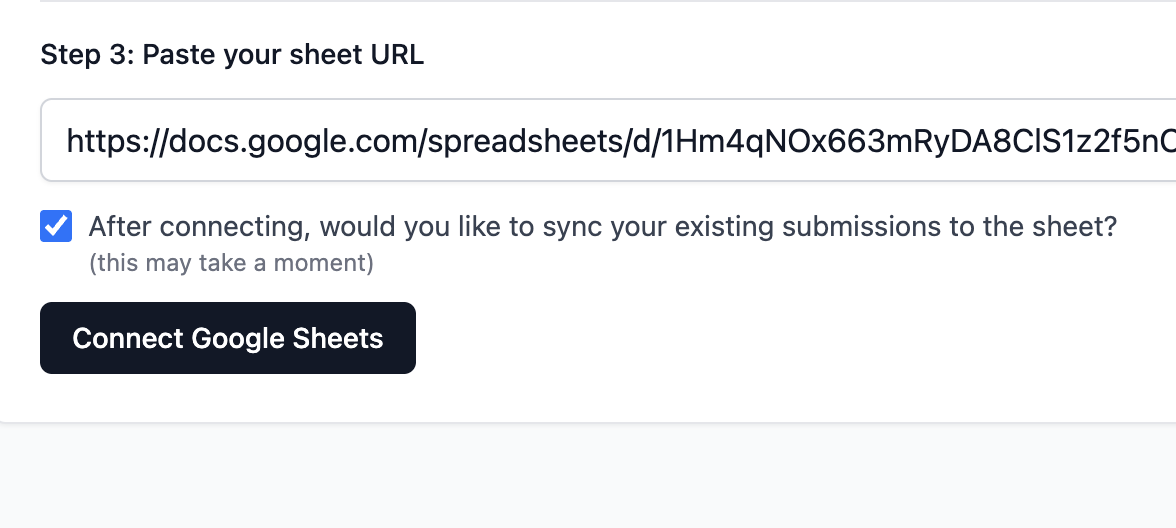
Step 10: Paste Your Sheet URL Into Formgrid
Go back to your Formgrid dashboard. Copy the full URL of your Google Sheet from the browser address bar of the tab where your sheet is open. The URL will look like this:
https://docs.google.com/spreadsheets/d/ 1BxiMVs0XRA5nFMdKvBdBZjgmUUqptlbs74 OgVE2upms/edit
Paste the full URL into the sheet URL field in your Formgrid dashboard. Make sure you are copying from the address bar and that the URL contains the full spreadsheet ID, which is the long alphanumeric string between /d/ and /edit.

Step 11: Choose Whether to Sync Existing Submissions
Before connecting, you will see this option: Sync existing submissions to this sheet? If you already have submissions, Formgrid can add them all to your Google Sheet now so your entire history is in one place. [ ] Yes, sync my existing submissions
If you have been collecting Squarespace form submissions through Formgrid for a while and want your full history in the sheet from day one, check this box. Formgrid will write all past submissions to the sheet before it begins syncing new ones.
If you only want submissions going forward, leave it unchecked.
Step 12: Click Connect
Click the Connect Google Sheets button.
Formgrid will verify that it can access your sheet and that the service account has the correct permissions. If everything is in order, you will see a success confirmation: Connected successfully Your sheet is ready. Every new submission will appear as a new row automatically.
Part Four: Verify the Full Flow Is Working
Step 13: Submit Another Test Entry Through Your Squarespace Form
Visit your live Squarespace site and submit another test entry through the form. Use realistic-looking data so it is easy to identify in your spreadsheet.
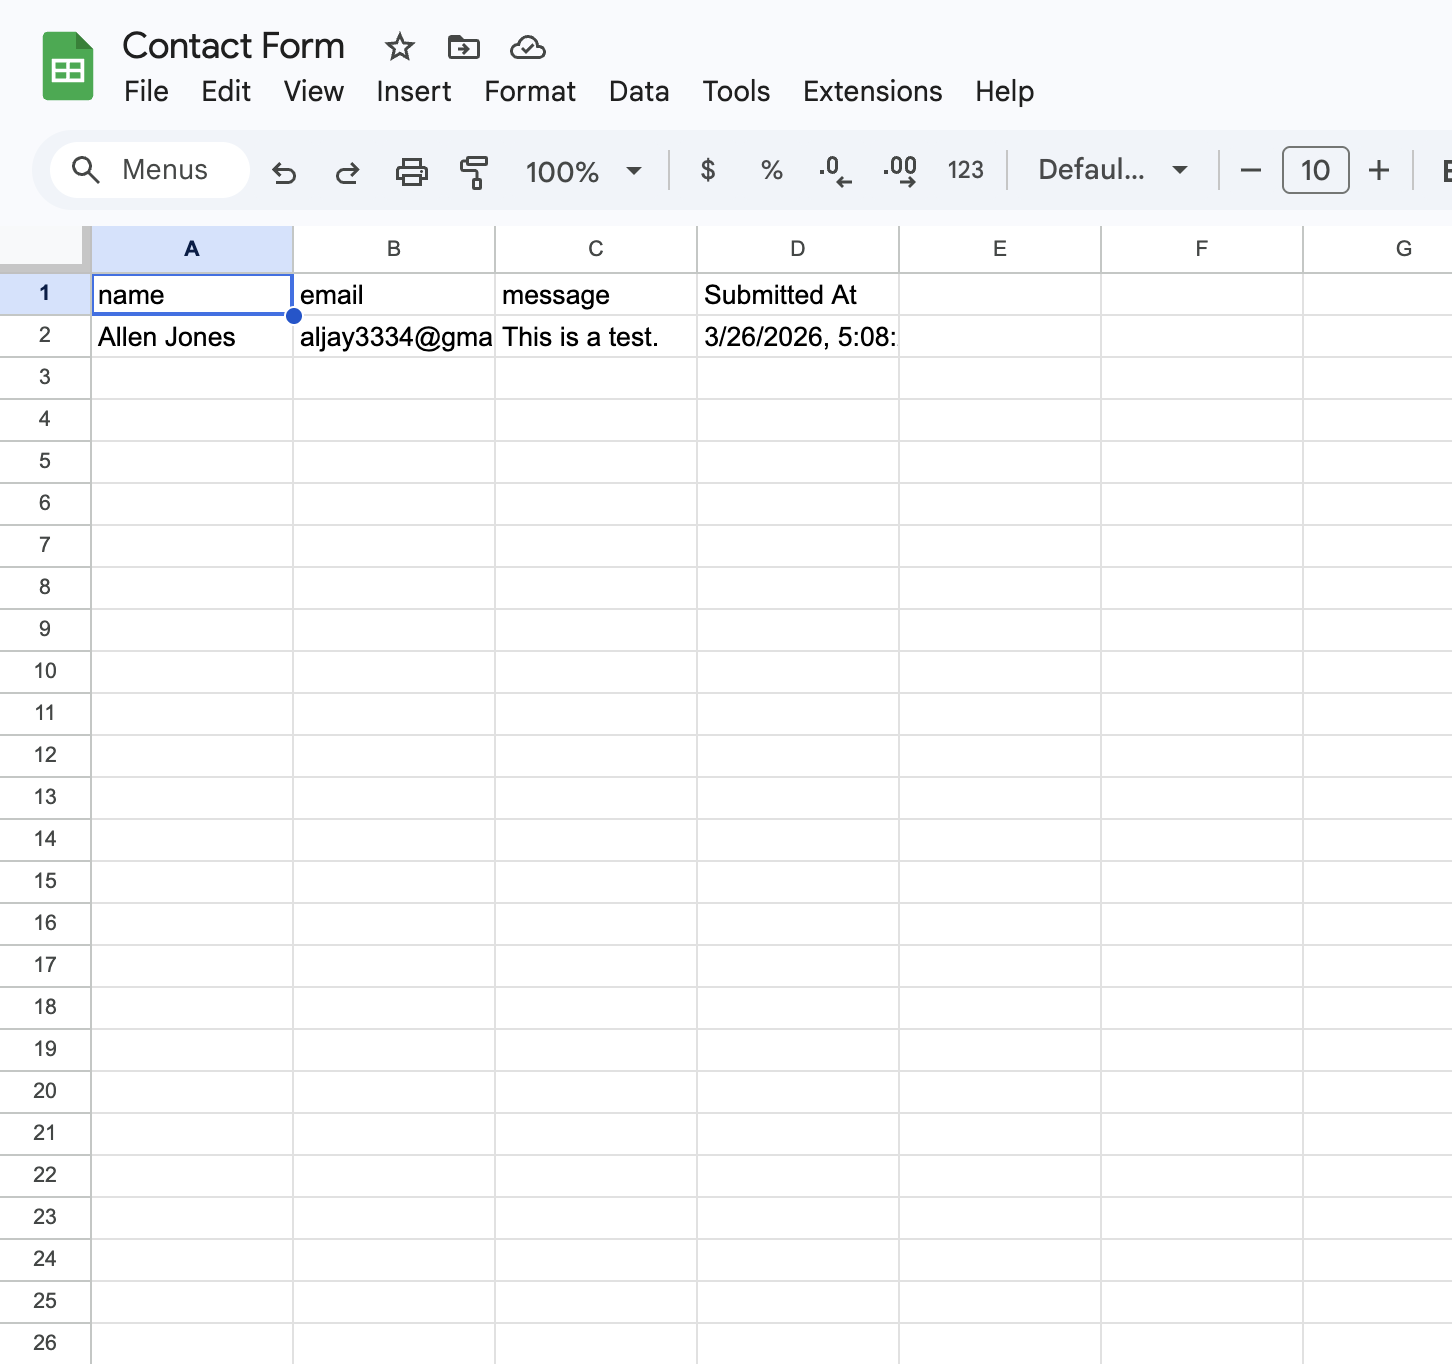
Open your Google Sheet. Within a few seconds, you should see:
Row 1: Column headers created automatically from your Squarespace form field labels.
Row 2: Your test submission data with a timestamp in the final column showing exactly when the submission was received.
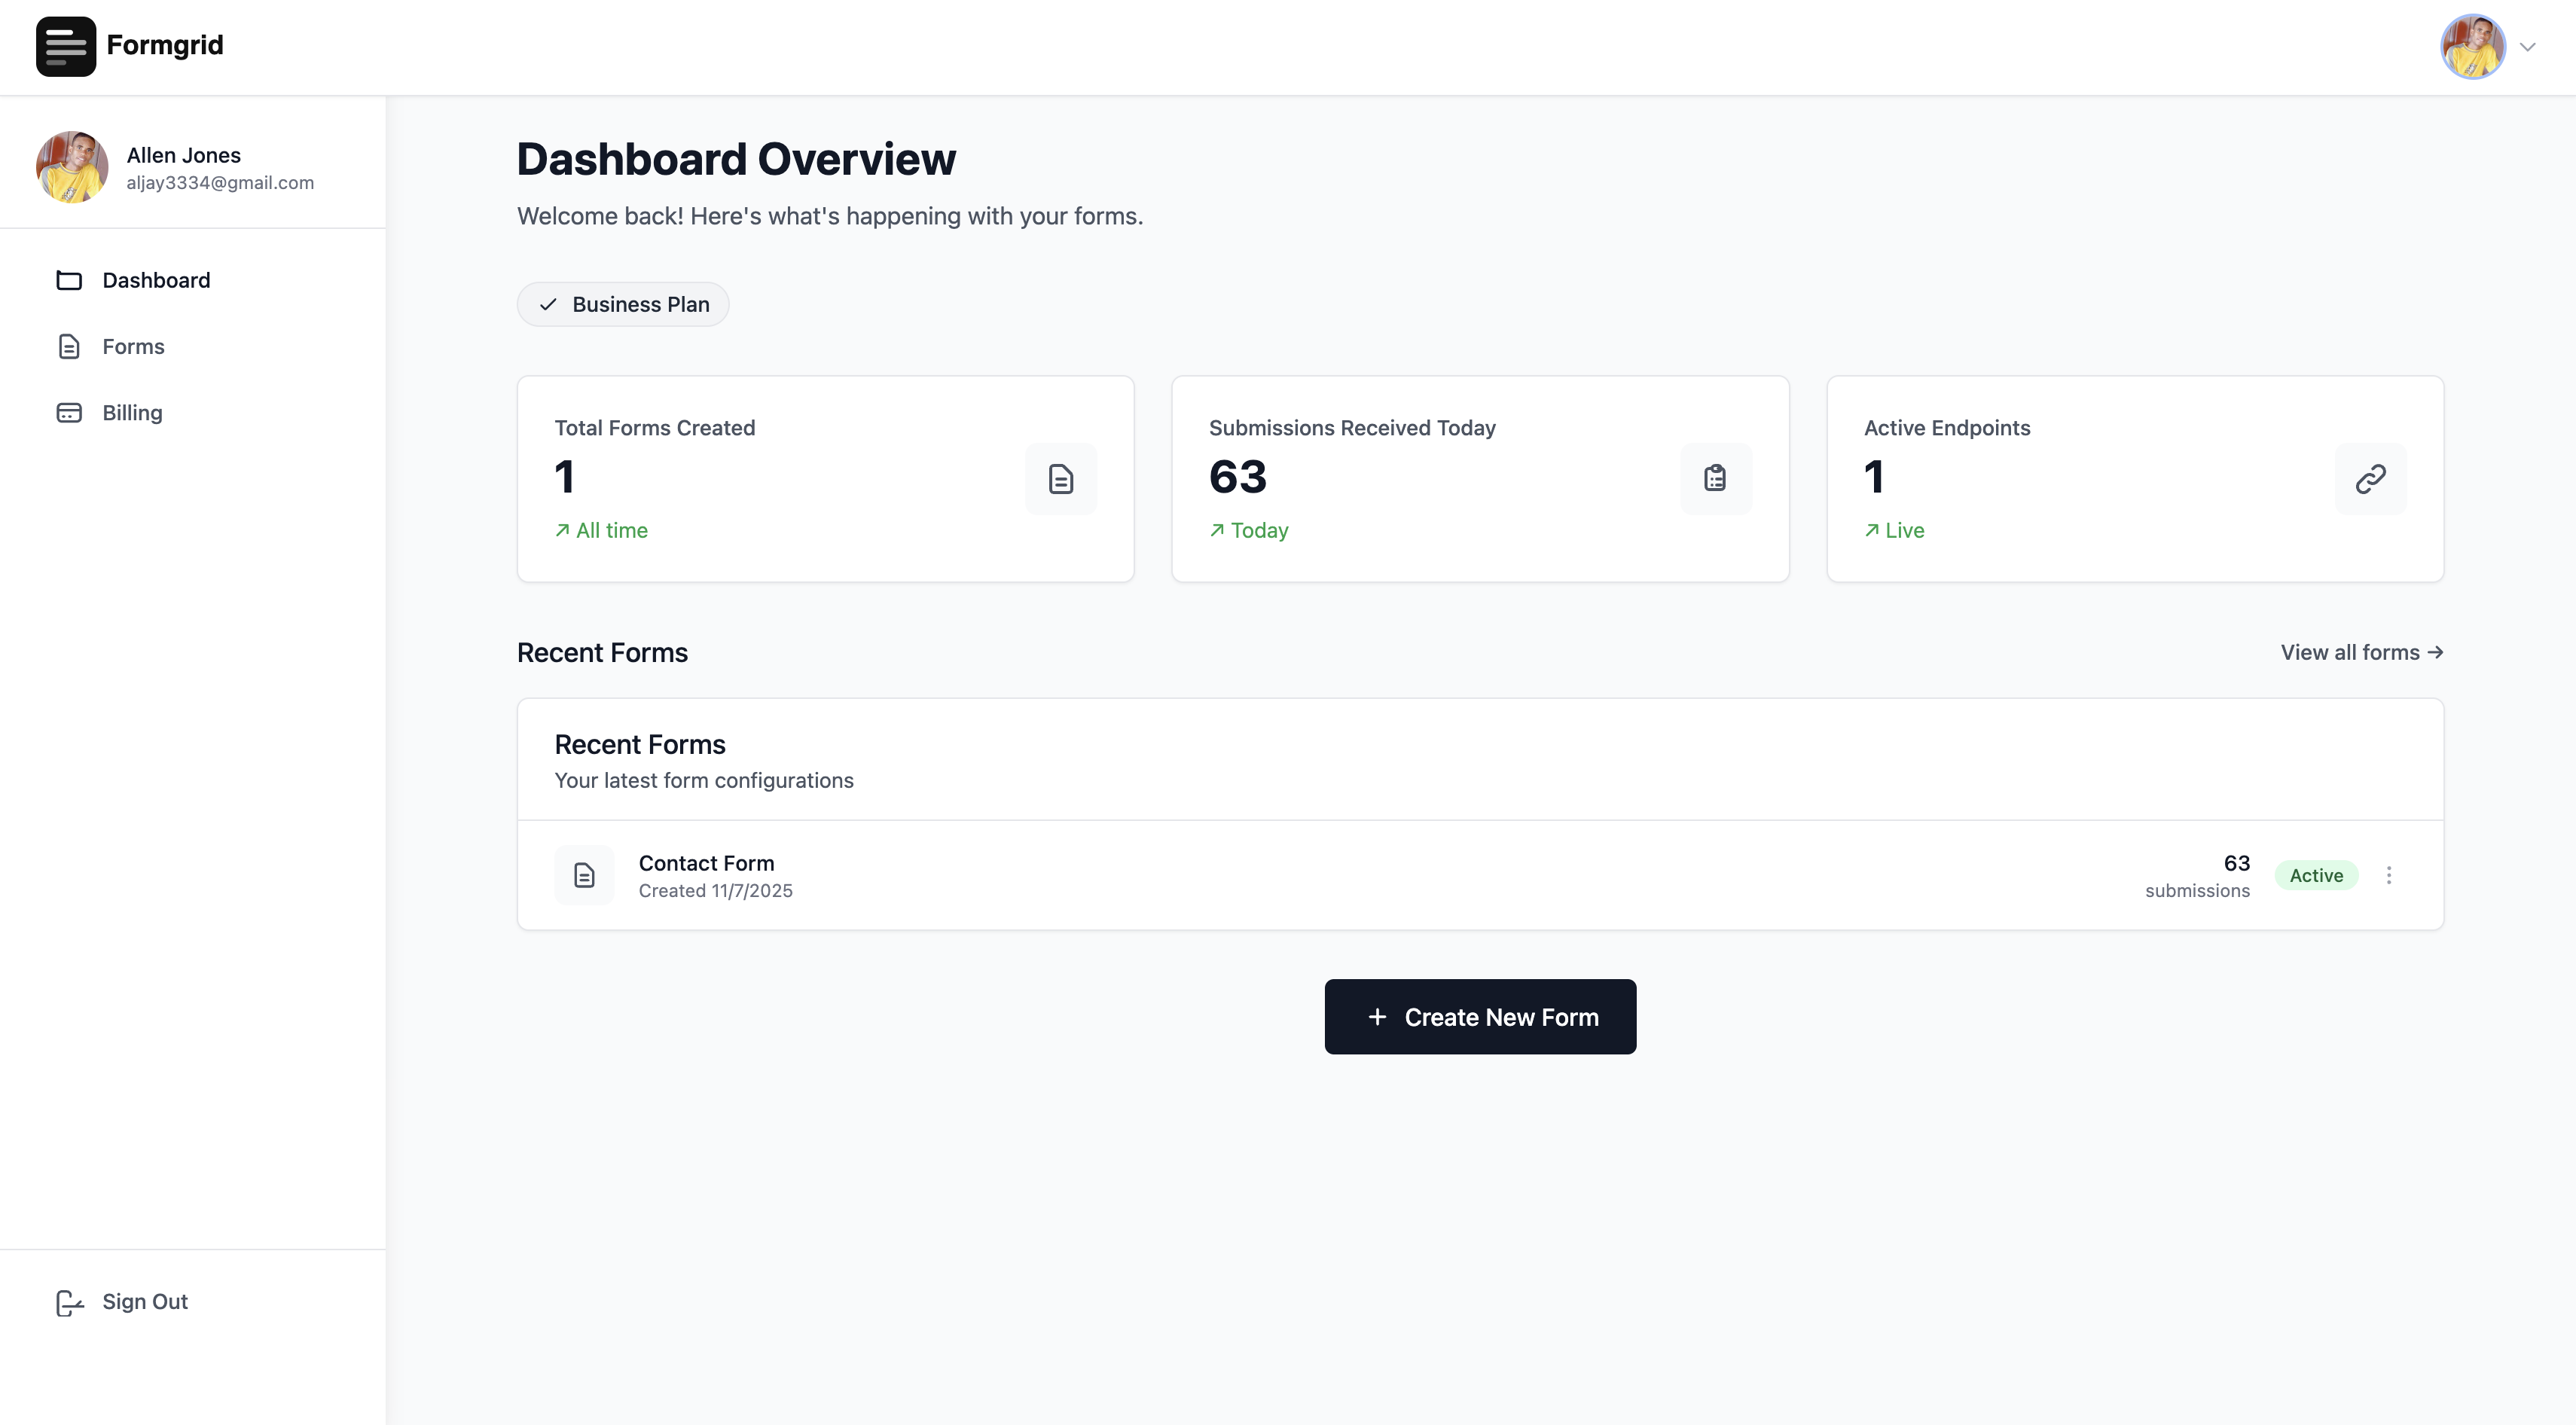
From this point forward, every submission made through your Squarespace form will appear as a new row in your Google Sheet in real time. You do not need to log into Formgrid, export anything, or take any manual action. The data moves automatically the moment someone fills in your form.
What Happens on Every Submission
Here is the complete flow from the moment a visitor fills in your Squarespace form to the moment a row appears in your spreadsheet: Visitor fills in your Squarespace form and clicks Submit ↓ The browser sends a POST request to your Formgrid endpoint ↓ Formgrid receives and saves the submission to your dashboard ↓ Email notification sent to you and any other configured recipients ↓ A new row added to your Google Sheet instantly ↓ Spam protection runs in the background to filter out bot submissions
Your submission is available in three places simultaneously: your Formgrid dashboard, your email inbox, and your Google Sheet. If any one of those ever has an issue, you still have the other two as a complete record.
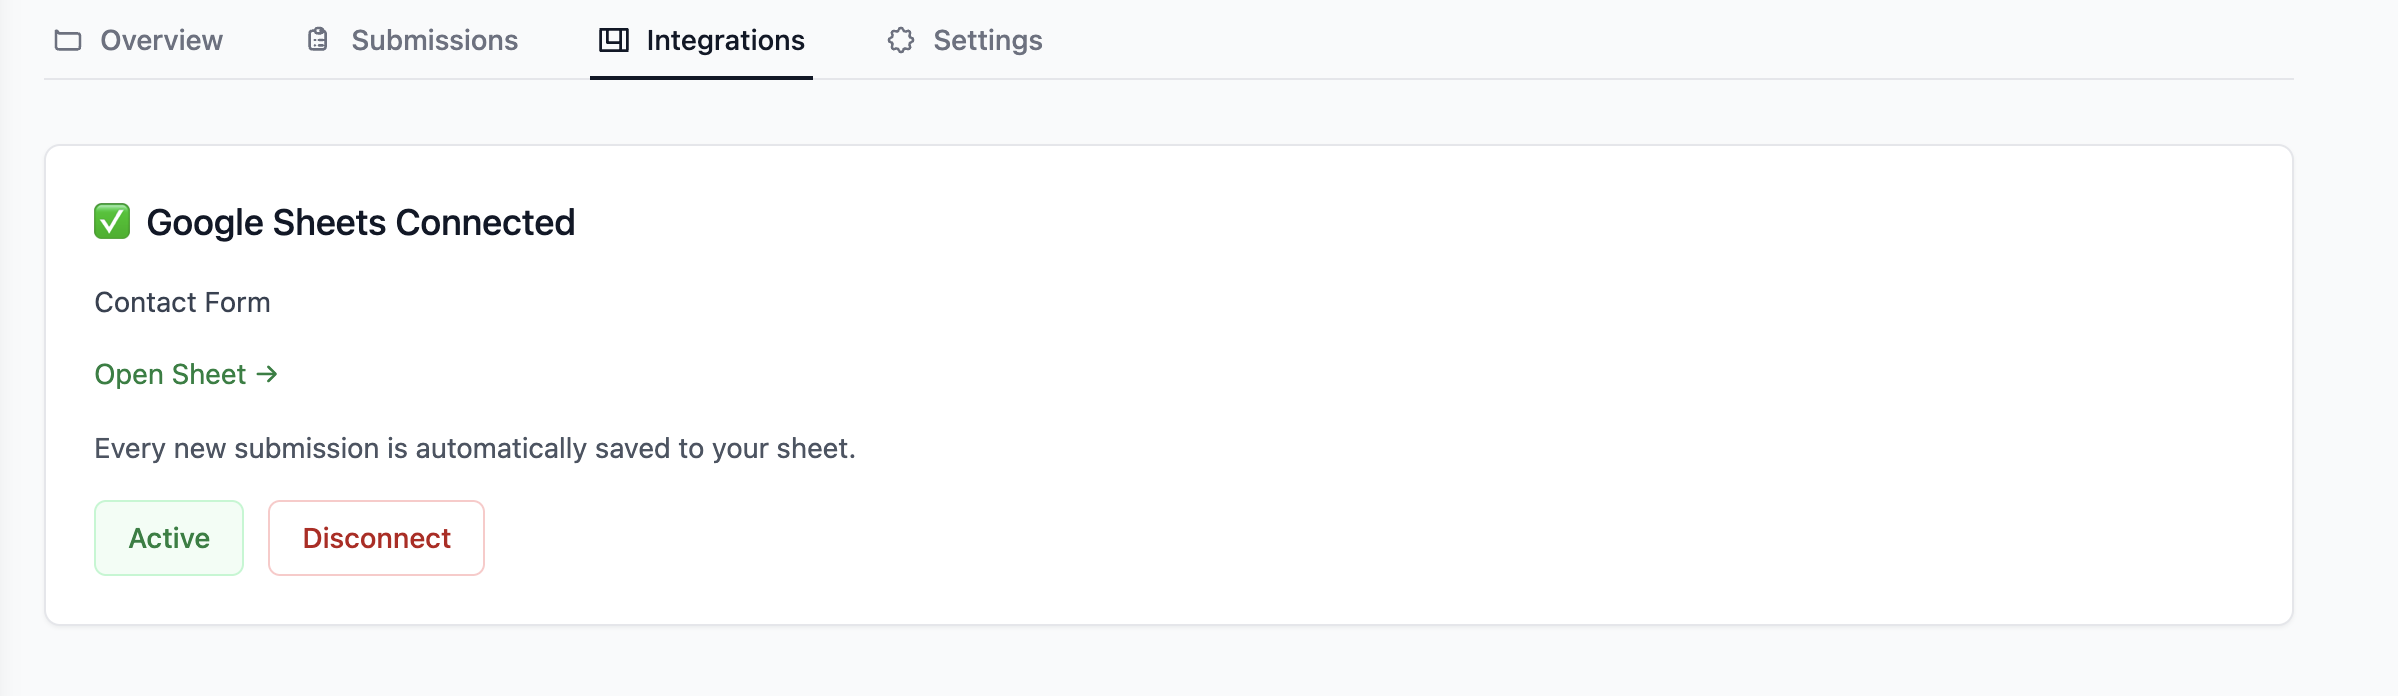
Managing Your Google Sheets Connection
Once connected, the Integrations tab in your Formgrid dashboard gives you full control over your Google Sheets connection:
Pause the integration: Use the Active toggle to pause syncing at any time. When paused, new submissions are still saved to your Formgrid dashboard, and email notifications still go out, but new rows are not written to your sheet. Toggle it back on to resume at any time.
Disconnect: Removes the connection entirely. Your existing sheet data stays exactly as it is in Google Sheets. New submissions will not be synced until you reconnect.
Open Sheet: Takes you directly to your connected Google Sheet with a single click without having to search for it in your Google Drive.

How This Compares to Using Zapier
A common approach is to use Zapier to push Squarespace form submissions into Google Sheets. It works, but you are paying for two services instead of one and adding a delay between submission and spreadsheet row because Zapier does not always run in real time.
| Zapier Route | Formgrid Native | |
|---|---|---|
| Extra monthly cost | $19.99/month | Included in all plans |
| Setup steps | 6 to 8 steps across two tools | 3 steps in one place |
| Real time sync | Depends on Zap frequency | Instant |
| Failure points | Two services that can break | One |
| Spam protection | None built in | Honeypot and rate limiting |
| Email notifications | Requires extra Zap | Included |
A Real Example: How a Photographer Uses This Setup
Sarah runs a photography studio. She uses Squarespace for her website and has a booking enquiry form on her contact page.
Before connecting Formgrid, every enquiry arrived as an email. Client name, event type, date, and budget all dumped into one unformatted message. She was managing her entire pipeline from her inbox, trying to remember which enquiries she had replied to and which ones needed a follow-up.
She connected her Squarespace form to Formgrid and linked it to a Google Sheet. Now every new booking enquiry appears instantly as a new row in her spreadsheet. Name in one column, event type in the next, date after that, budget at the end. Organised. Automatic. No manual work.
She shares the Sheet with her assistant, who can see new enquiries in real time without needing access to her email or her Formgrid dashboard.
Her conversion rate went from unknown to measurable the week she set this up.
Troubleshooting
Submissions not appearing in Formgrid after updating Squarespace:
Confirm that you saved and published the changes in Squarespace after updating the Post URL. Squarespace changes do not take effect on your live site until you publish. Also, confirm that the Post URL is your full Formgrid endpoint and not a partial URL.
"Could not access this sheet" error when connecting:
This means Formgrid does not have write access to your sheet. Open Google Sheets, click Share, and confirm that the Formgrid service account email is listed as an Editor. If it is listed as a Viewer, remove it and re-add it with Editor access, then try connecting again.
Column headers missing or showing unexpected values:
Column headers come from the field labels in your Squarespace form. If a column is missing or looks incorrect, review your form field labels in Squarespace, make the changes, publish the site, and submit a new test entry. Note that existing headers in your sheet will not update automatically. You would need to clear the sheet and reconnect if you want the headers to reflect updated field labels.
Submissions appearing in Formgrid but not in Google Sheets:
Open the Integrations tab in your Formgrid dashboard and check that the Google Sheets integration is showing as Active. If it shows as Paused, click the toggle to resume. If it shows as Active but submissions are still not appearing, try disconnecting and reconnecting the integration.
Squarespace is still sending its own confirmation email:
When you set a custom Post URL in Squarespace, it takes over the form submission handling. If Squarespace is still sending its own confirmation, that is fine. Formgrid also sends an email notification independently. You can disable the Squarespace notification in your Squarespace form storage settings if you only want the Formgrid notification.
What Formgrid Includes
Google Sheets integration is available on all Formgrid plans, including free.
Free plan at $0 per month: Google Sheets sync (first 10 rows per form. One time.) Form builder with shareable link Form endpoint URL Email notifications 50 submissions per month
Premium plan at $12 per month: Google Sheets sync (up to 500 rows per month) Everything in the free plan 1,000 submissions per month File uploads up to 1GB per file Auto-responder emails to form submitters CSV export Advanced spam protection Remove Formgrid branding
Business plan at $29 per month: Google Sheets sync (unlimited rows. Every submission syncs automatically.) Everything in Premium 15,000 submissions per month Webhooks: connect to Zapier, Make, Slack, Notion, Airtable, and more Workflow automations Custom HTML email templates Multiple notification recipients Custom email subject lines Priority support with direct access to the founder
No contracts. Cancel at any time.
👉 Start free at formgrid.dev No credit card required.
Final Thoughts
Squarespace makes it easy to build forms. Formgrid makes it easy to do something useful with what those forms collect.
Connecting your Squarespace form to Google Sheets through Formgrid requires one change in your Squarespace form settings, one shared spreadsheet, and a few clicks in your Formgrid dashboard. Once it is set up, every submission lands in your spreadsheet automatically and in real time without a Zapier subscription and without any ongoing maintenance on your part.
If your team is currently managing Squarespace form submissions out of an email inbox, this setup will save you time from the first submission it processes.
Full disclosure: I built Formgrid. Written as honestly as I could. Let me know in the comments if anything is unclear or looks off.
Comments
Leave a comment