WordPress has thousands of contact form plugins. WPForms, Contact Form 7, Gravity Forms, Ninja Forms. Most WordPress tutorials point you straight to one of them.
But plugins come with problems most tutorials do not mention.
Every plugin you install adds weight to your site. Contact Form 7 alone loads extra JavaScript and CSS on every page, not just the page your form is on. Plugins break with WordPress updates. A plugin that worked perfectly last month stops working after a core update, and you spend an afternoon debugging a contact form when you should be running your business.
Some plugins require paid upgrades to do things that should be basic. Email notifications, spam protection, file uploads. Features that are obvious requirements end up behind a paywall.
There is a simpler approach. An HTML form that points directly at an external endpoint handles everything a plugin does, without any of the overhead.
This post shows you how to add a working contact form to your WordPress site in 5 minutes using Formgrid, with no plugin required.
Why the Plugin Approach Has Problems
Most WordPress contact form plugins work by installing a shortcode or block that renders a form on your page. The plugin handles the form processing on your server.
That creates several problems:
Plugin conflicts. WordPress sites often run 15 to 30 plugins. Each new plugin is a potential conflict with another. Contact form plugins are particularly prone to conflicts with caching plugins, security plugins, and page builders.
Update dependencies. When WordPress updates, plugins need to update too. If the plugin developer is slow to release a compatible version, your form breaks. On a business site, a broken contact form means lost enquiries.
Server load. Contact Form 7 processes form submissions on your WordPress server. If your hosting is shared or underpowered, high-traffic periods can slow form processing or cause timeouts.
Limited lead management. Almost no WordPress contact form plugin tells you what happens after the submission. Your message arrives in an inbox, and you manage the rest manually.
An external form endpoint solves all of these. The form is just HTML. Your server does nothing. The processing happens on Formgrid's servers. No plugin. No conflicts. No server load.
What You Will Have After This Tutorial
A working HTML contact form on any WordPress page or post
Instant email notification for every submission
Every submission stored as a tracked lead in a dashboard
Notes and follow-up reminders per lead
Free bot protection and spam filtering
Optional Google Sheets sync
No plugin installed
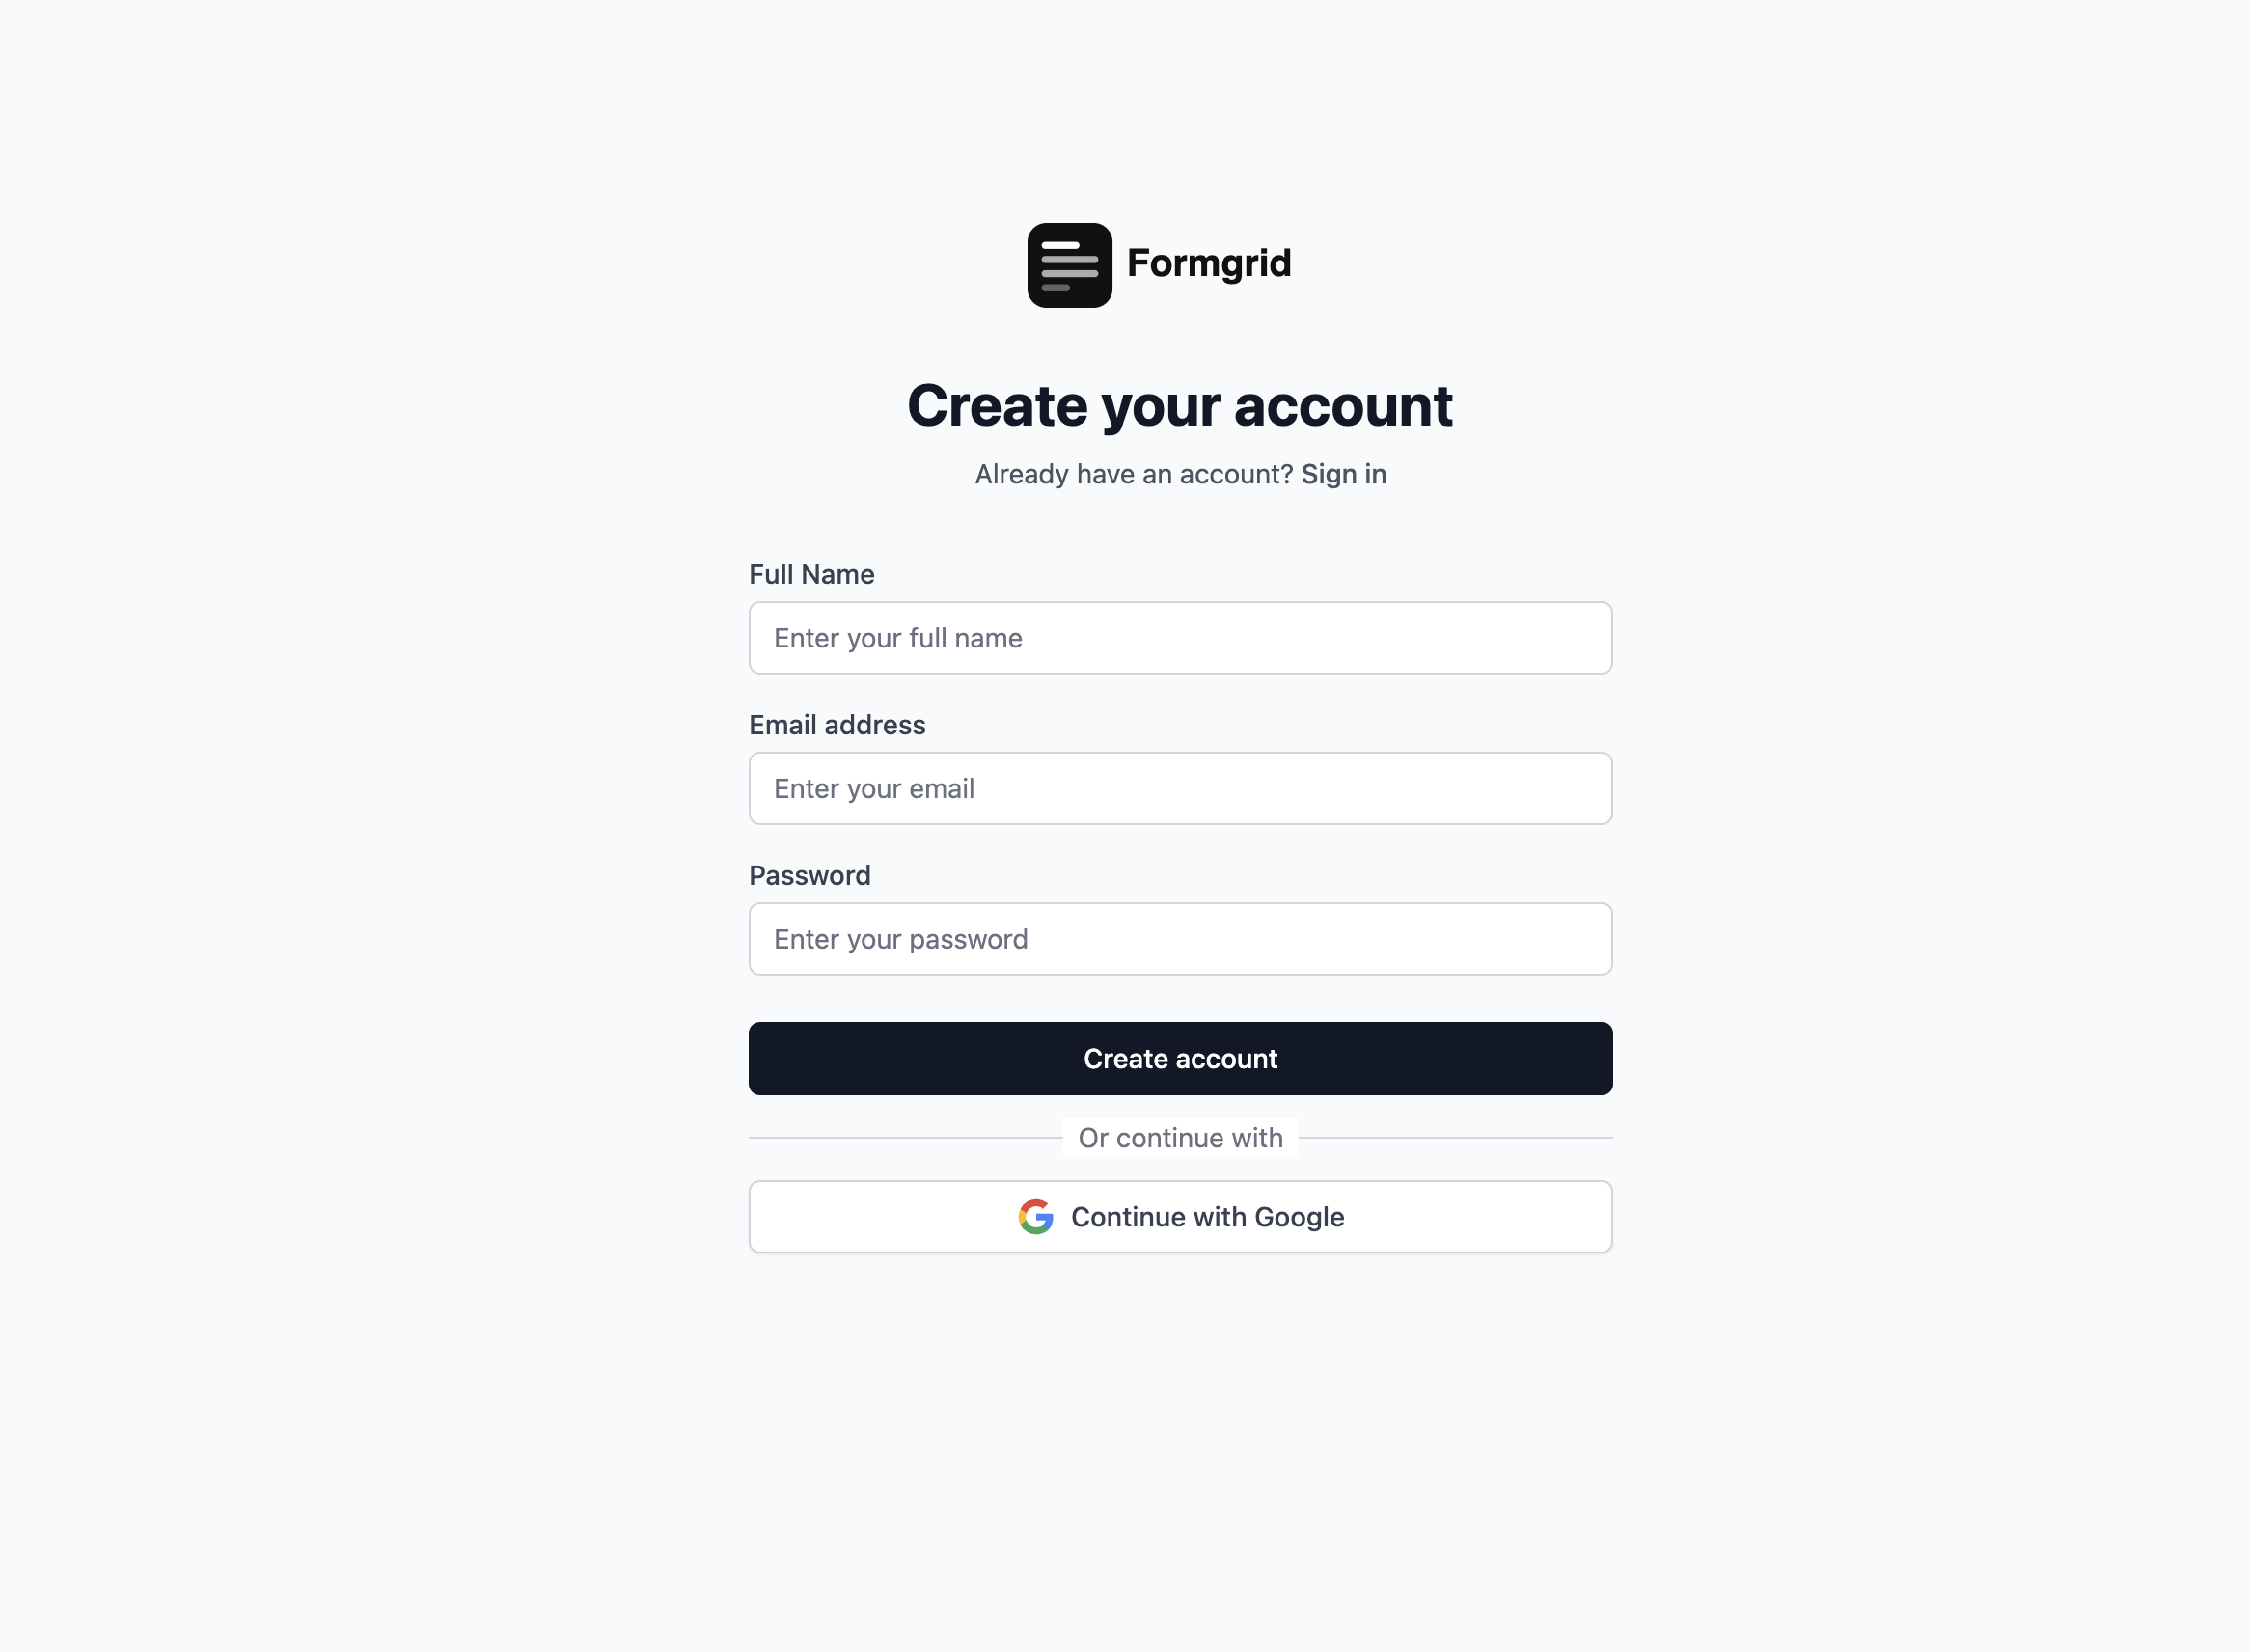
No server processingStep 1: Create a Free Formgrid Account
Go to formgrid.dev and sign up with Google or your email address. No credit card required.
The free plan gives you 50 submissions per month. For a business site with higher volume, the Premium plan at $12 per month gives you 1,000 submissions, Google Sheets sync, and file uploads.

Step 2: Create a New Form
Once you are logged in, click New Form. Give it a name that matches your use case. "WordPress Contact Form" or "Website Enquiries" works fine. This is just for your own reference inside the dashboard.
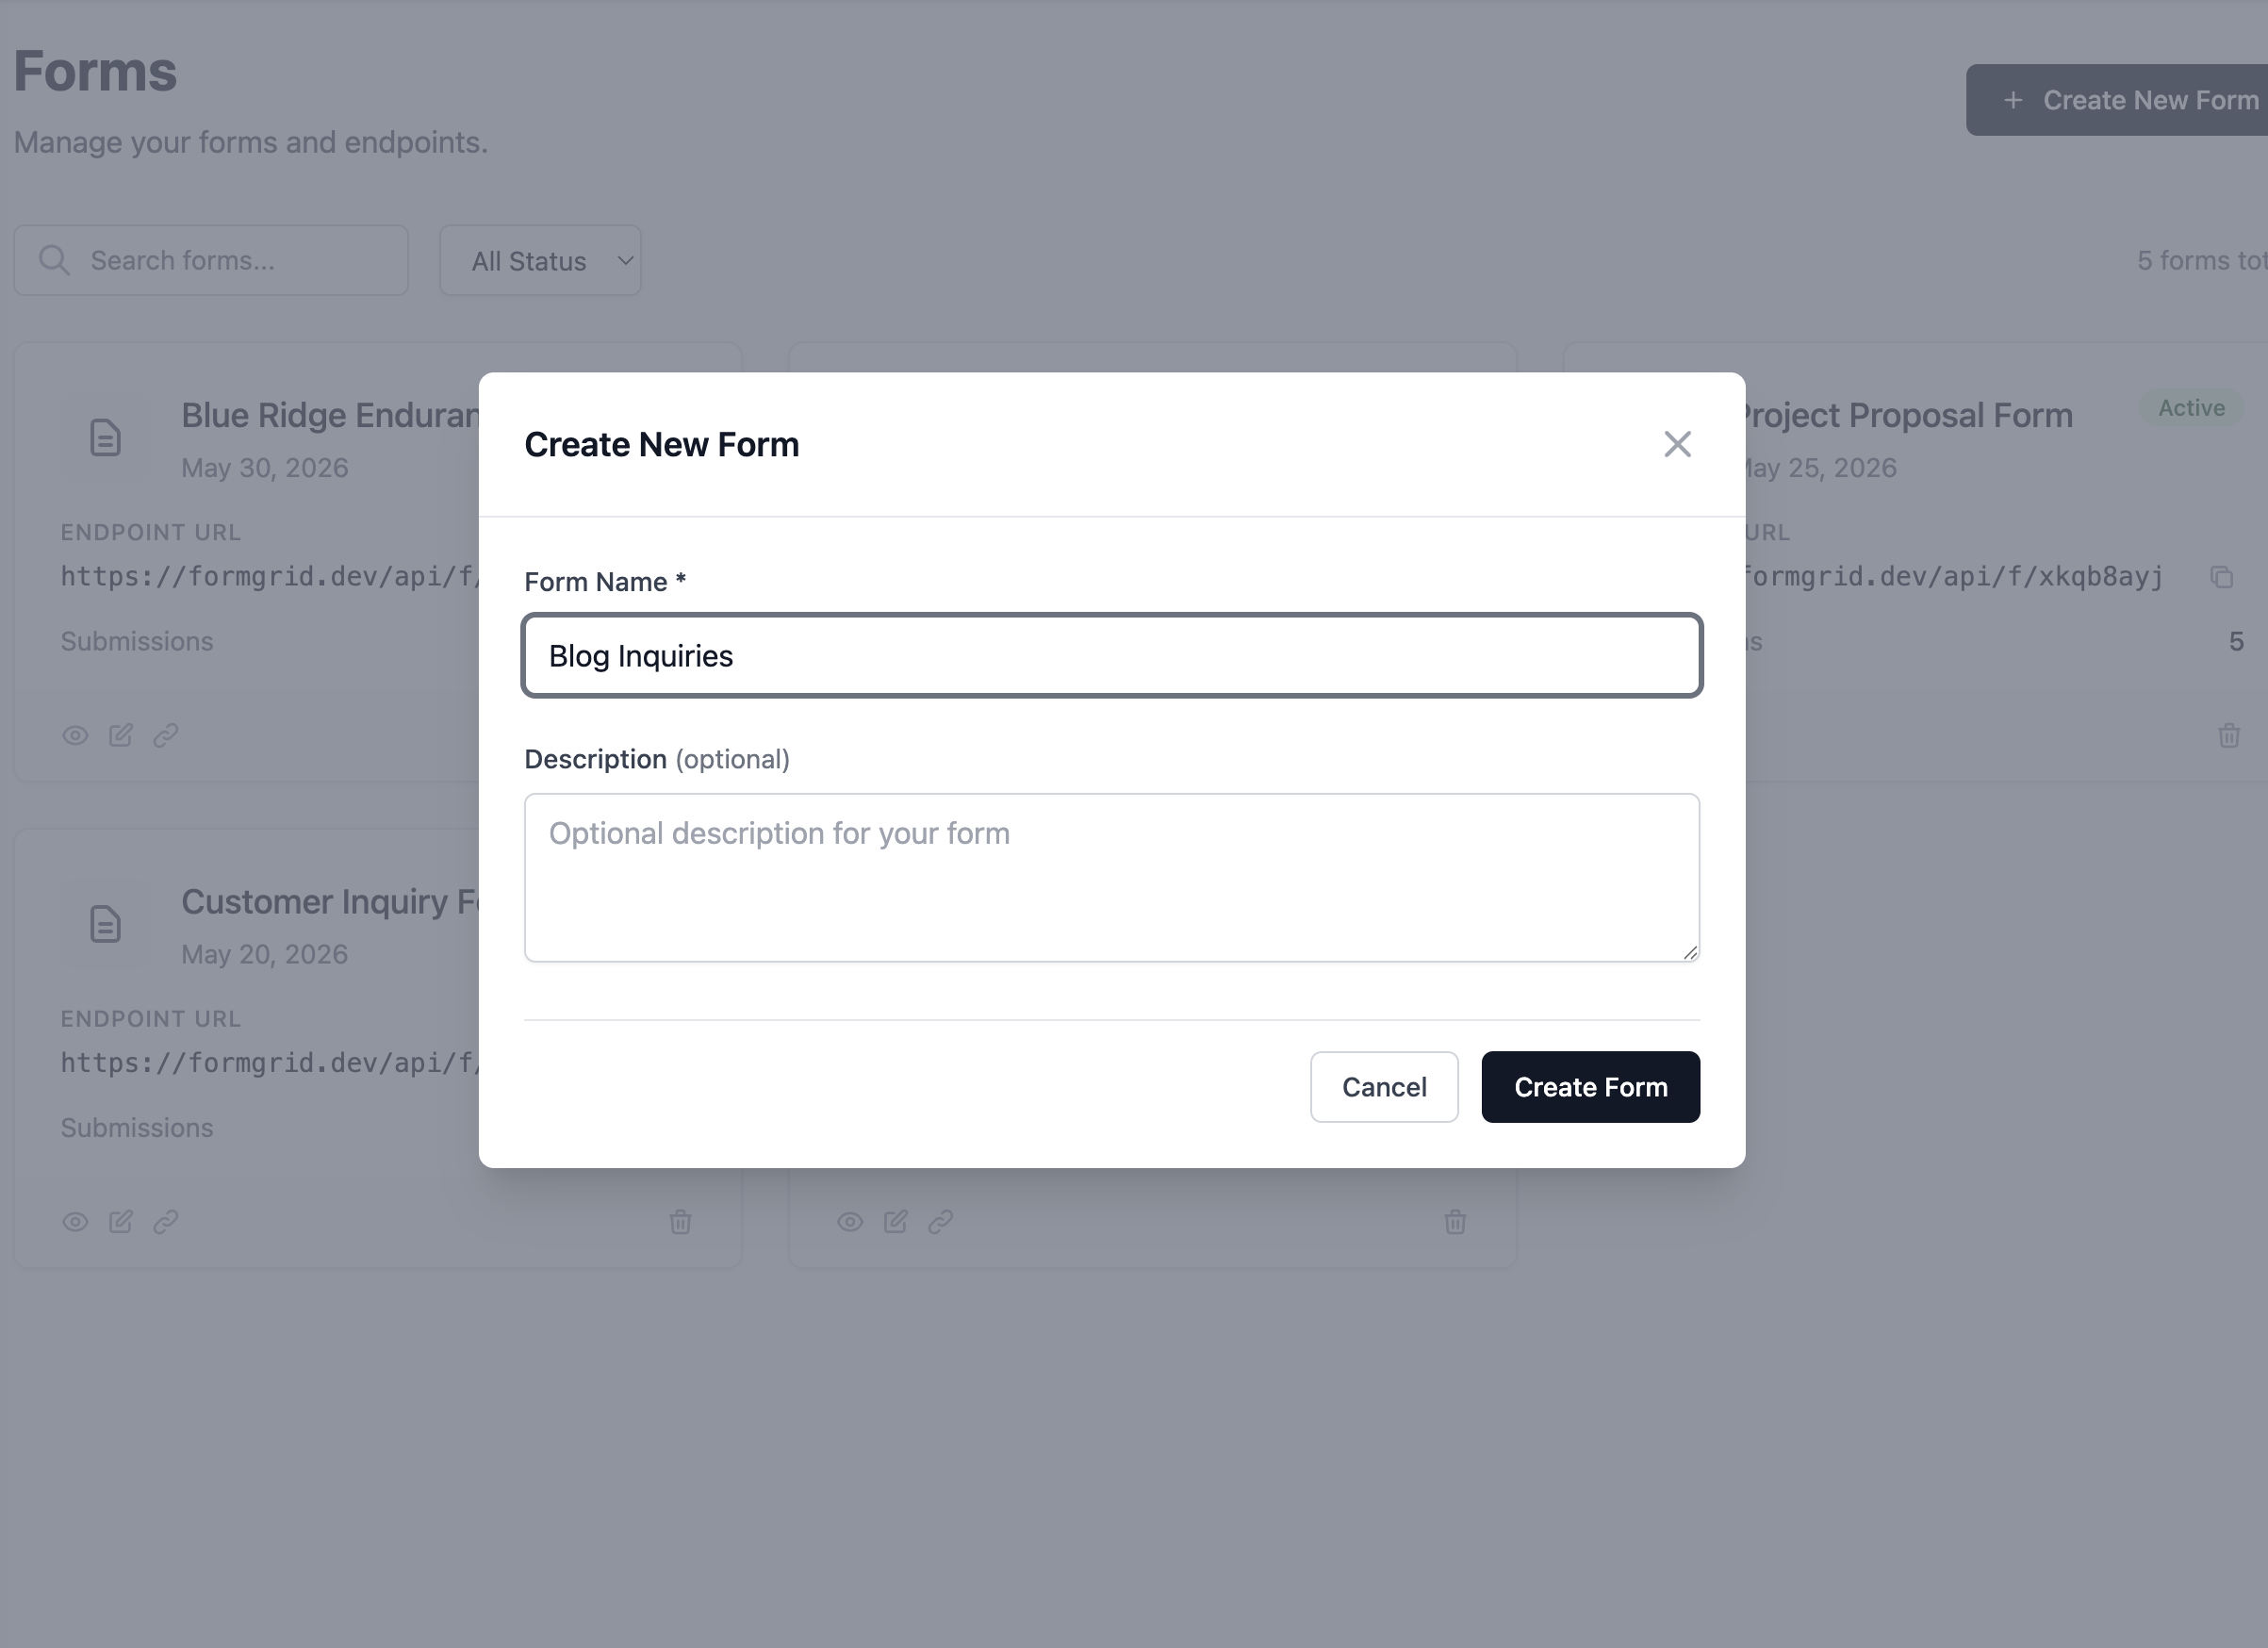
After creating the form, you will be taken to the form details page.
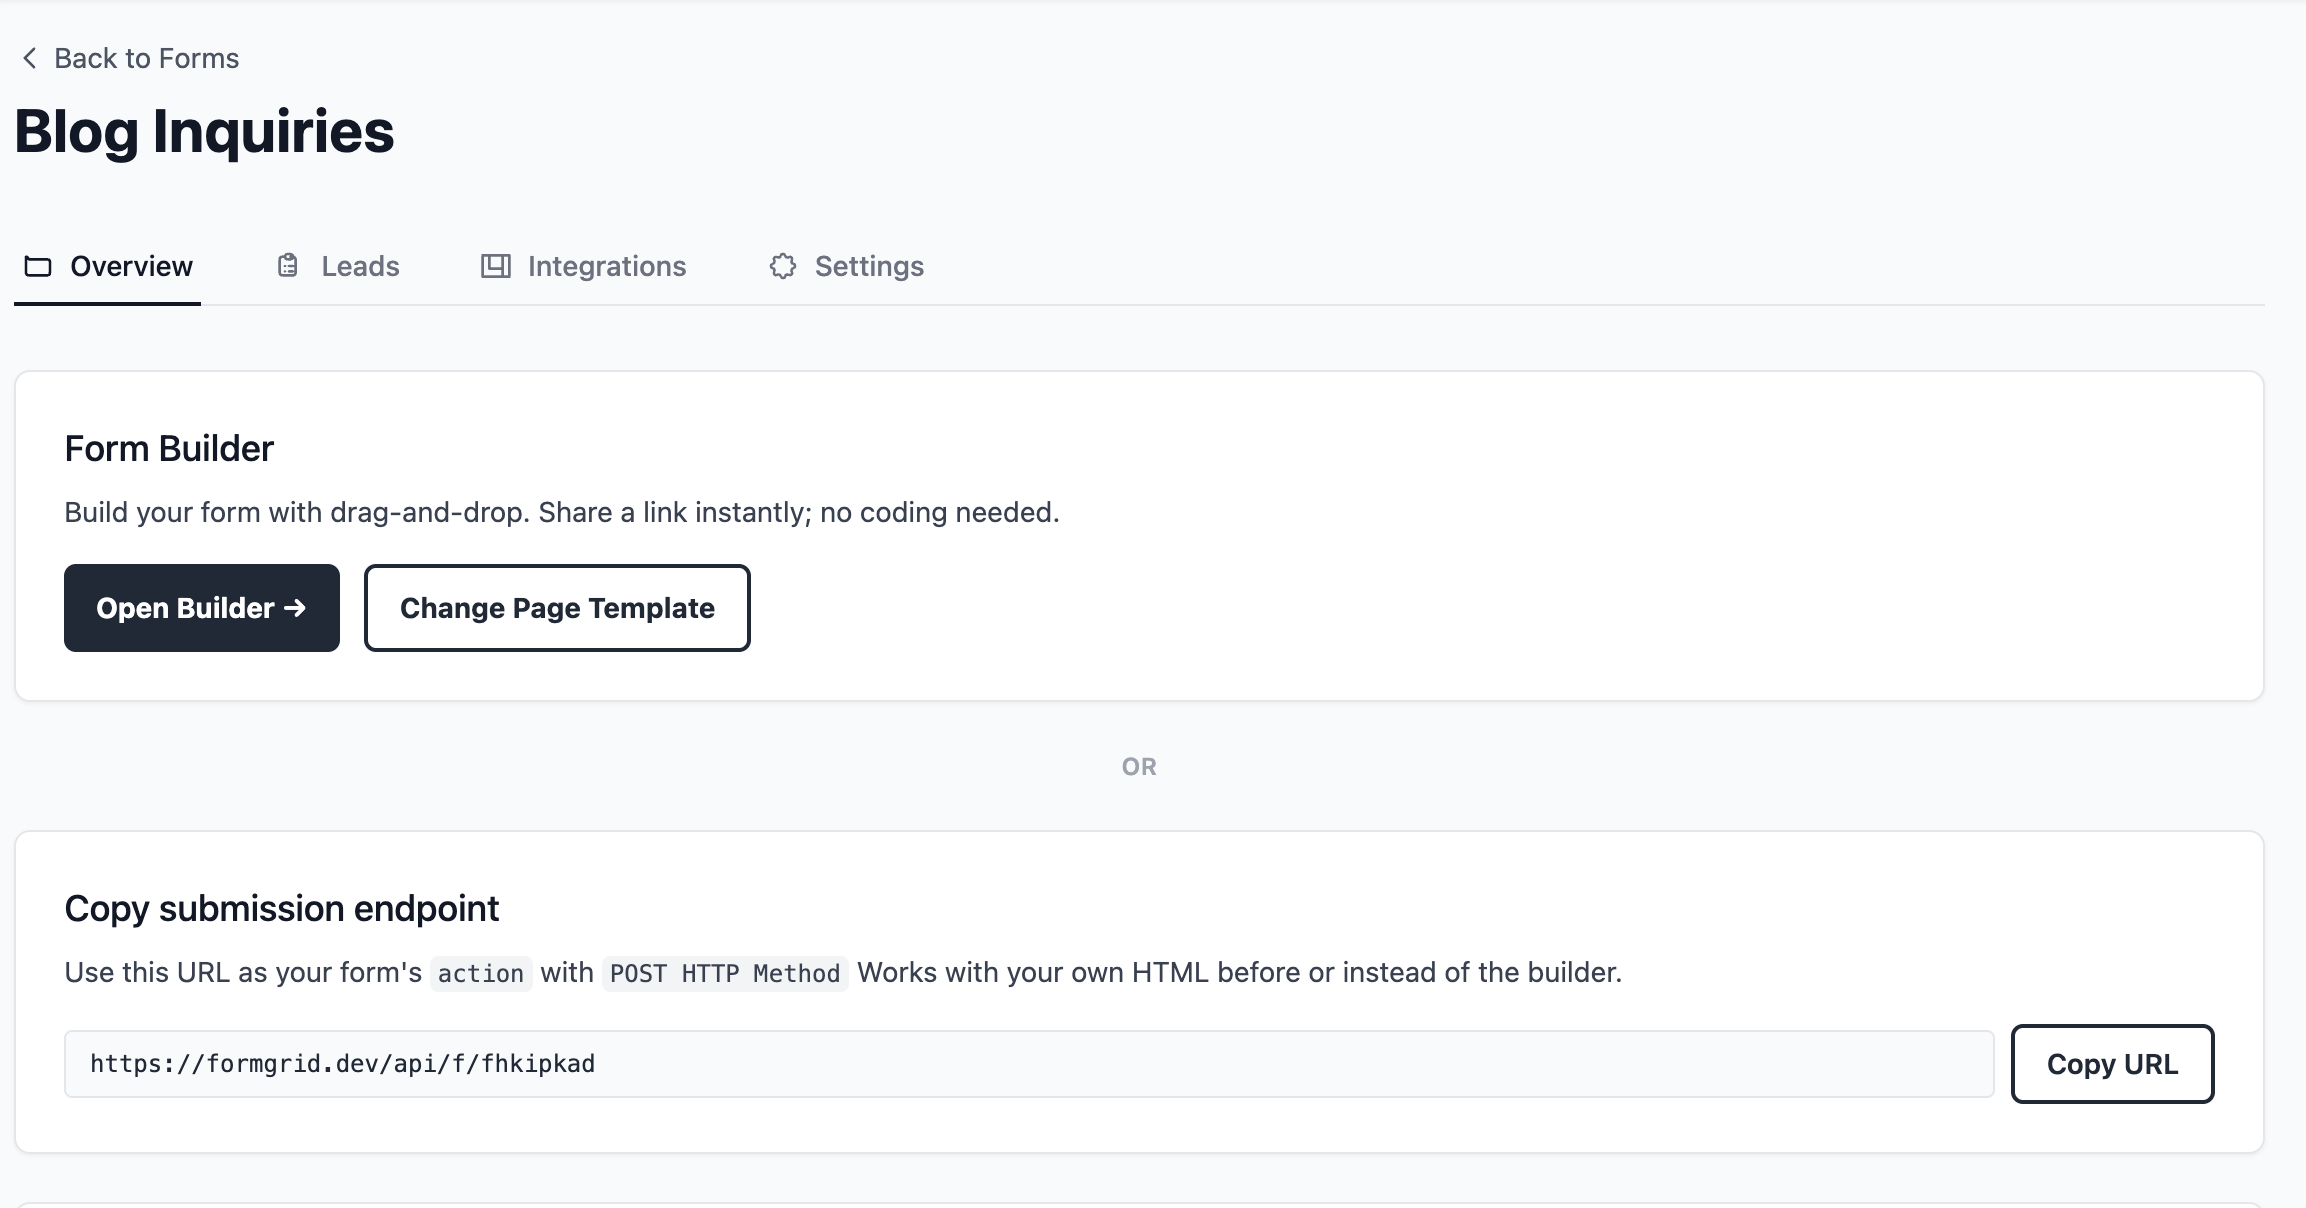
Step 3: Copy Your Endpoint URL
On the form details page, you will see your unique endpoint URL. It looks like this:
https://formgrid.dev/api/f/your-form-idCopy this URL. You will paste it into the action attribute of your HTML form in WordPress.
This is the address where your WordPress form will send data when a visitor clicks submit. Formgrid receives it, stores it, sends you an email, and adds it to your lead dashboard automatically.
Step 4: Add the HTML Form to WordPress
This is the part that replaces the plugin entirely.
Log in to your WordPress dashboard. Navigate to the page where you want the contact form. This could be a dedicated Contact page, your homepage, or a landing page.
If you are using the Gutenberg block editor, click the + button to add a new block. Search for Custom HTML and select it. This gives you a raw HTML block where you can paste your form code.
If you are using the Classic Editor, switch to the Text tab instead of the Visual tab. This shows you the raw HTML of your page content. Place your cursor where you want the form to appear.
Paste the following code, replacing your-form-id with your actual form ID from Formgrid:
<form
  action="https://formgrid.dev/api/f/your-form-id"
  method="POST"
  style="display: flex; flex-direction: column; gap: 16px; max-width: 600px;"
>

  <div>
    <label for="name" style="display: block; margin-bottom: 6px; font-weight: 600;">
      Name
    </label>
    <input
      type="text"
      id="name"
      name="name"
      required
      placeholder="Your full name"
      style="width: 100%; padding: 10px 14px; border: 1px solid #ddd; border-radius: 6px; font-size: 16px; box-sizing: border-box;"
    />
  </div>

  <div>
    <label for="email" style="display: block; margin-bottom: 6px; font-weight: 600;">
      Email
    </label>
    <input
      type="email"
      id="email"
      name="email"
      required
      placeholder="your@email.com"
      style="width: 100%; padding: 10px 14px; border: 1px solid #ddd; border-radius: 6px; font-size: 16px; box-sizing: border-box;"
    />
  </div>

  <div>
    <label for="subject" style="display: block; margin-bottom: 6px; font-weight: 600;">
      Subject
    </label>
    <input
      type="text"
      id="subject"
      name="subject"
      placeholder="What is this about?"
      style="width: 100%; padding: 10px 14px; border: 1px solid #ddd; border-radius: 6px; font-size: 16px; box-sizing: border-box;"
    />
  </div>

  <div>
    <label for="message" style="display: block; margin-bottom: 6px; font-weight: 600;">
      Message
    </label>
    <textarea
      id="message"
      name="message"
      required
      rows="6"
      placeholder="What would you like to say?"
      style="width: 100%; padding: 10px 14px; border: 1px solid #ddd; border-radius: 6px; font-size: 16px; resize: vertical; box-sizing: border-box;"
    ></textarea>
  </div>

  <!-- Honeypot: hidden from humans, filled by bots -->
  <input type="text" name="_honey" style="display: none;" />

  <div>
    <button
      type="submit"
      style="background: #000; color: #fff; padding: 12px 28px; border: none; border-radius: 6px; font-size: 16px; font-weight: 600; cursor: pointer;"
    >
      Send Message
    </button>
  </div>

</form>
Click Update or Publish on your WordPress page.
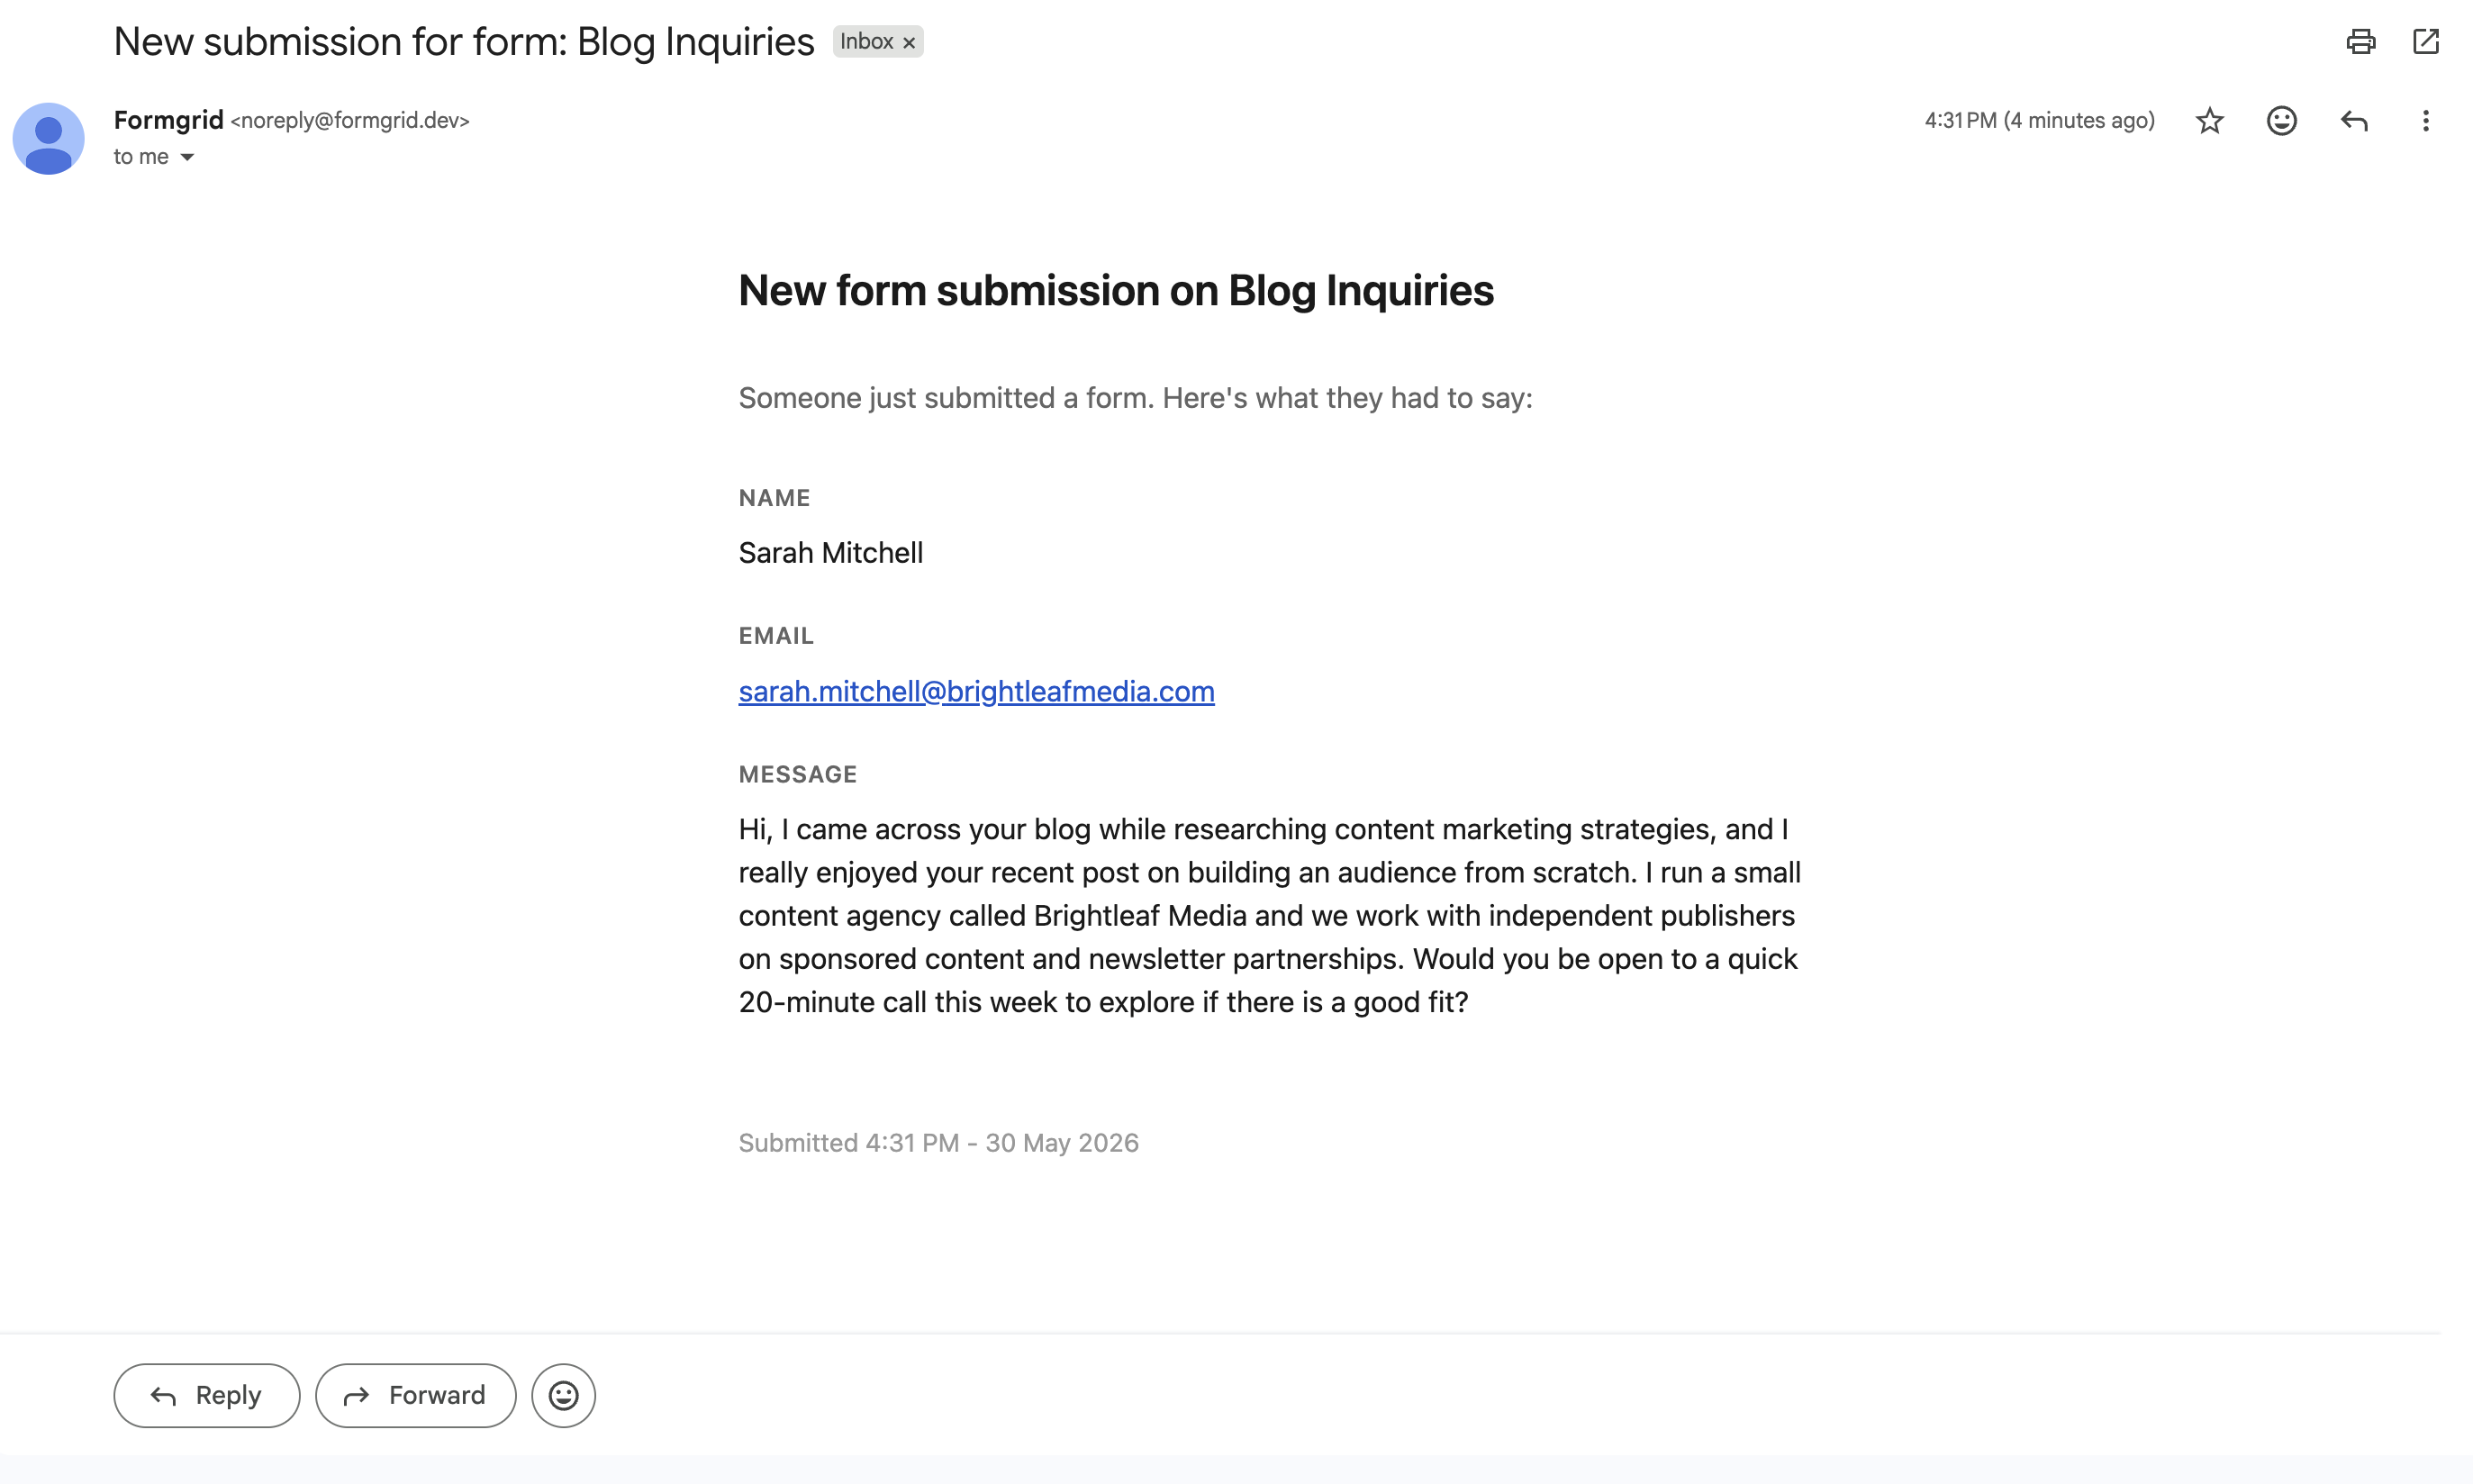
Step 5: Test Your Form
Visit the page on your WordPress site. Fill in the form with a test name, email, and message. Click Send Message.
Within seconds, you will receive an email notification at the address you signed up with on Formgrid. The email arrives formatted cleanly with every field the visitor filled in.
Now go back to your Formgrid dashboard and click the Leads tab. You will see the test submission listed as a new lead with a status of New.
What Happens After Every Submission
This is where Formgrid goes beyond every contact form plugin.
Most plugins deliver your message to an inbox and stop there. Formgrid turns every submission into a tracked lead automatically.
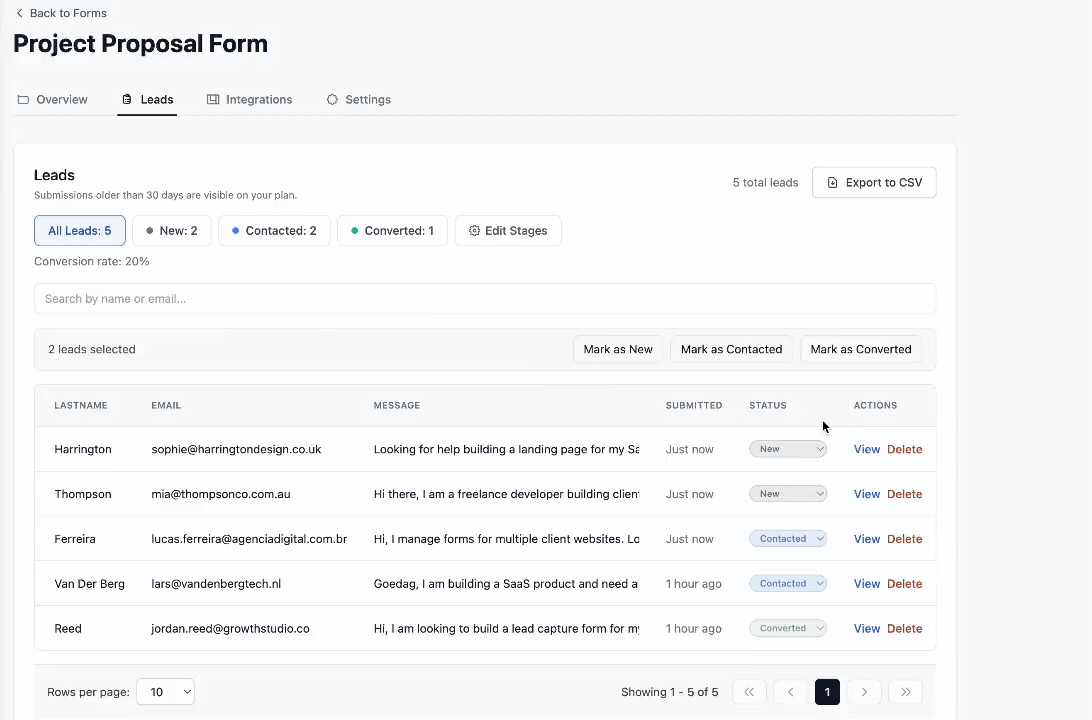
Every submission becomes a lead in your pipeline
The moment someone submits your WordPress form, it appears in your Leads tab with a status of New. You move it through a simple pipeline: New to Contacted to Converted.
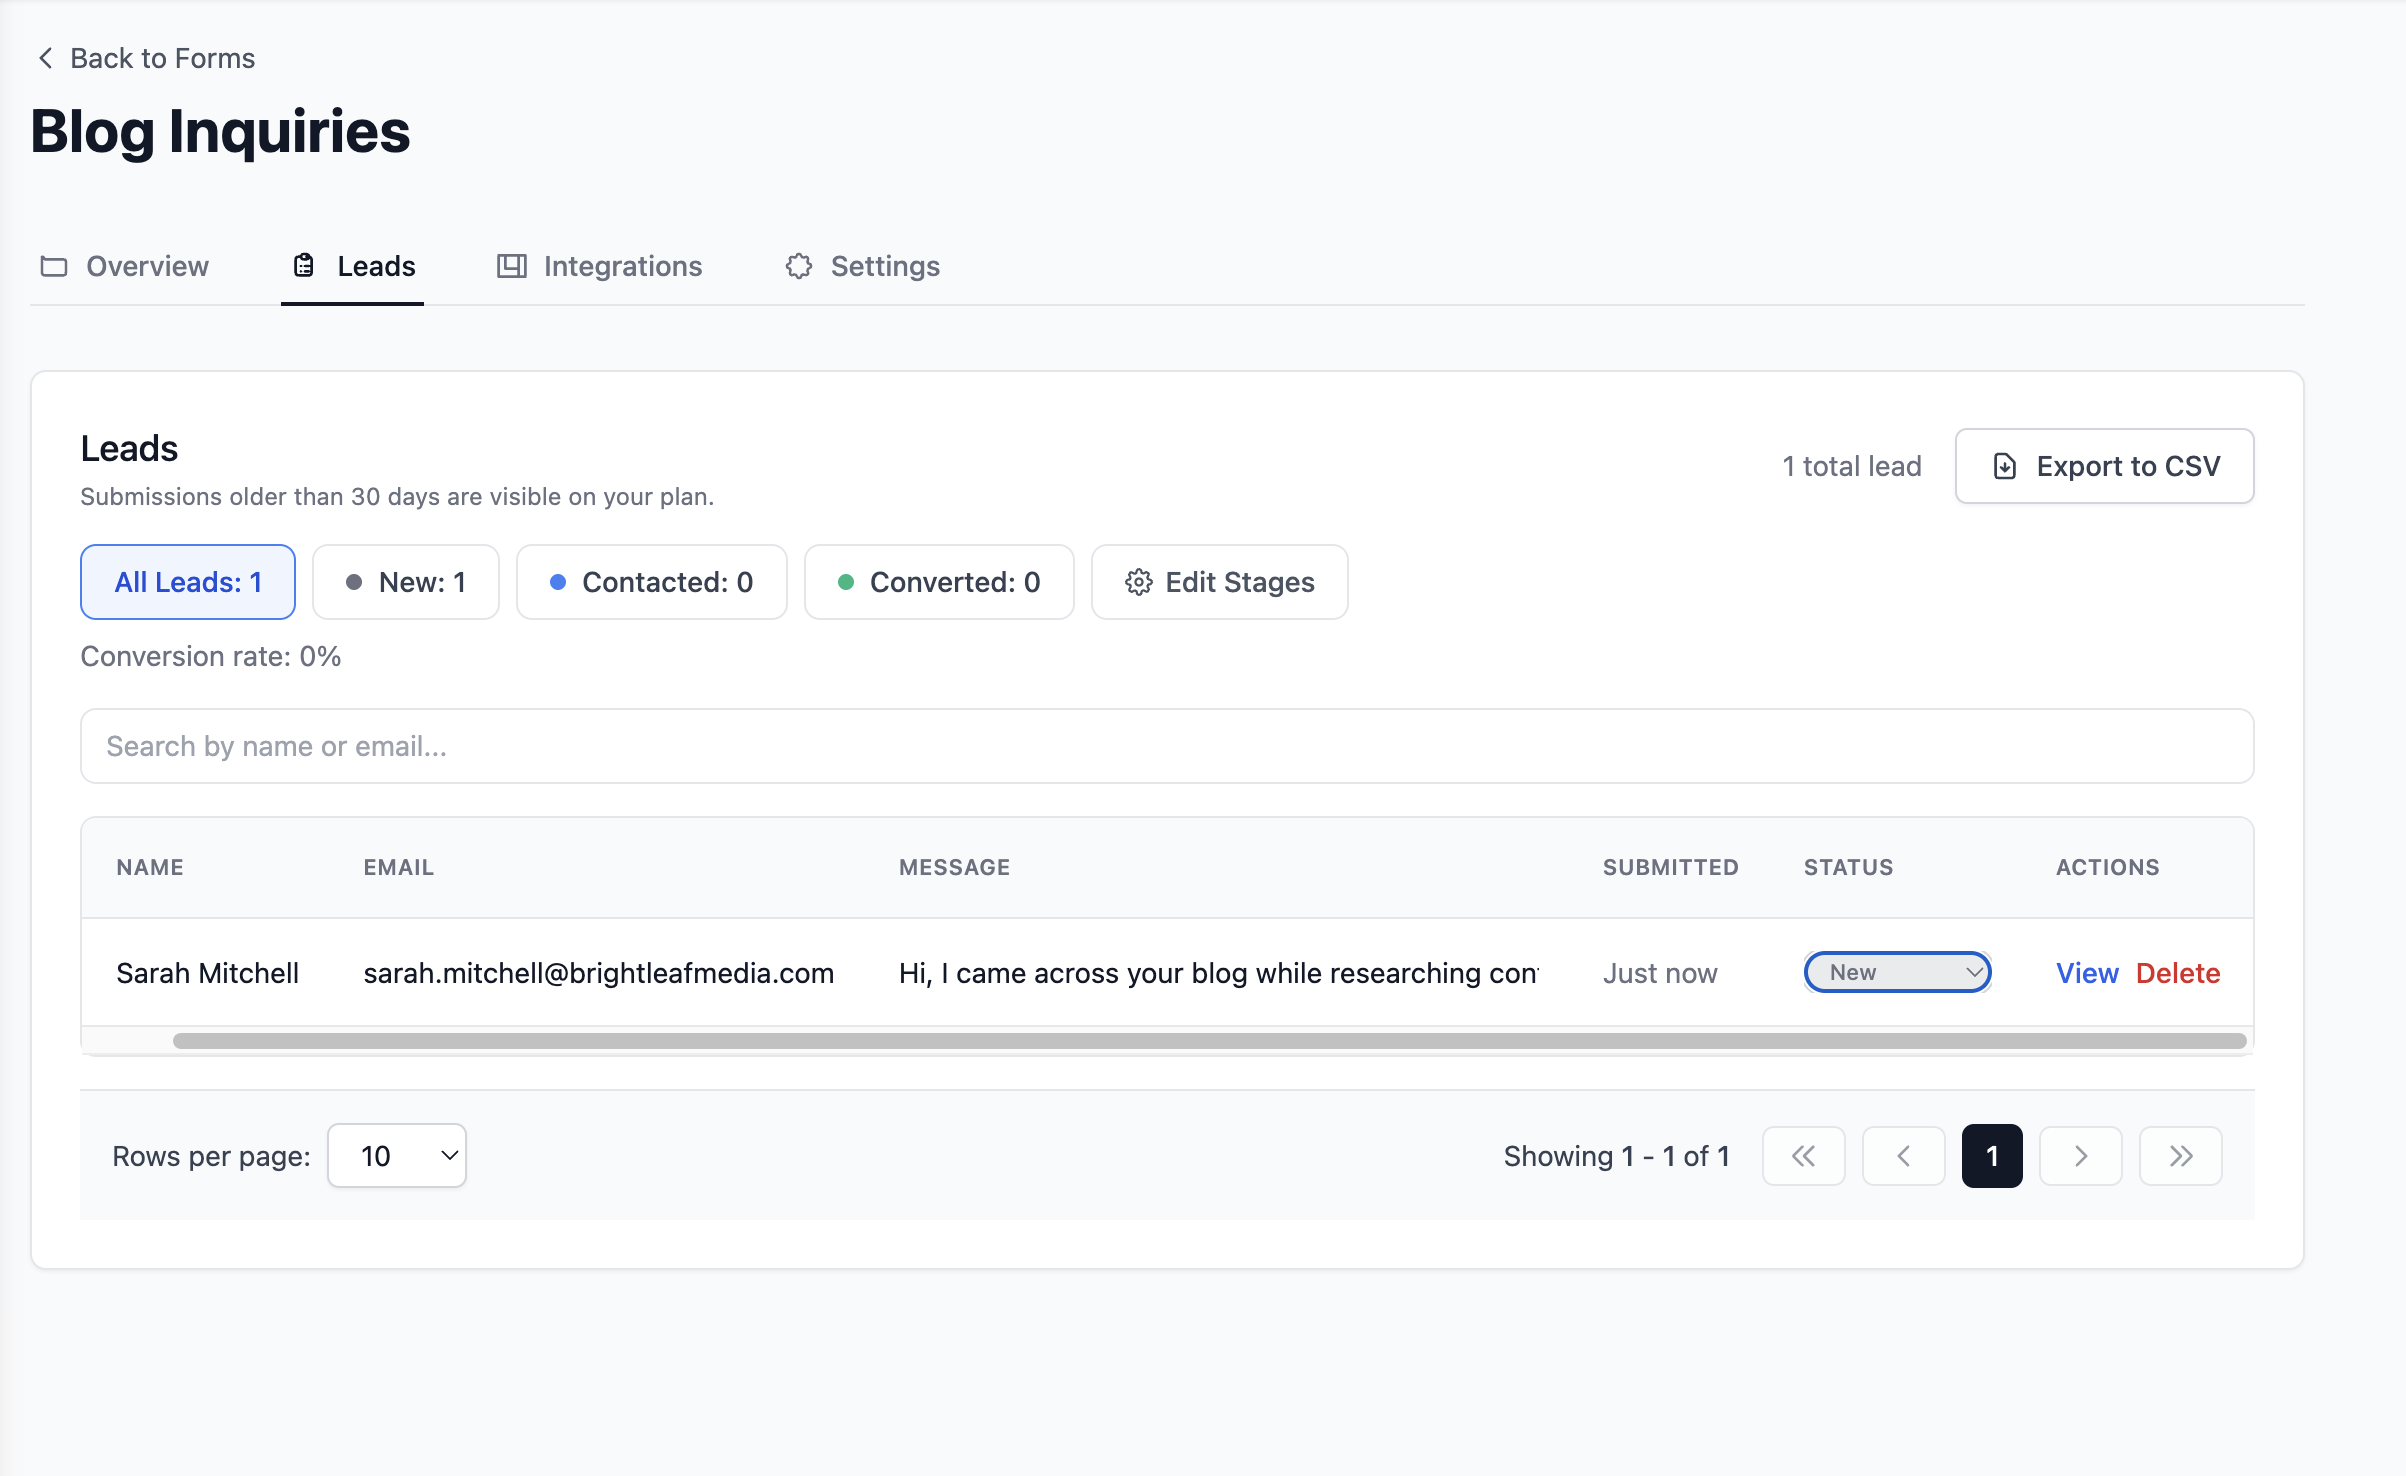
At the top of your leads tab, you see your conversion rate updating automatically as you work through enquiries.
Add notes after every conversation
After you reply to someone, add a private note directly on the lead. What they asked about. What you quoted. What the next step is. Everything in one place.
Replied Thursday. Interested in sponsored post.
Wants to know rates. Follow up next week.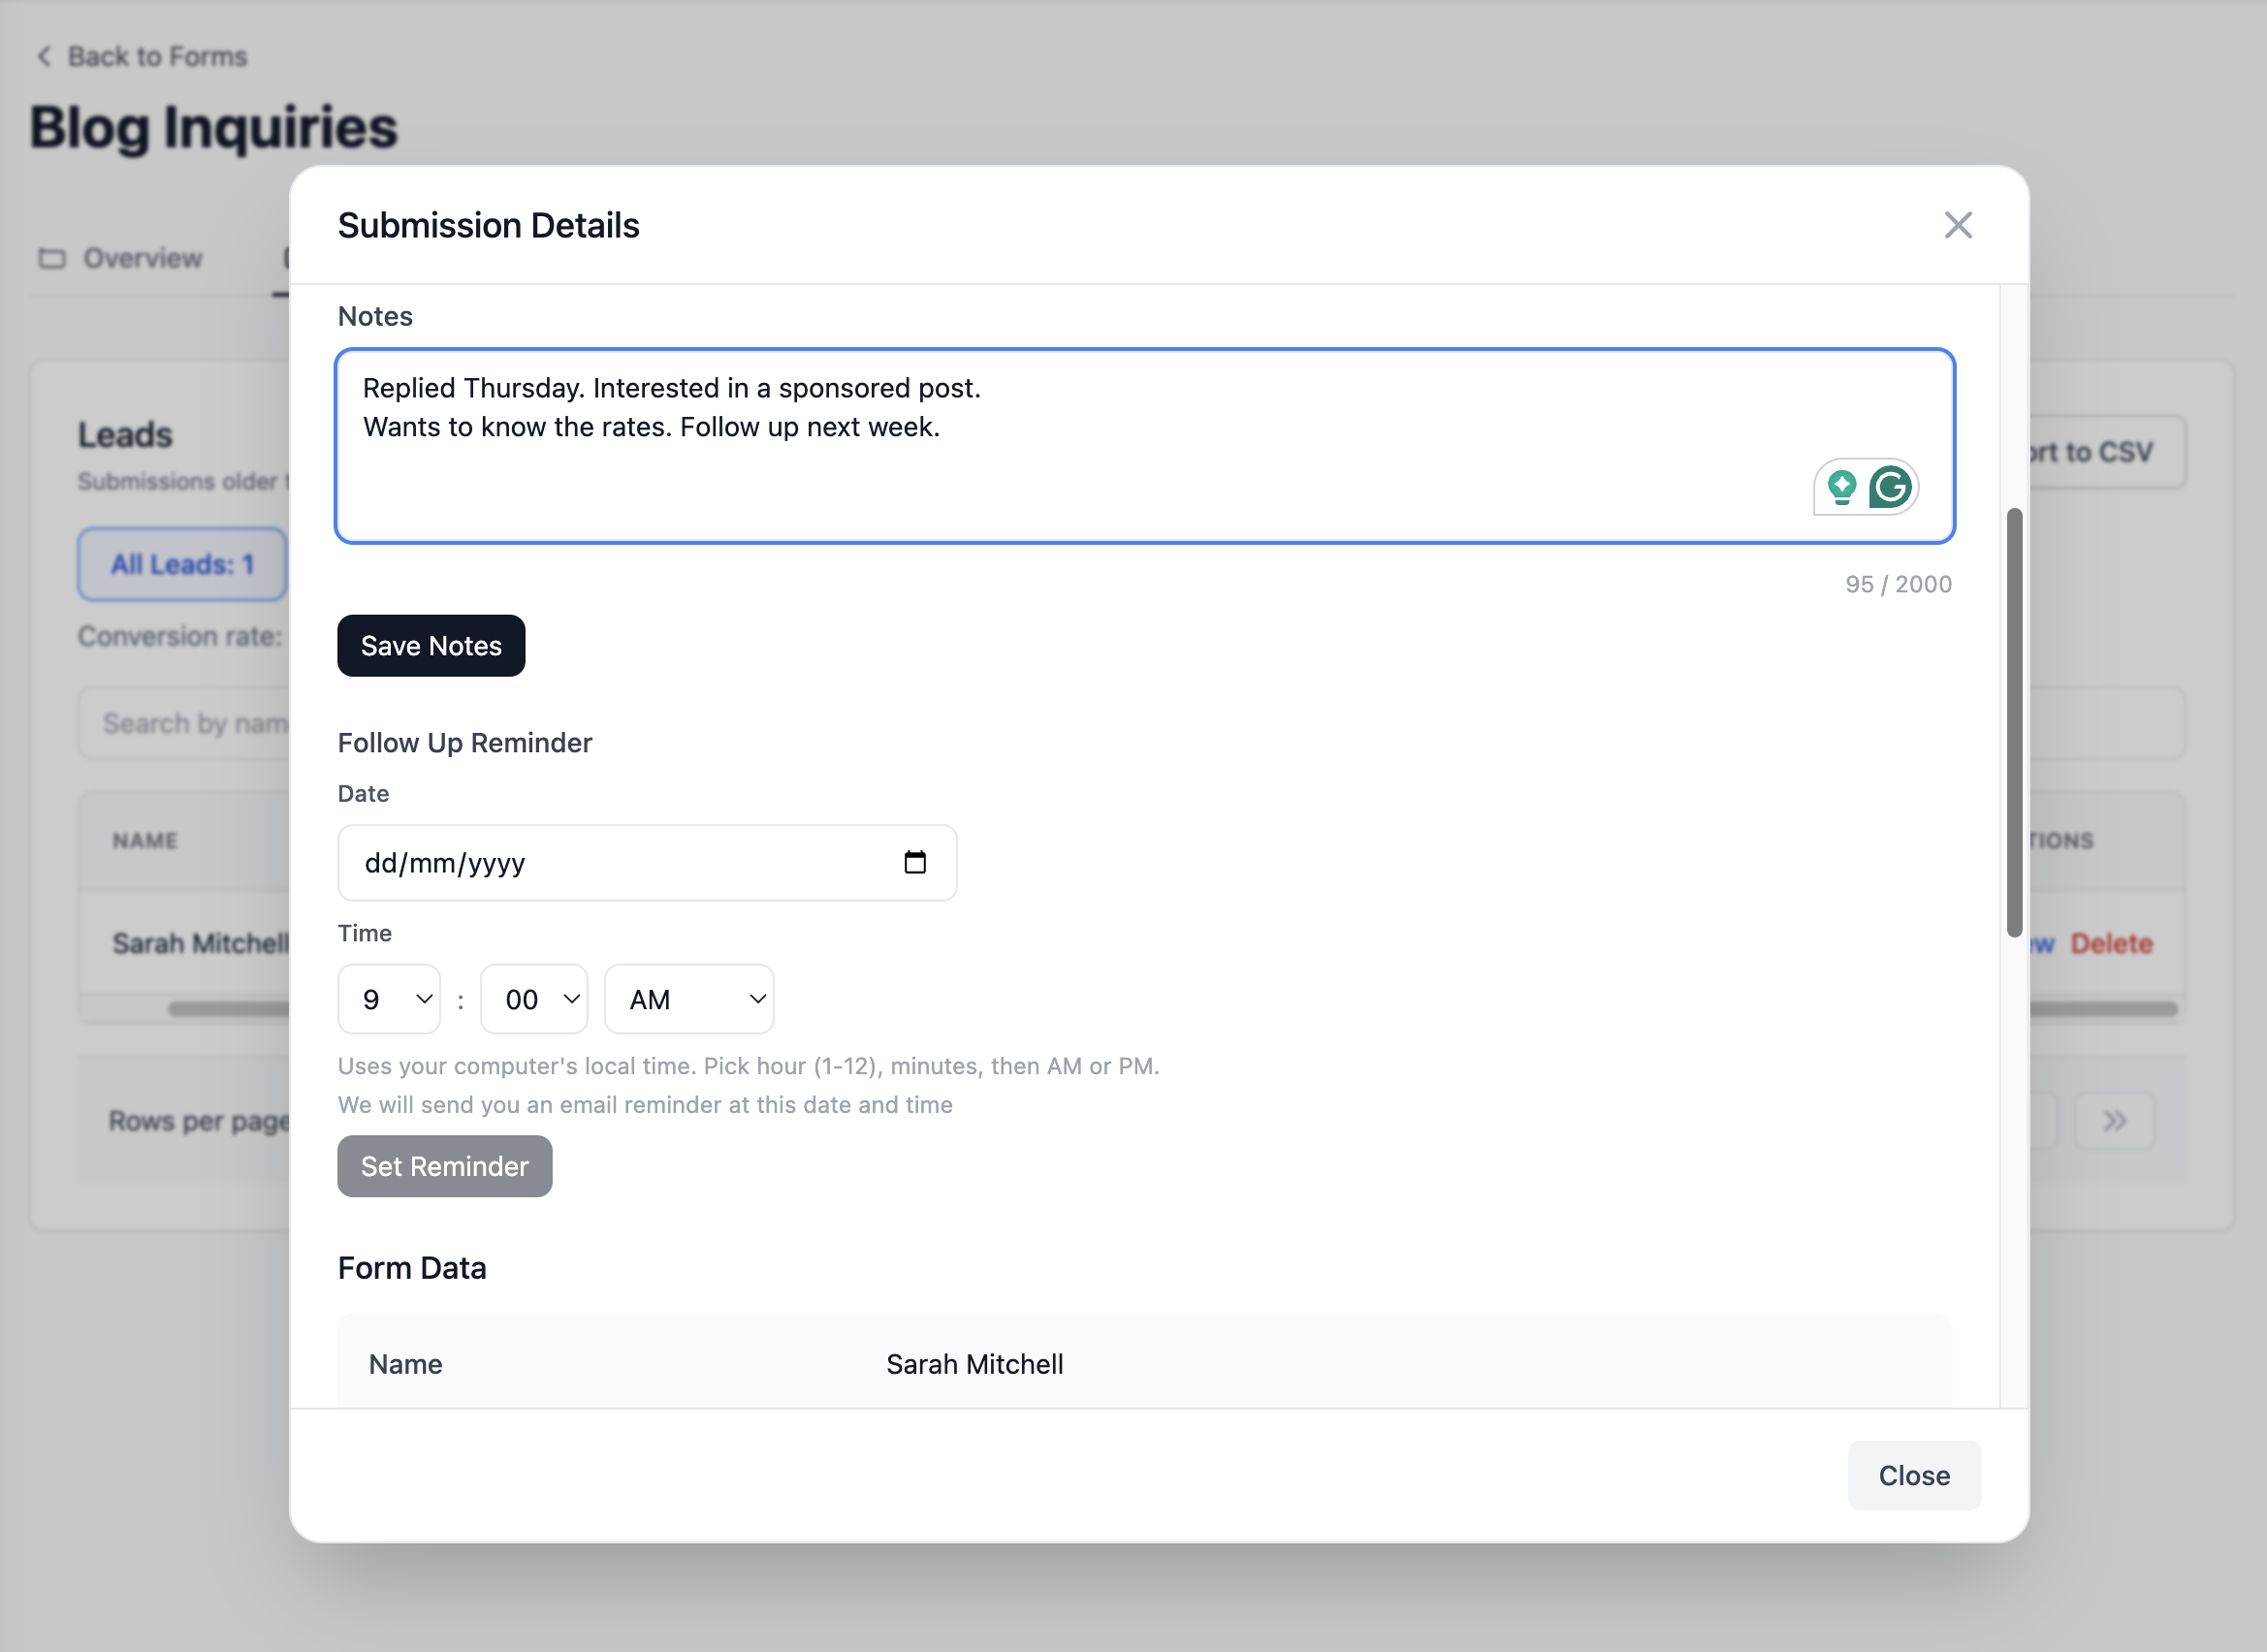
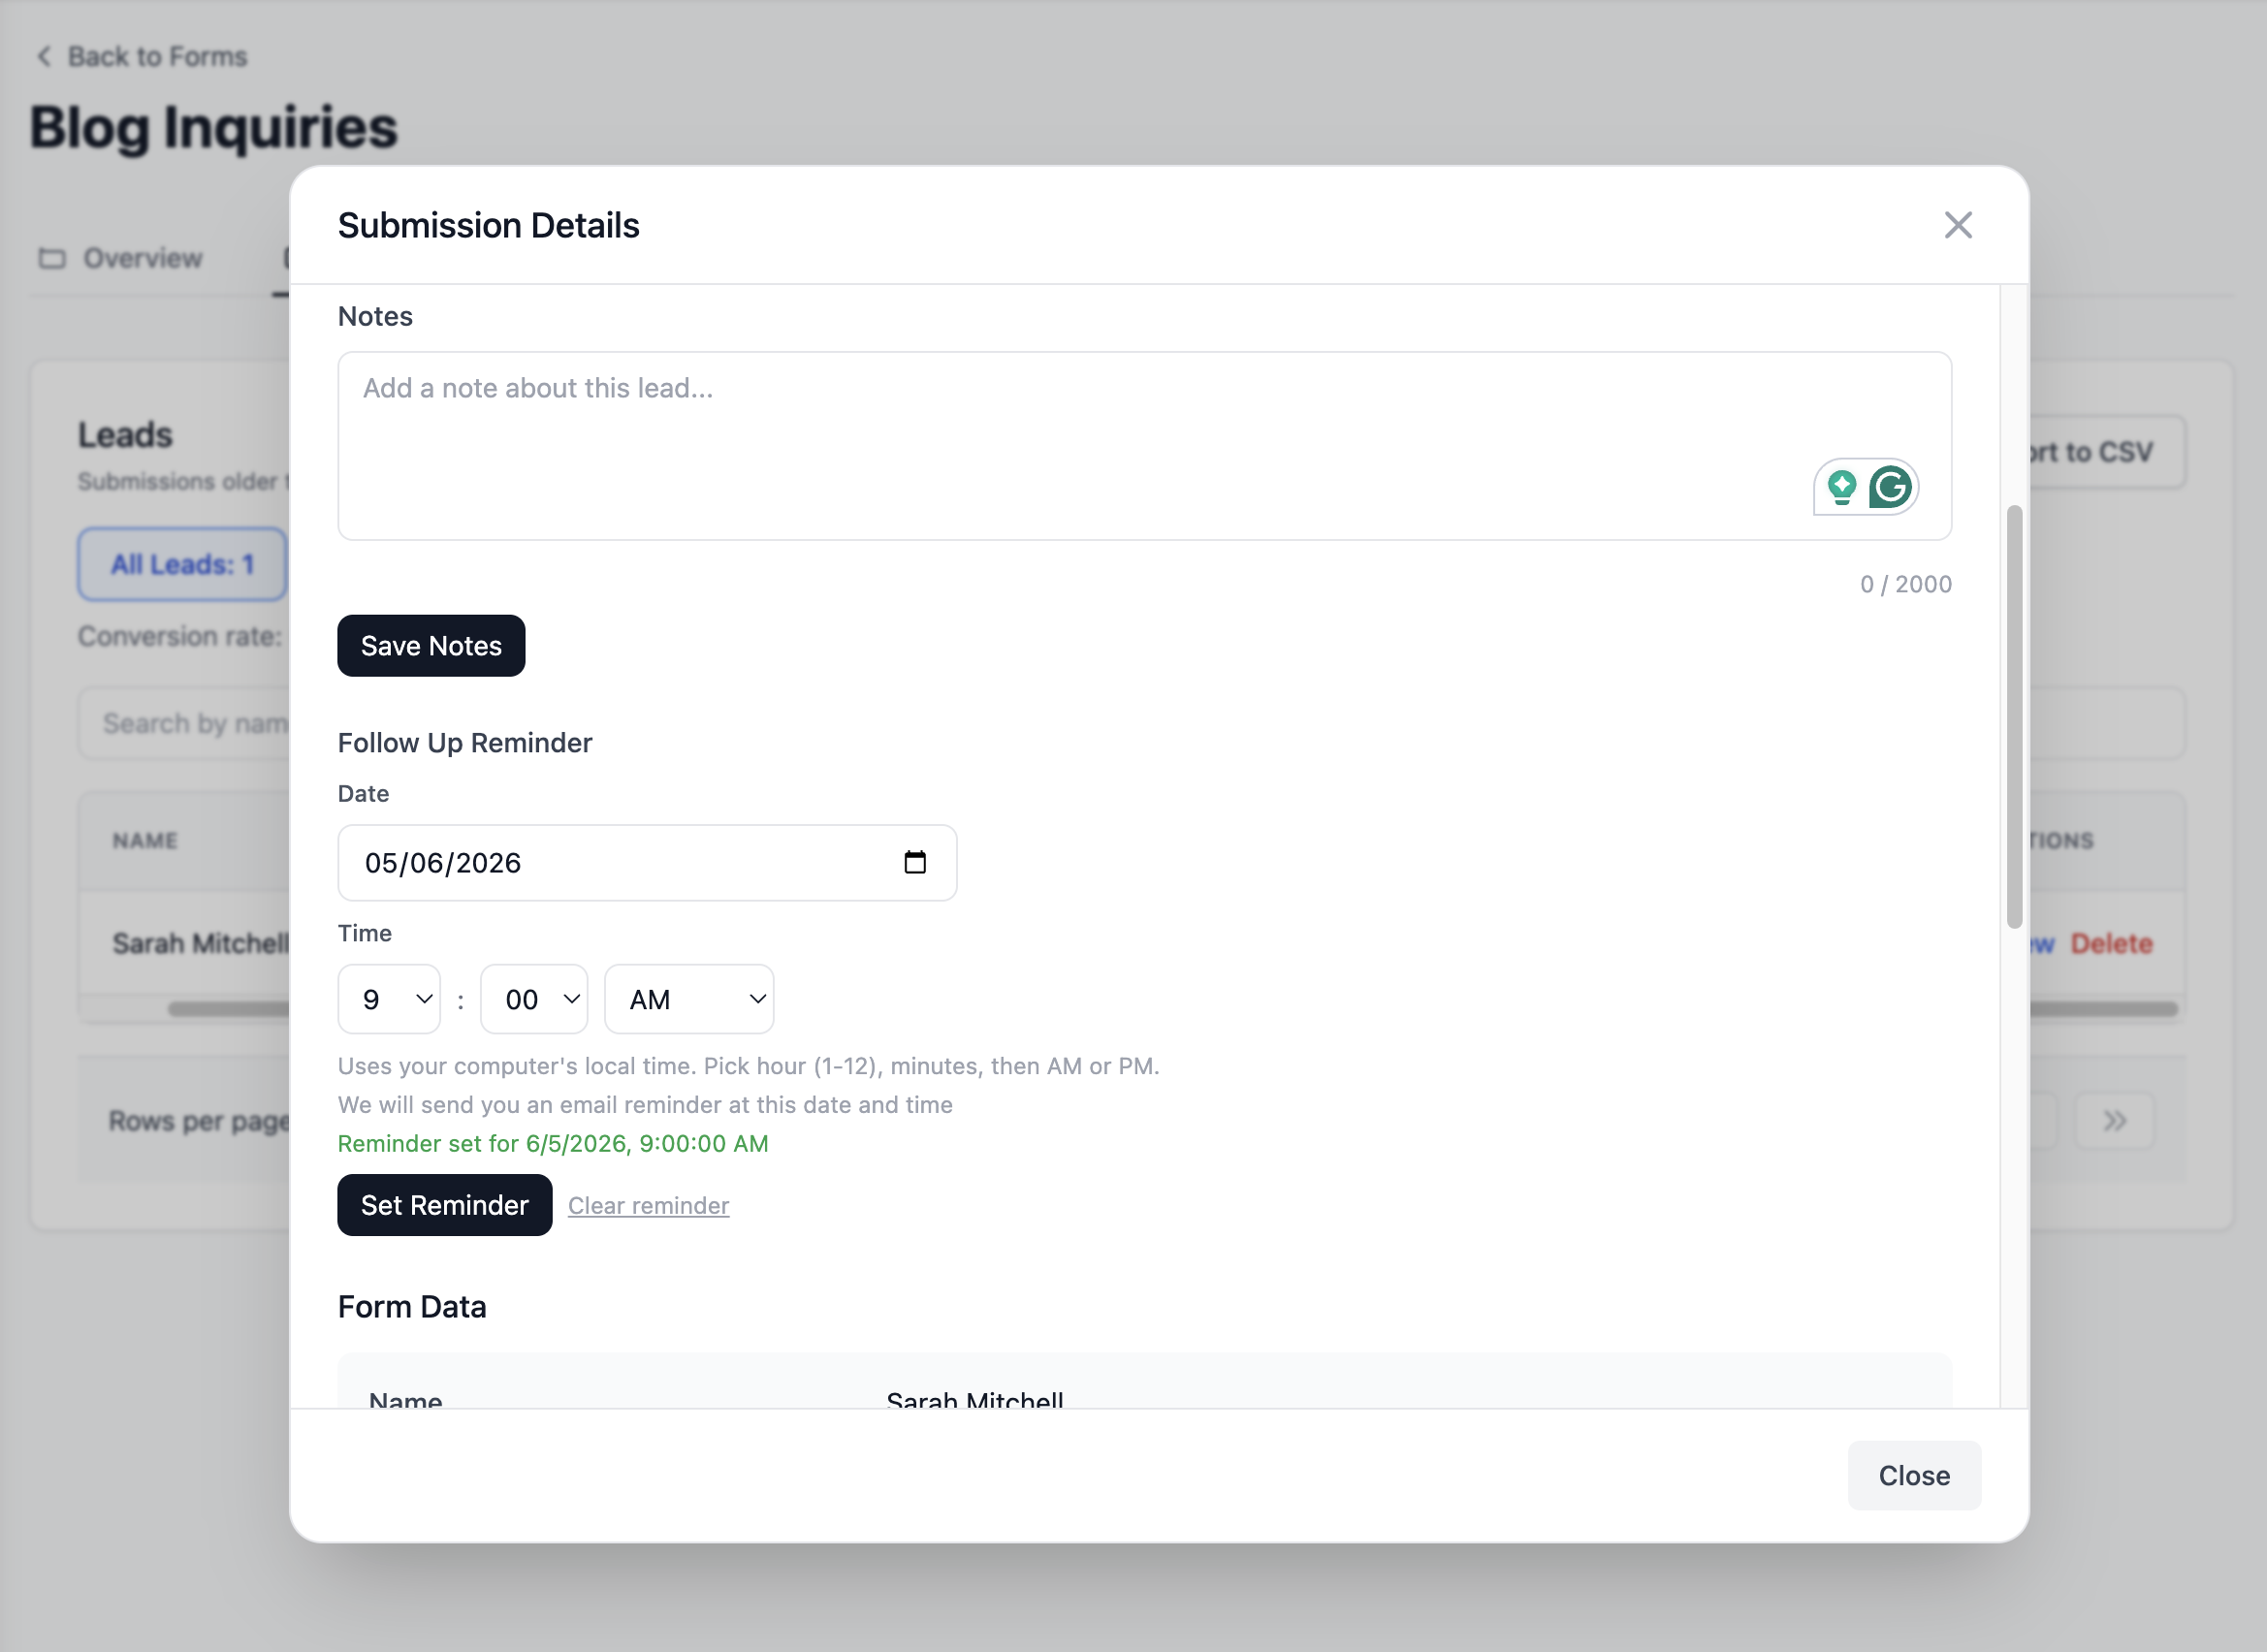
Set follow-up reminders
When someone asks you to follow up next week, set a reminder directly on the lead. Pick a date. Formgrid emails you on that day with the lead details and your notes attached.
Here is what the full flow looks like from WordPress form submission to tracked lead:
How to Add Spam Protection Without a Plugin
Formgrid includes free bot protection on all plans. The honeypot field in the form code above already catches most bots silently. Real visitors never see or interact with it. Bots fill in every field, including hidden ones, which flags the submission automatically.
For stronger protection, you can enable hCaptcha from your Formgrid form settings. Add this to your Custom HTML block in WordPress:
<!-- Add this script once in the Custom HTML block -->
<script src="https://js.hcaptcha.com/1/api.js" async defer></script>

<!-- Add this just before your submit button -->
<div class="h-captcha" data-sitekey="your-hcaptcha-site-key"></div>
Your hCaptcha site key is available in your Formgrid dashboard under form settings after you enable captcha. Formgrid verifies the token on the server side automatically. No backend code needed.
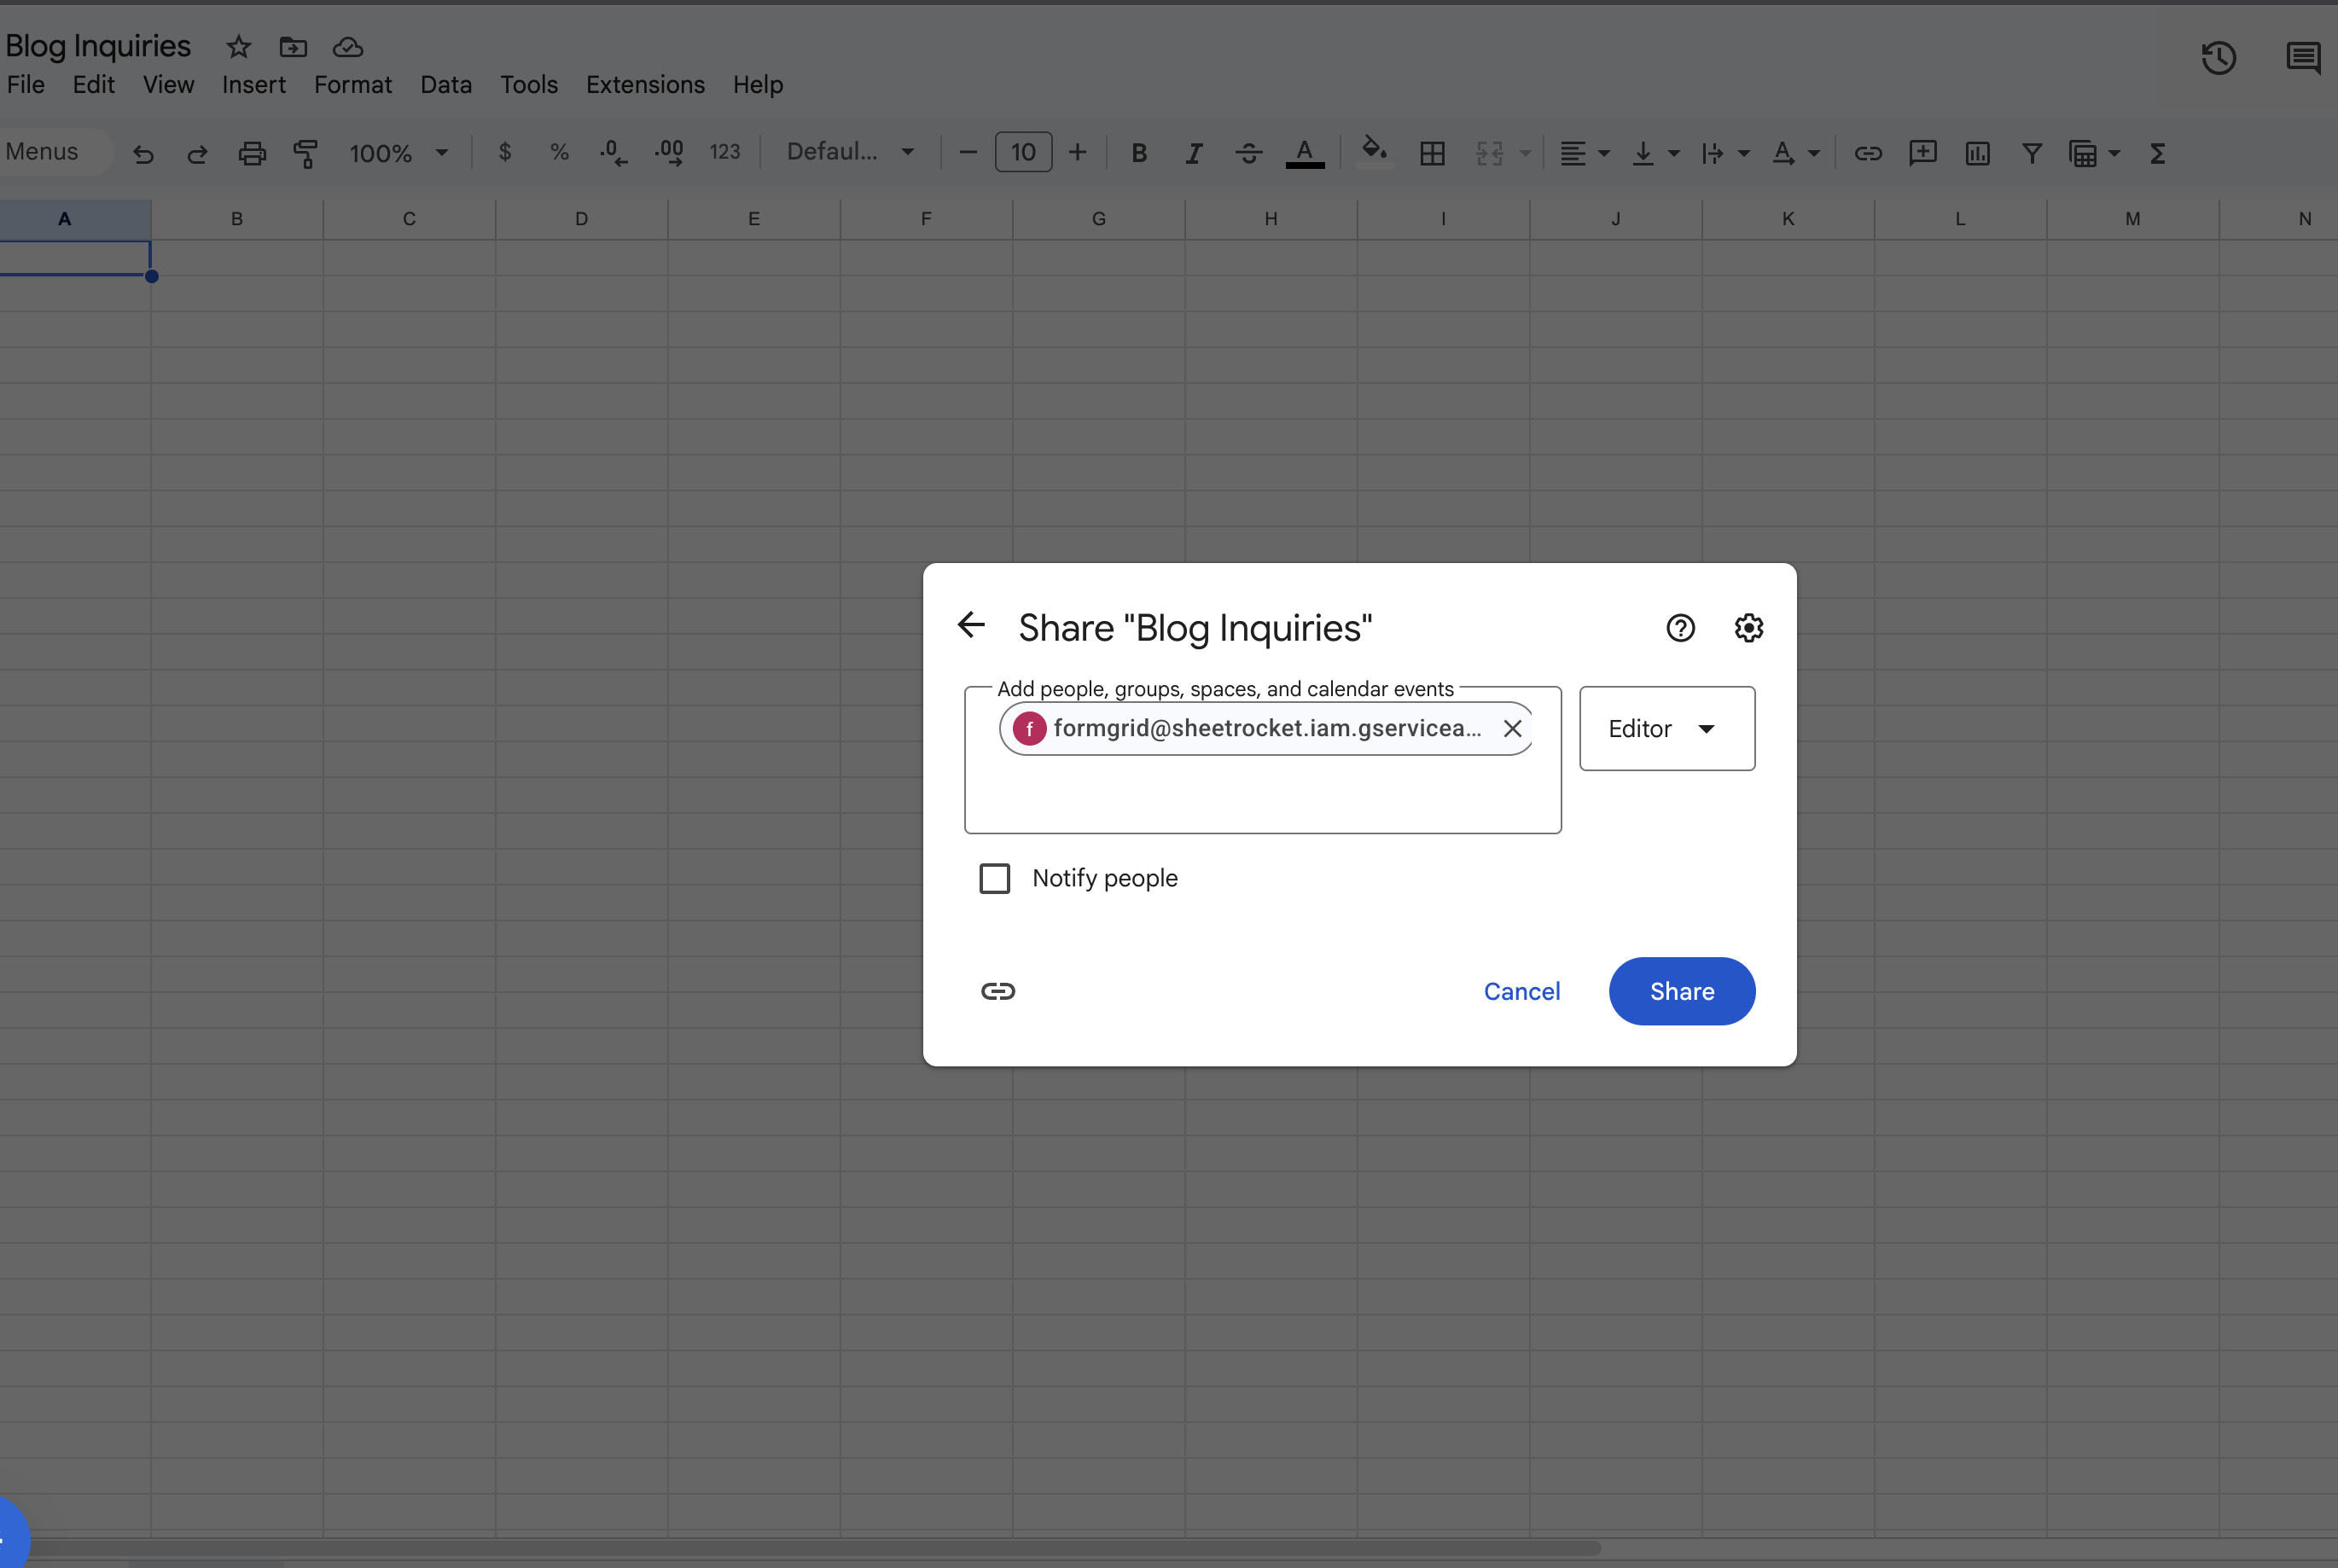
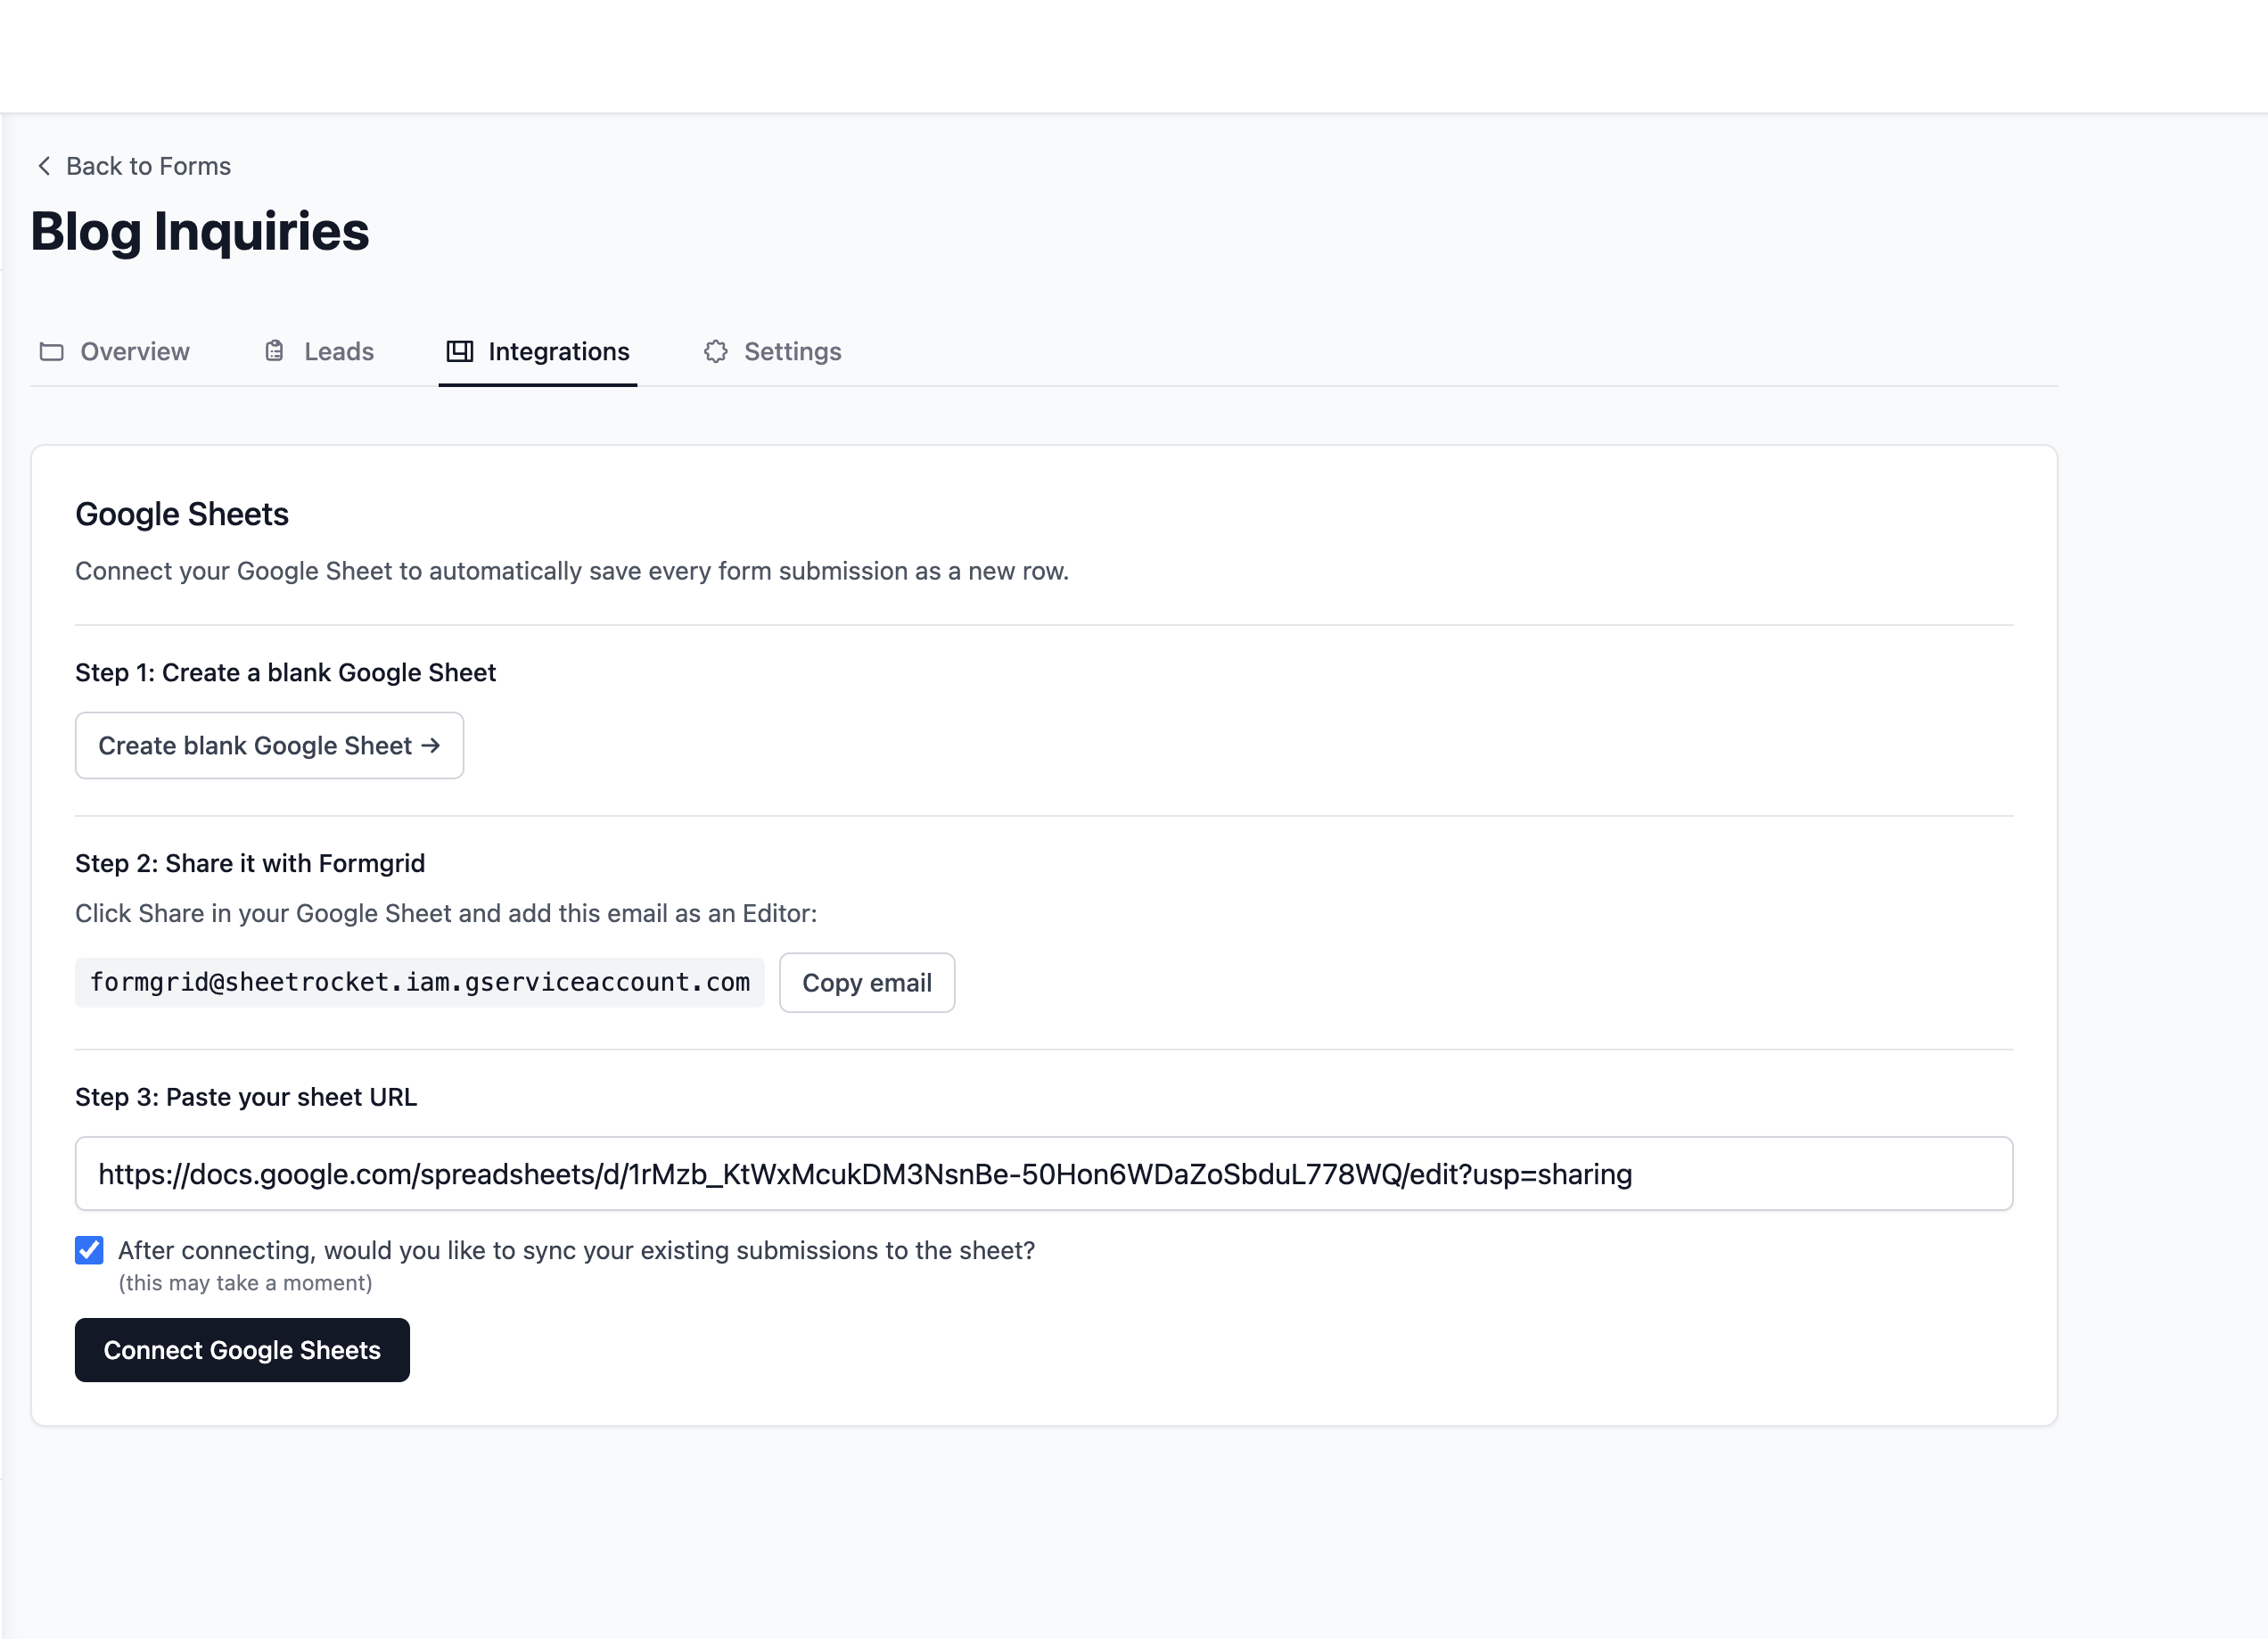
How to Sync WordPress Form Submissions to Google Sheets
If you want every contact form submission to appear automatically as a row in a Google Sheet, set that up from your Formgrid Integrations tab.
Connect your Google account, select the spreadsheet and sheet you want to sync to, and every new submission appears as a new row within seconds. No Zapier needed. No additional cost beyond the Premium plan at $12 per month.
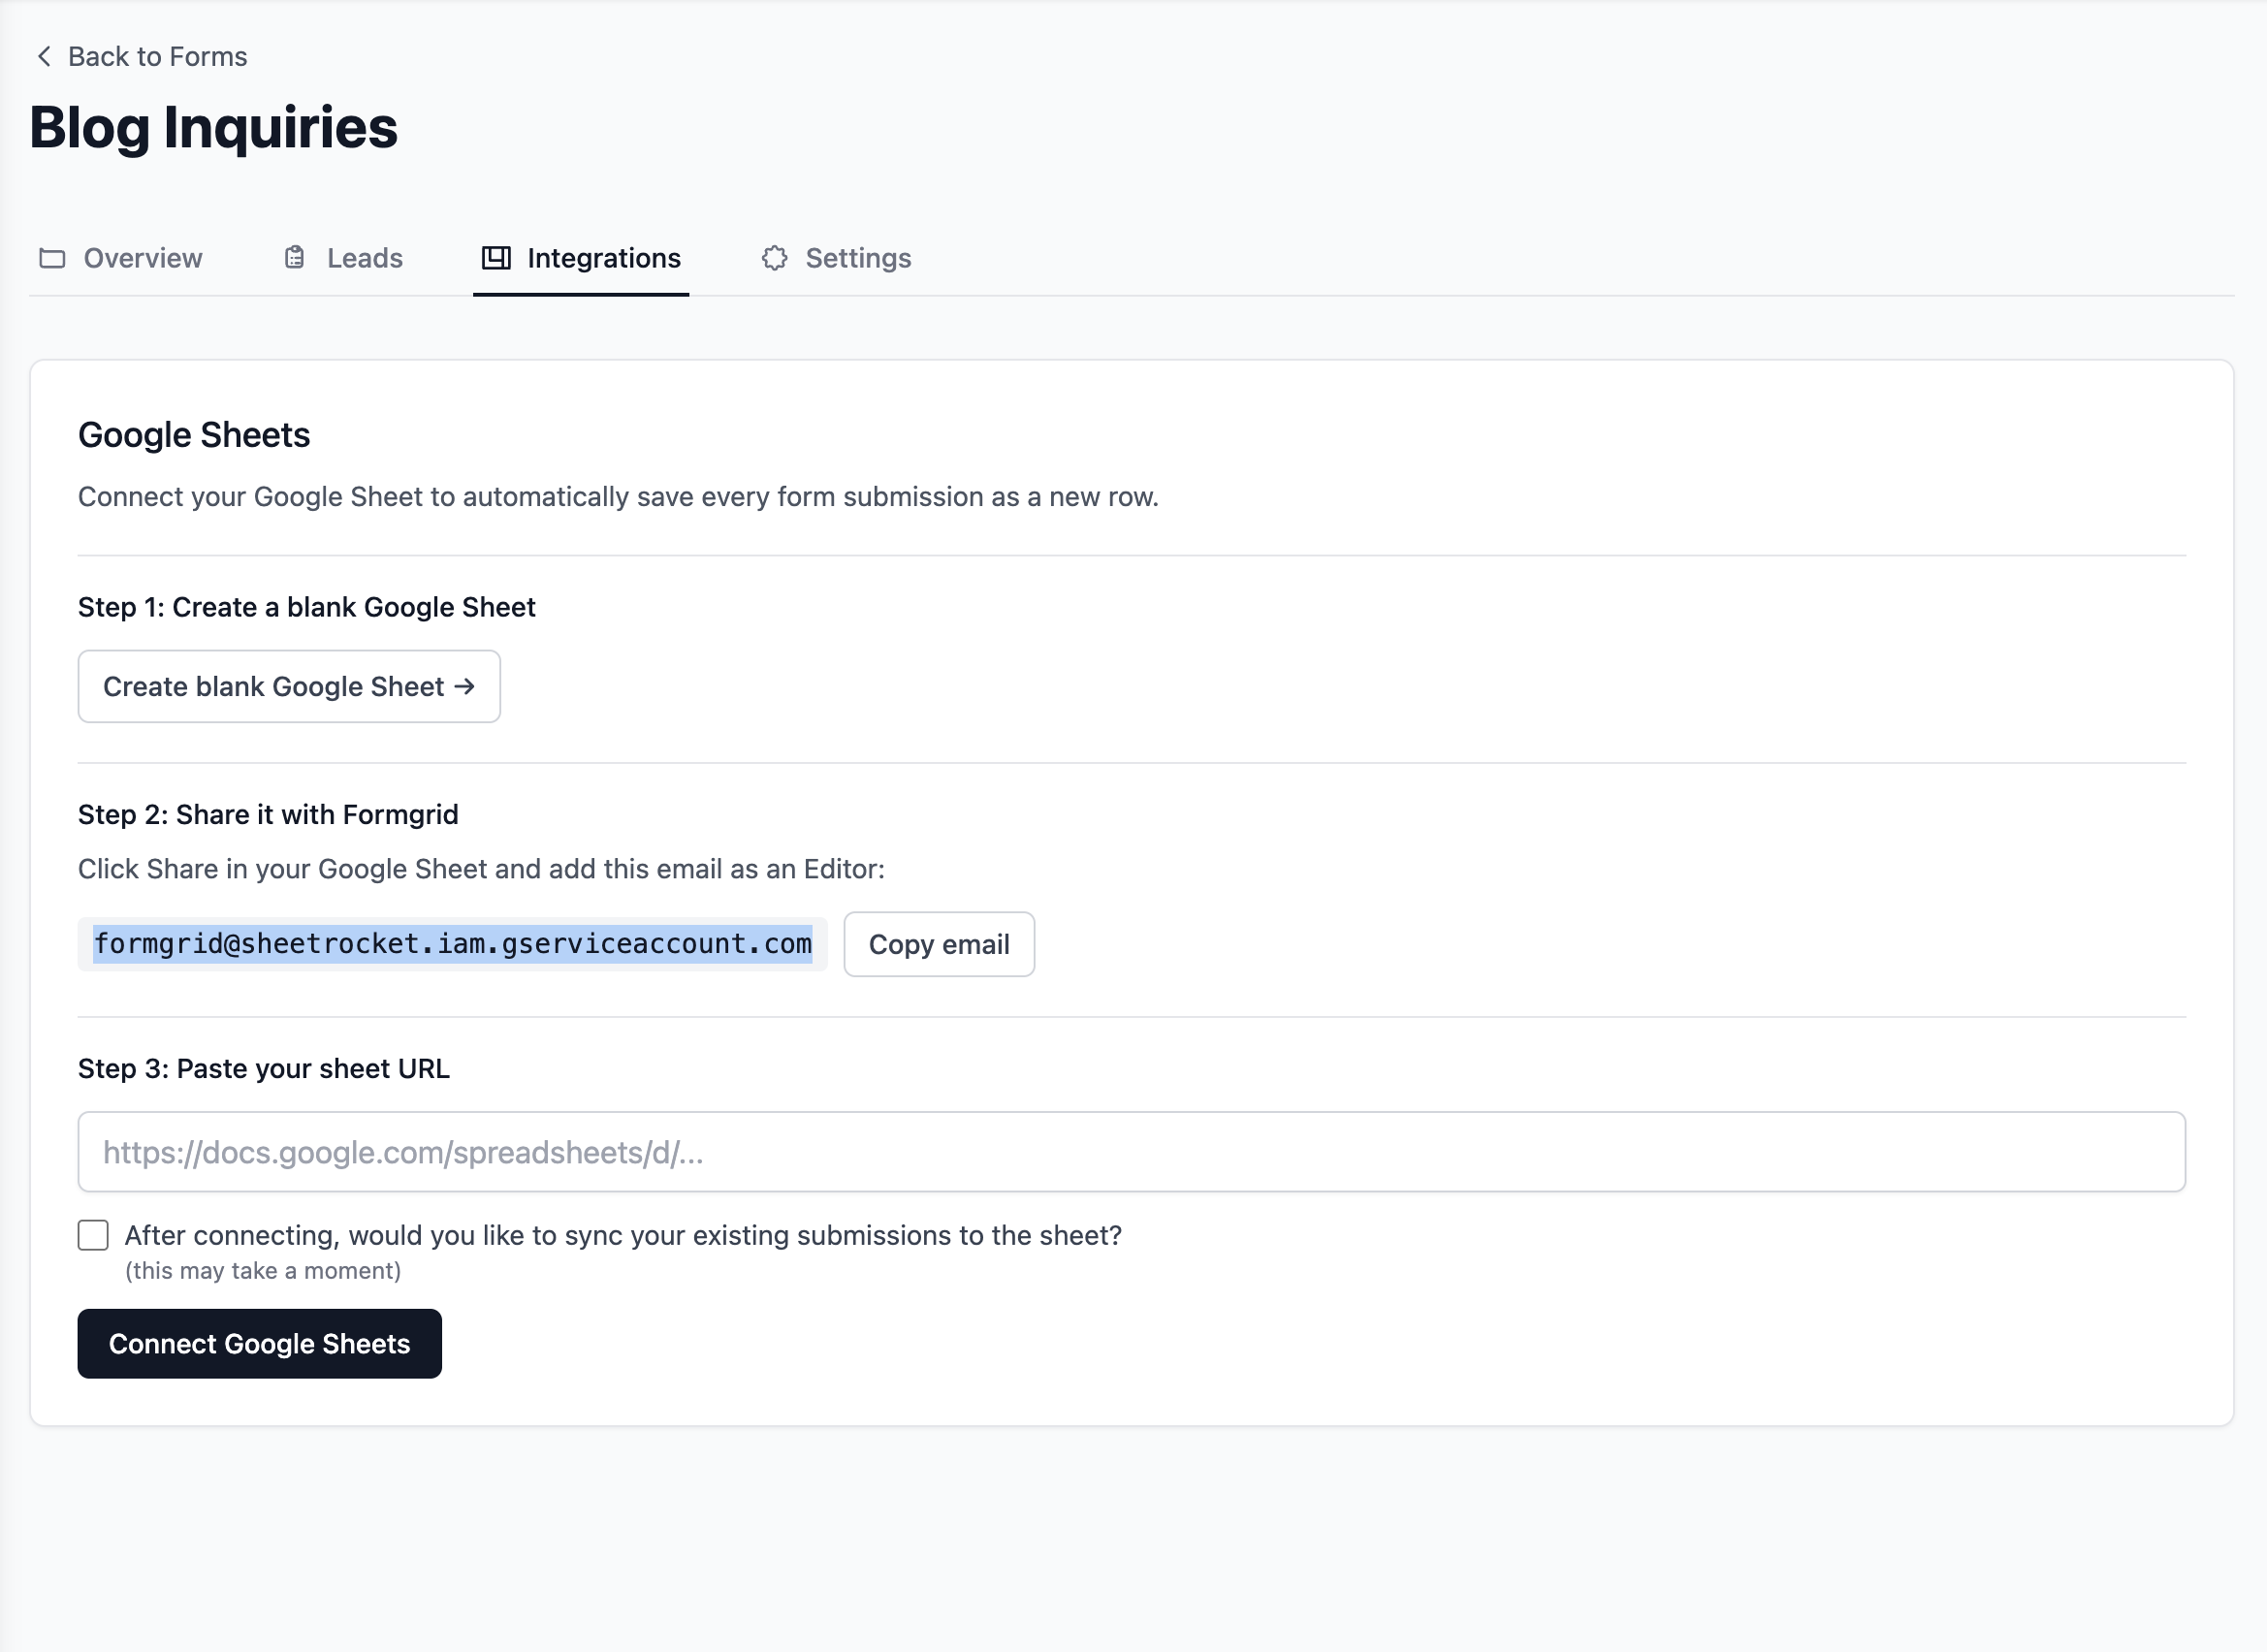
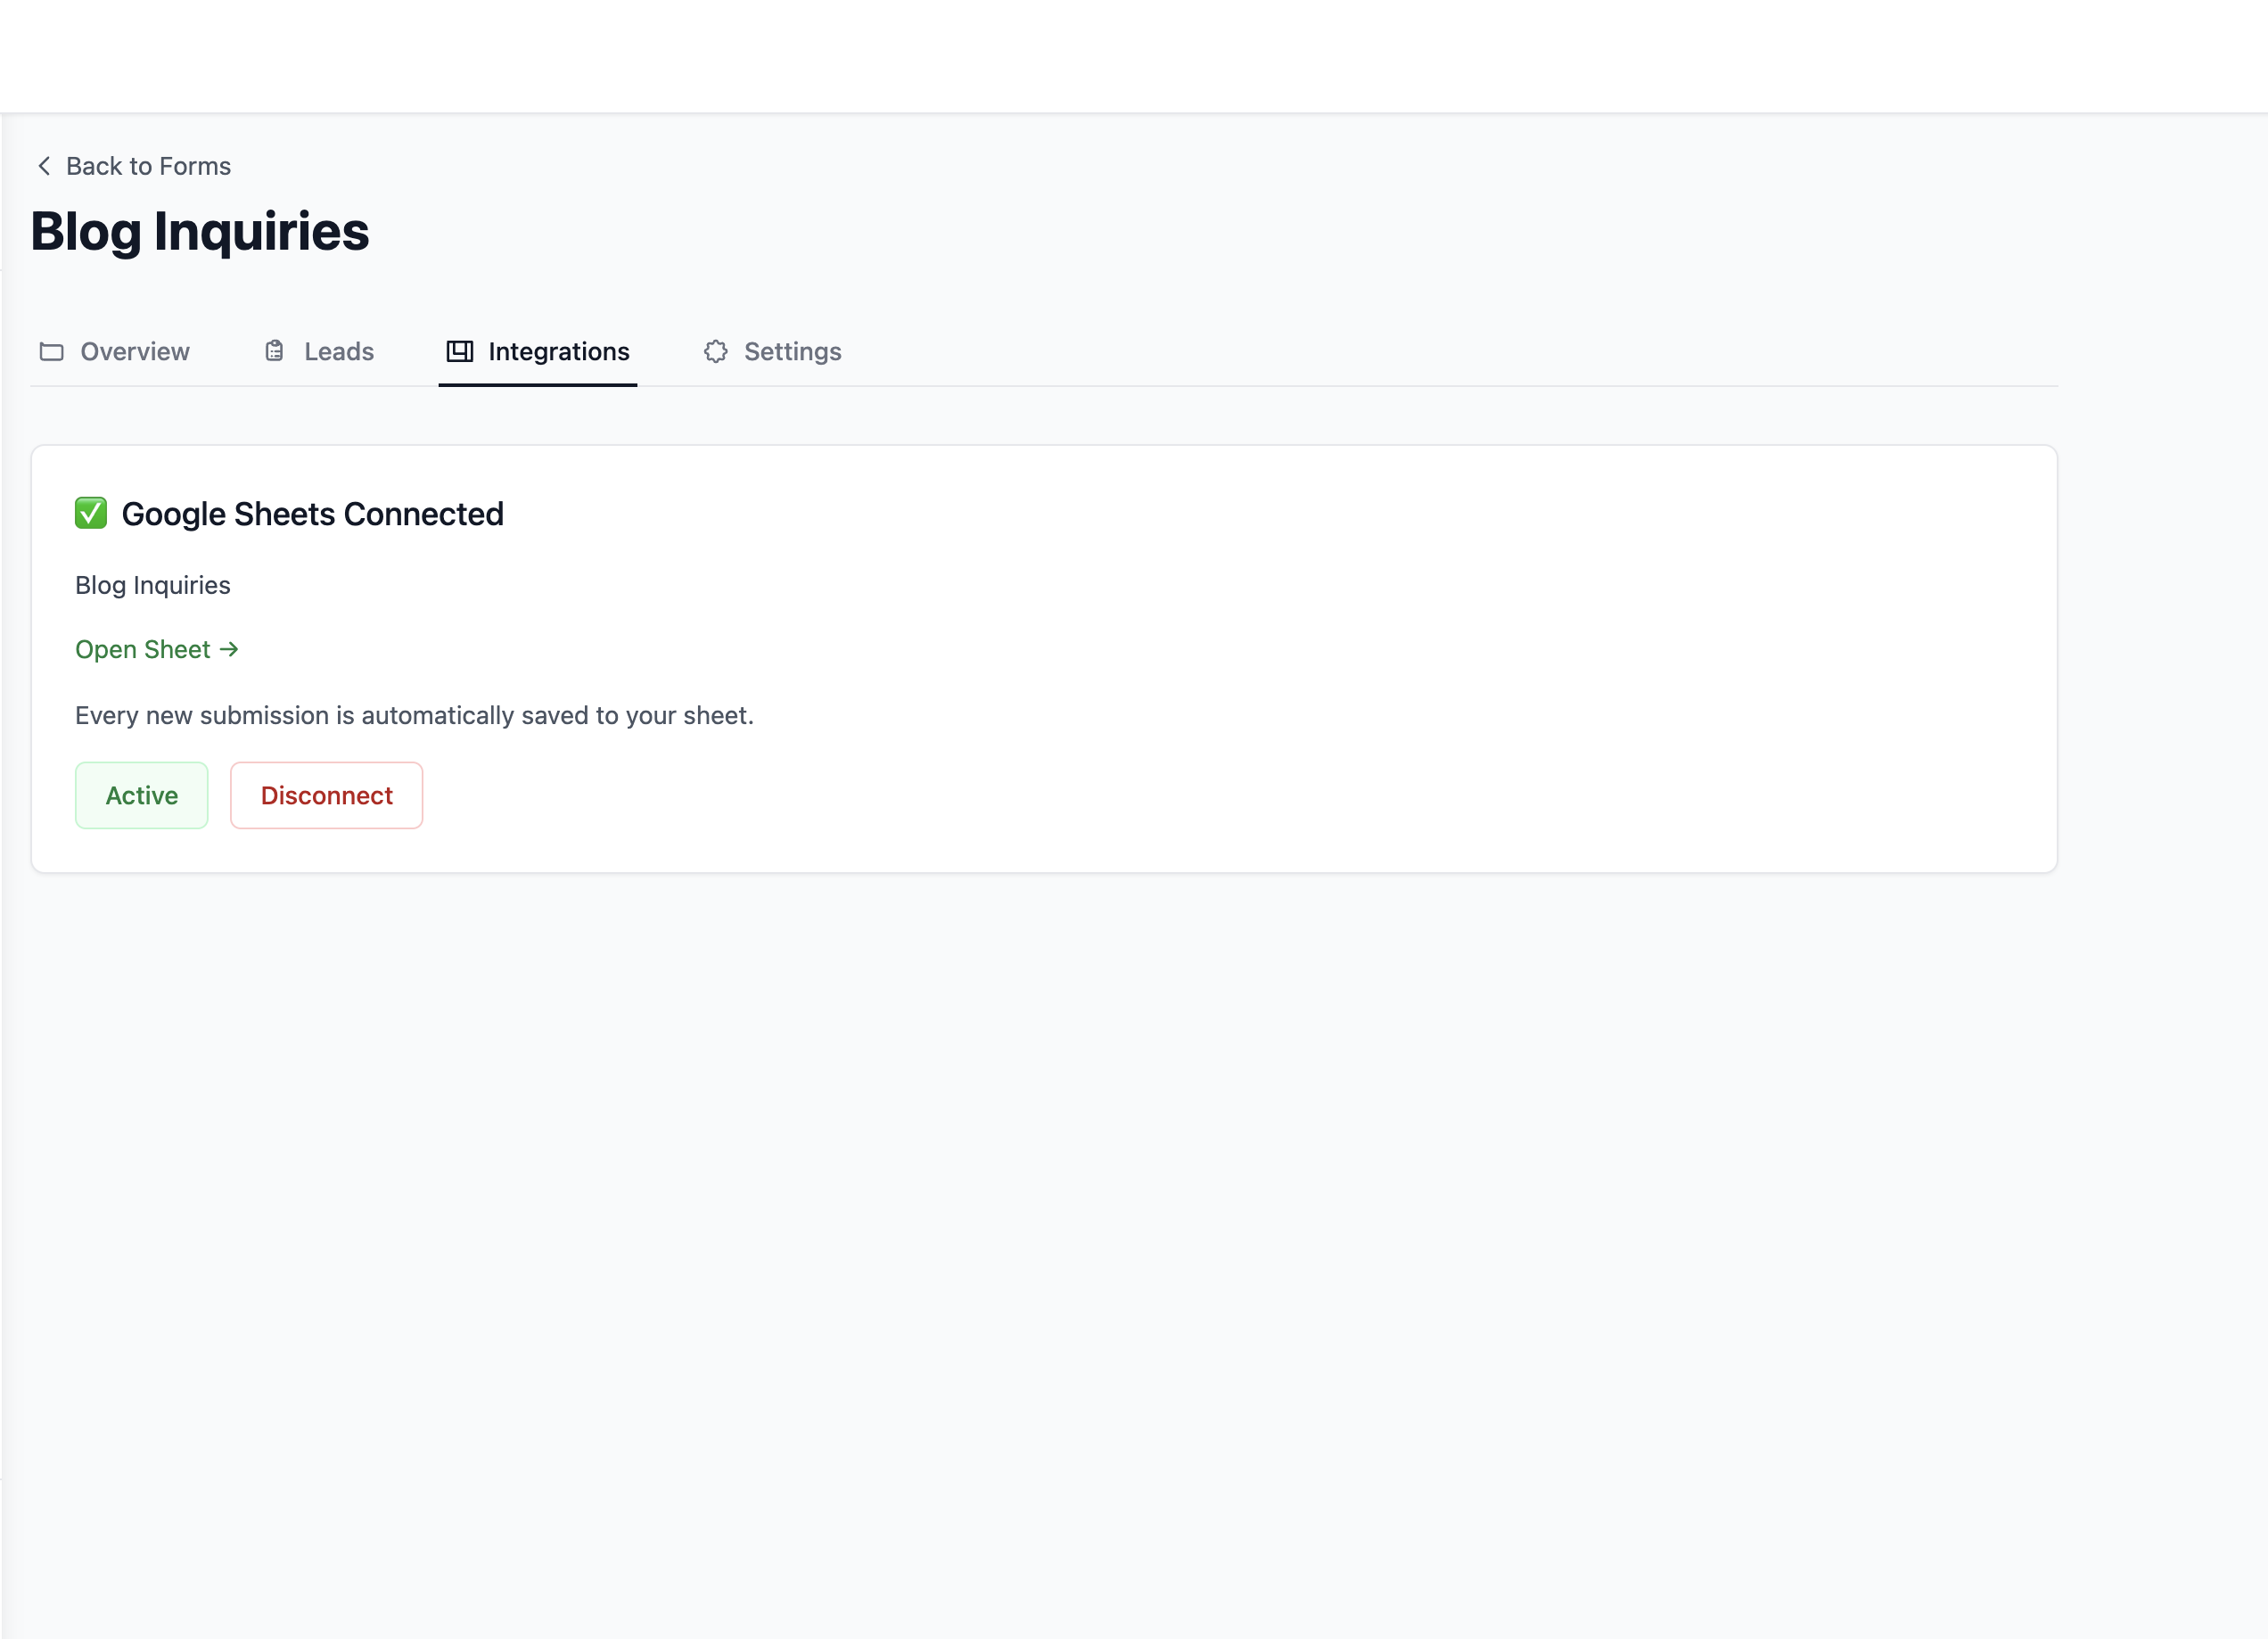

Your whole team can see new enquiries in the shared sheet in real time without logging into WordPress or Formgrid.
How to Redirect to a Thank You Page After Submission
To send visitors to a custom thank you page after they submit, add this hidden field inside your form:
<input
  type="hidden"
  name="_redirect"
  value="https://yoursite.com/thank-you"
/>
Create a Thank You page in WordPress and replace the URL with your actual page address.
The Complete Form Code
Here is the full version with honeypot spam protection, hCaptcha, and a custom redirect:
<!-- hCaptcha script: add once per Custom HTML block -->
<script src="https://js.hcaptcha.com/1/api.js" async defer></script>

<form
  action="https://formgrid.dev/api/f/your-form-id"
  method="POST"
  style="display: flex; flex-direction: column; gap: 16px; max-width: 600px;"
>

  <div>
    <label for="name" style="display: block; margin-bottom: 6px; font-weight: 600;">Name</label>
    <input type="text" id="name" name="name" required placeholder="Your full name"
      style="width: 100%; padding: 10px 14px; border: 1px solid #ddd; border-radius: 6px; font-size: 16px; box-sizing: border-box;" />
  </div>

  <div>
    <label for="email" style="display: block; margin-bottom: 6px; font-weight: 600;">Email</label>
    <input type="email" id="email" name="email" required placeholder="your@email.com"
      style="width: 100%; padding: 10px 14px; border: 1px solid #ddd; border-radius: 6px; font-size: 16px; box-sizing: border-box;" />
  </div>

  <div>
    <label for="subject" style="display: block; margin-bottom: 6px; font-weight: 600;">Subject</label>
    <input type="text" id="subject" name="subject" placeholder="What is this about?"
      style="width: 100%; padding: 10px 14px; border: 1px solid #ddd; border-radius: 6px; font-size: 16px; box-sizing: border-box;" />
  </div>

  <div>
    <label for="message" style="display: block; margin-bottom: 6px; font-weight: 600;">Message</label>
    <textarea id="message" name="message" required rows="6" placeholder="What would you like to say?"
      style="width: 100%; padding: 10px 14px; border: 1px solid #ddd; border-radius: 6px; font-size: 16px; resize: vertical; box-sizing: border-box;"></textarea>
  </div>

  <!-- Honeypot: hidden from humans, filled by bots -->
  <input type="text" name="_honey" style="display: none;" />

  <!-- Custom redirect after submission -->
  <input type="hidden" name="_redirect" value="https://yoursite.com/thank-you" />

  <!-- hCaptcha: only needed if captcha is enabled in Formgrid settings -->
  <div class="h-captcha" data-sitekey="your-hcaptcha-site-key"></div>

  <div>
    <button type="submit"
      style="background: #000; color: #fff; padding: 12px 28px; border: none; border-radius: 6px; font-size: 16px; font-weight: 600; cursor: pointer;">
      Send Message
    </button>
  </div>

</form>
Replace your-form-id with your Formgrid form ID, your-hcaptcha-site-key with the key from your Formgrid settings, and the redirect URL with your actual thank you page.
Formgrid vs WordPress Contact Form Plugins
| Feature | Contact Form 7 | WPForms Free | Formgrid |
|---|---|---|---|
| Plugin required | Yes | Yes | No |
| Lead pipeline | No | No | Yes |
| Follow up reminders | No | No | Yes |
| Conversion tracking | No | No | Yes |
| Google Sheets sync | No | No | Yes at $12/mo |
| Spam protection | Basic | Basic | Free on all plans |
| File uploads | No | No | Yes |
| Self-hostable | N/A | N/A | Yes |
| Open source | Yes | Partial | Yes MIT |
| Server load | On your server | On your server | On Formgrid servers |
| Plugin conflicts | Possible | Possible | None |
Troubleshooting Common Issues
Form submits but no email arrives
Check your spam folder first. If the email is not there, go to your Formgrid dashboard and confirm the notification email address is correctly set under form settings. Make sure the form endpoint URL in your WordPress Custom HTML block exactly matches the URL shown in your Formgrid dashboard.
WordPress sanitizes the form HTML
Some WordPress themes or security plugins strip custom HTML from page content. If your form disappears after saving, try adding it through a Full Site Editor block, a Custom HTML widget in a sidebar, or directly in your theme files. You can also use a page builder like Elementor or Bricks and add a Custom HTML element.
The form shows an error after submission
This usually means the form ID in the action URL is incorrect, or the form has been deleted from Formgrid. Copy the endpoint URL directly from your form details page and paste it fresh into your WordPress block.
Bots are submitting the form
Enable CAPTCHA in your Formgrid form settings and add the hCaptcha snippet to your Custom HTML block as shown in the spam protection section above. The honeypot field already filters most automated submissions silently.
Why This Approach Beats Every Plugin
Contact Form 7 has over 5 million active installations. It works. But it stops at the inbox. Your submission arrives, you get an email, and that is it.
Formgrid gives you everything Contact Form 7 gives you, plus a lead pipeline, follow-up reminders, conversion tracking, Google Sheets sync, and file uploads, all without installing a single plugin on your WordPress site.
Your WordPress server does no form processing. Your plugin count stays the same. Your site stays fast. And every enquiry becomes a tracked lead you can actually manage.
Getting Started
Your WordPress site does not need a form plugin to have a working contact form.
Five minutes to create a Formgrid account, copy an endpoint URL, paste one HTML block into your page, and you have a contact form that tracks every enquiry from the moment it arrives to the moment it becomes a customer.
👉 Try Formgrid free No credit card required.
Full disclosure: I built Formgrid. I wrote this tutorial as honestly as I could. If anything looks inaccurate or you run into an issue following the steps, let me know in the comments.

Comments
Leave a comment