You built a landing page. It looks great. But when someone fills out your contact form and clicks submit, nothing happens.
That is because HTML forms need a server to process submissions. And setting up a server just to collect email addresses is overkill for most landing pages.
In this guide, you will learn exactly how to add a working email capture form to any landing page without writing any backend code, using Formgrid.dev.
Why HTML Forms Do Not Work on Their Own
When someone submits an HTML form, the browser sends the data to whatever URL is in the
action attribute:
<form action="WHERE_DOES_THIS_GO" method="POST">On a static site, there is no server listening at that URL. So the data goes nowhere. The visitor gets an error. You get nothing.
You have three options:
Option 1: Set up your own server. Node.js, PHP, Python. Configure email sending. Handle spam. Maintain it forever. This is weeks of work for something that should take 10 minutes.
Option 2: Use a form backend service. Point your form at their endpoint. They handle everything. You get submissions in your inbox and dashboard.
Option 3: Do nothing. Lose every lead that tries to contact you.
Option 2 is the right call for 90% of landing pages.
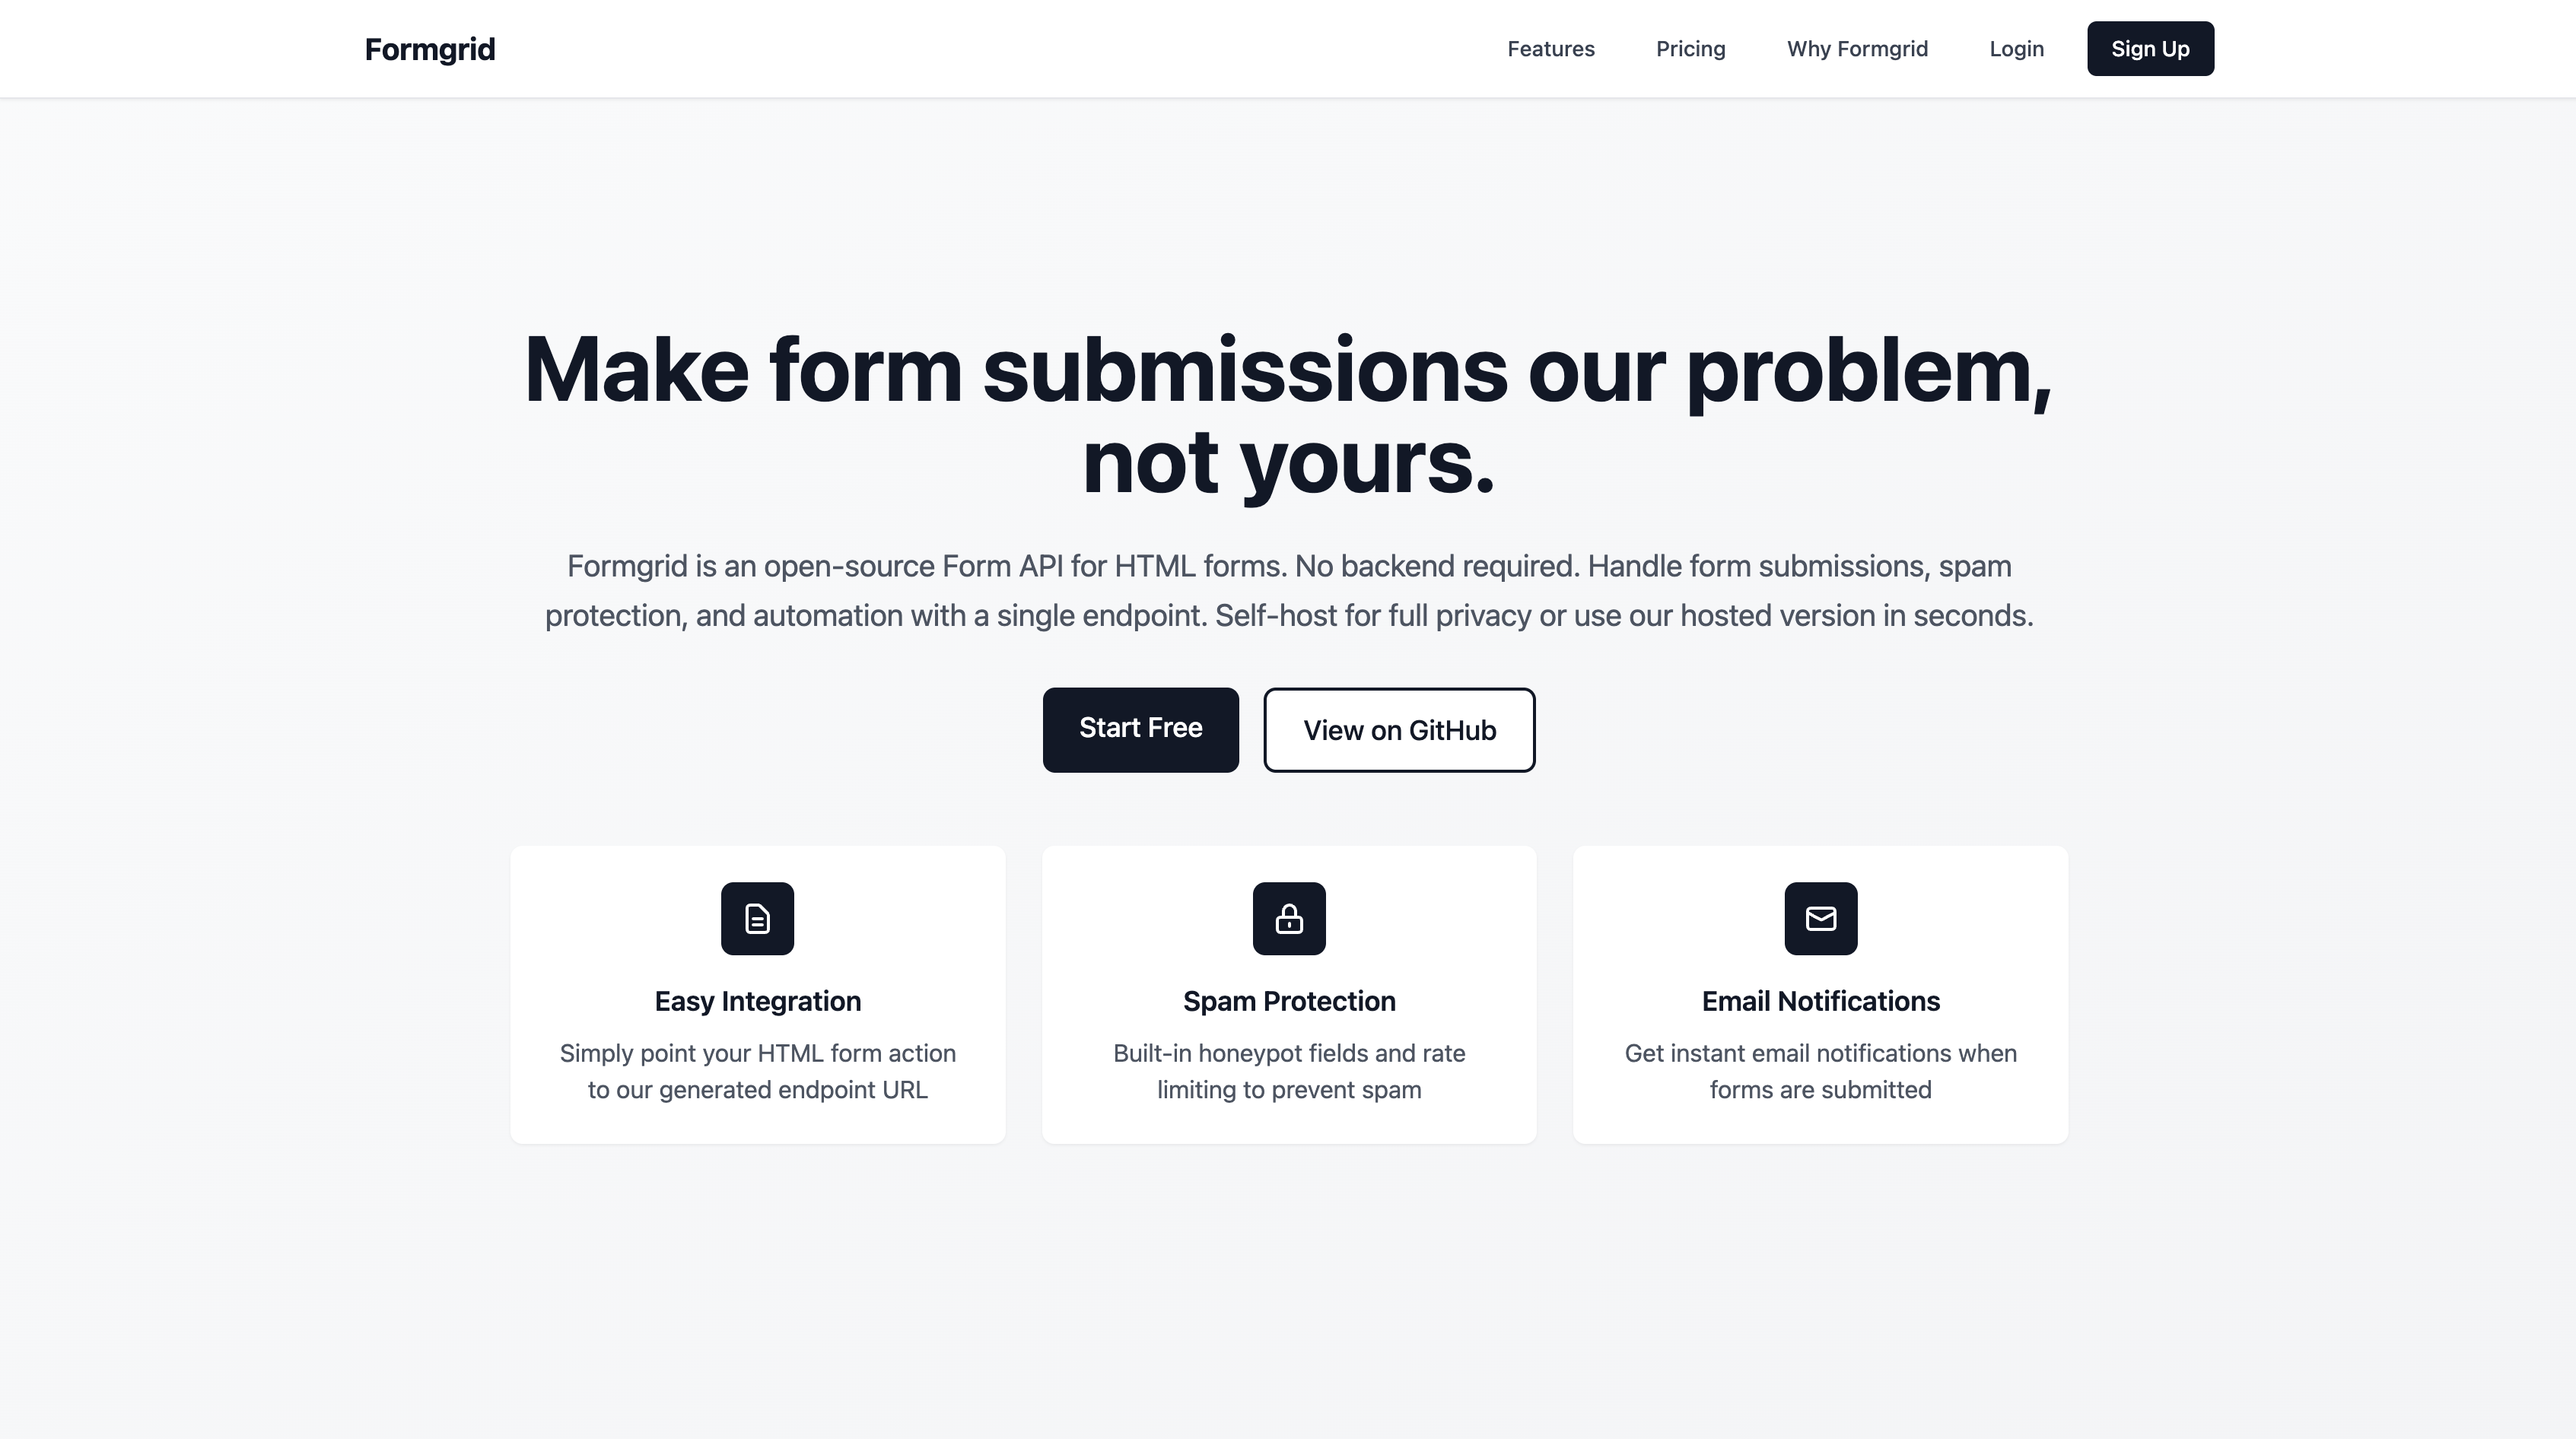
The Solution: Formgrid.dev
Formgrid is a form backend
that works with any HTML form on any website. Point
your form's action attribute at your Formgrid
endpoint and it just works.
Free plan includes:
- Unlimited forms
- 50 submissions per month
- Instant email notifications
- Spam protection built in
- Submission dashboard
Step by Step Setup
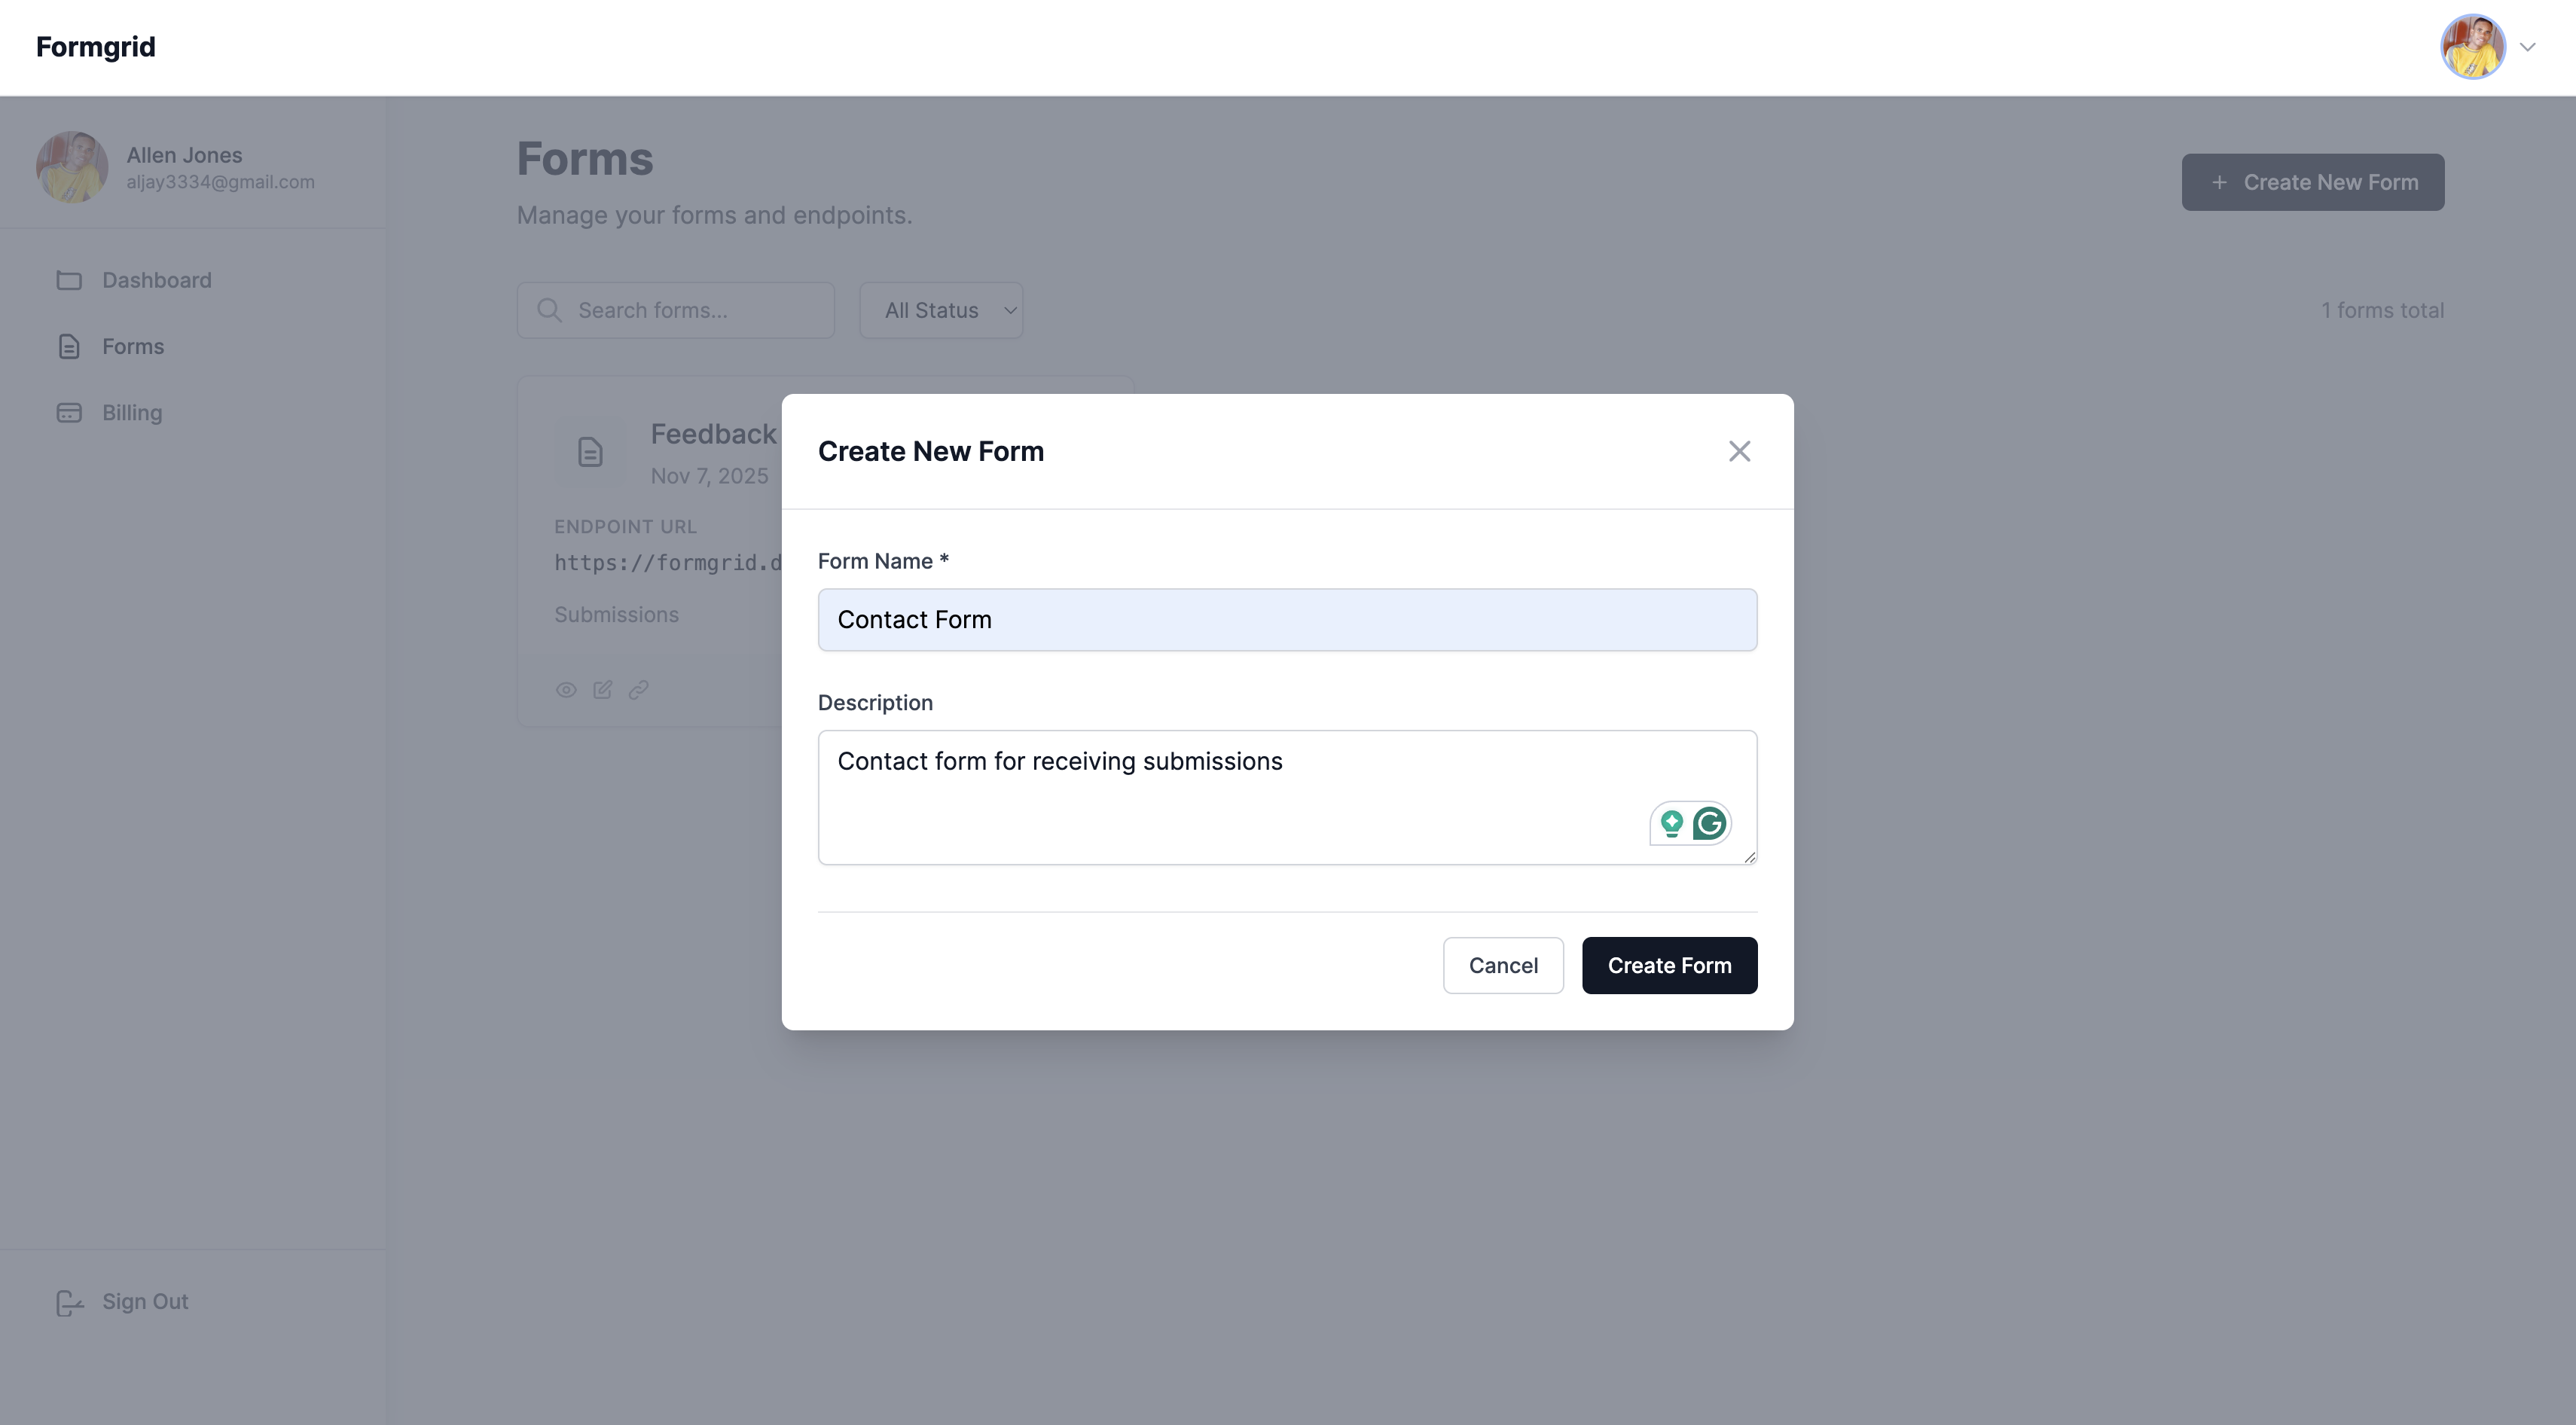
Step 1: Create your Formgrid account
Go to formgrid.dev and sign up with Google or Email. No credit card needed.
Step 2: Create a new form
Click New Form, give it a name like "Landing Page Leads" or Contact Form, and click Create Form.
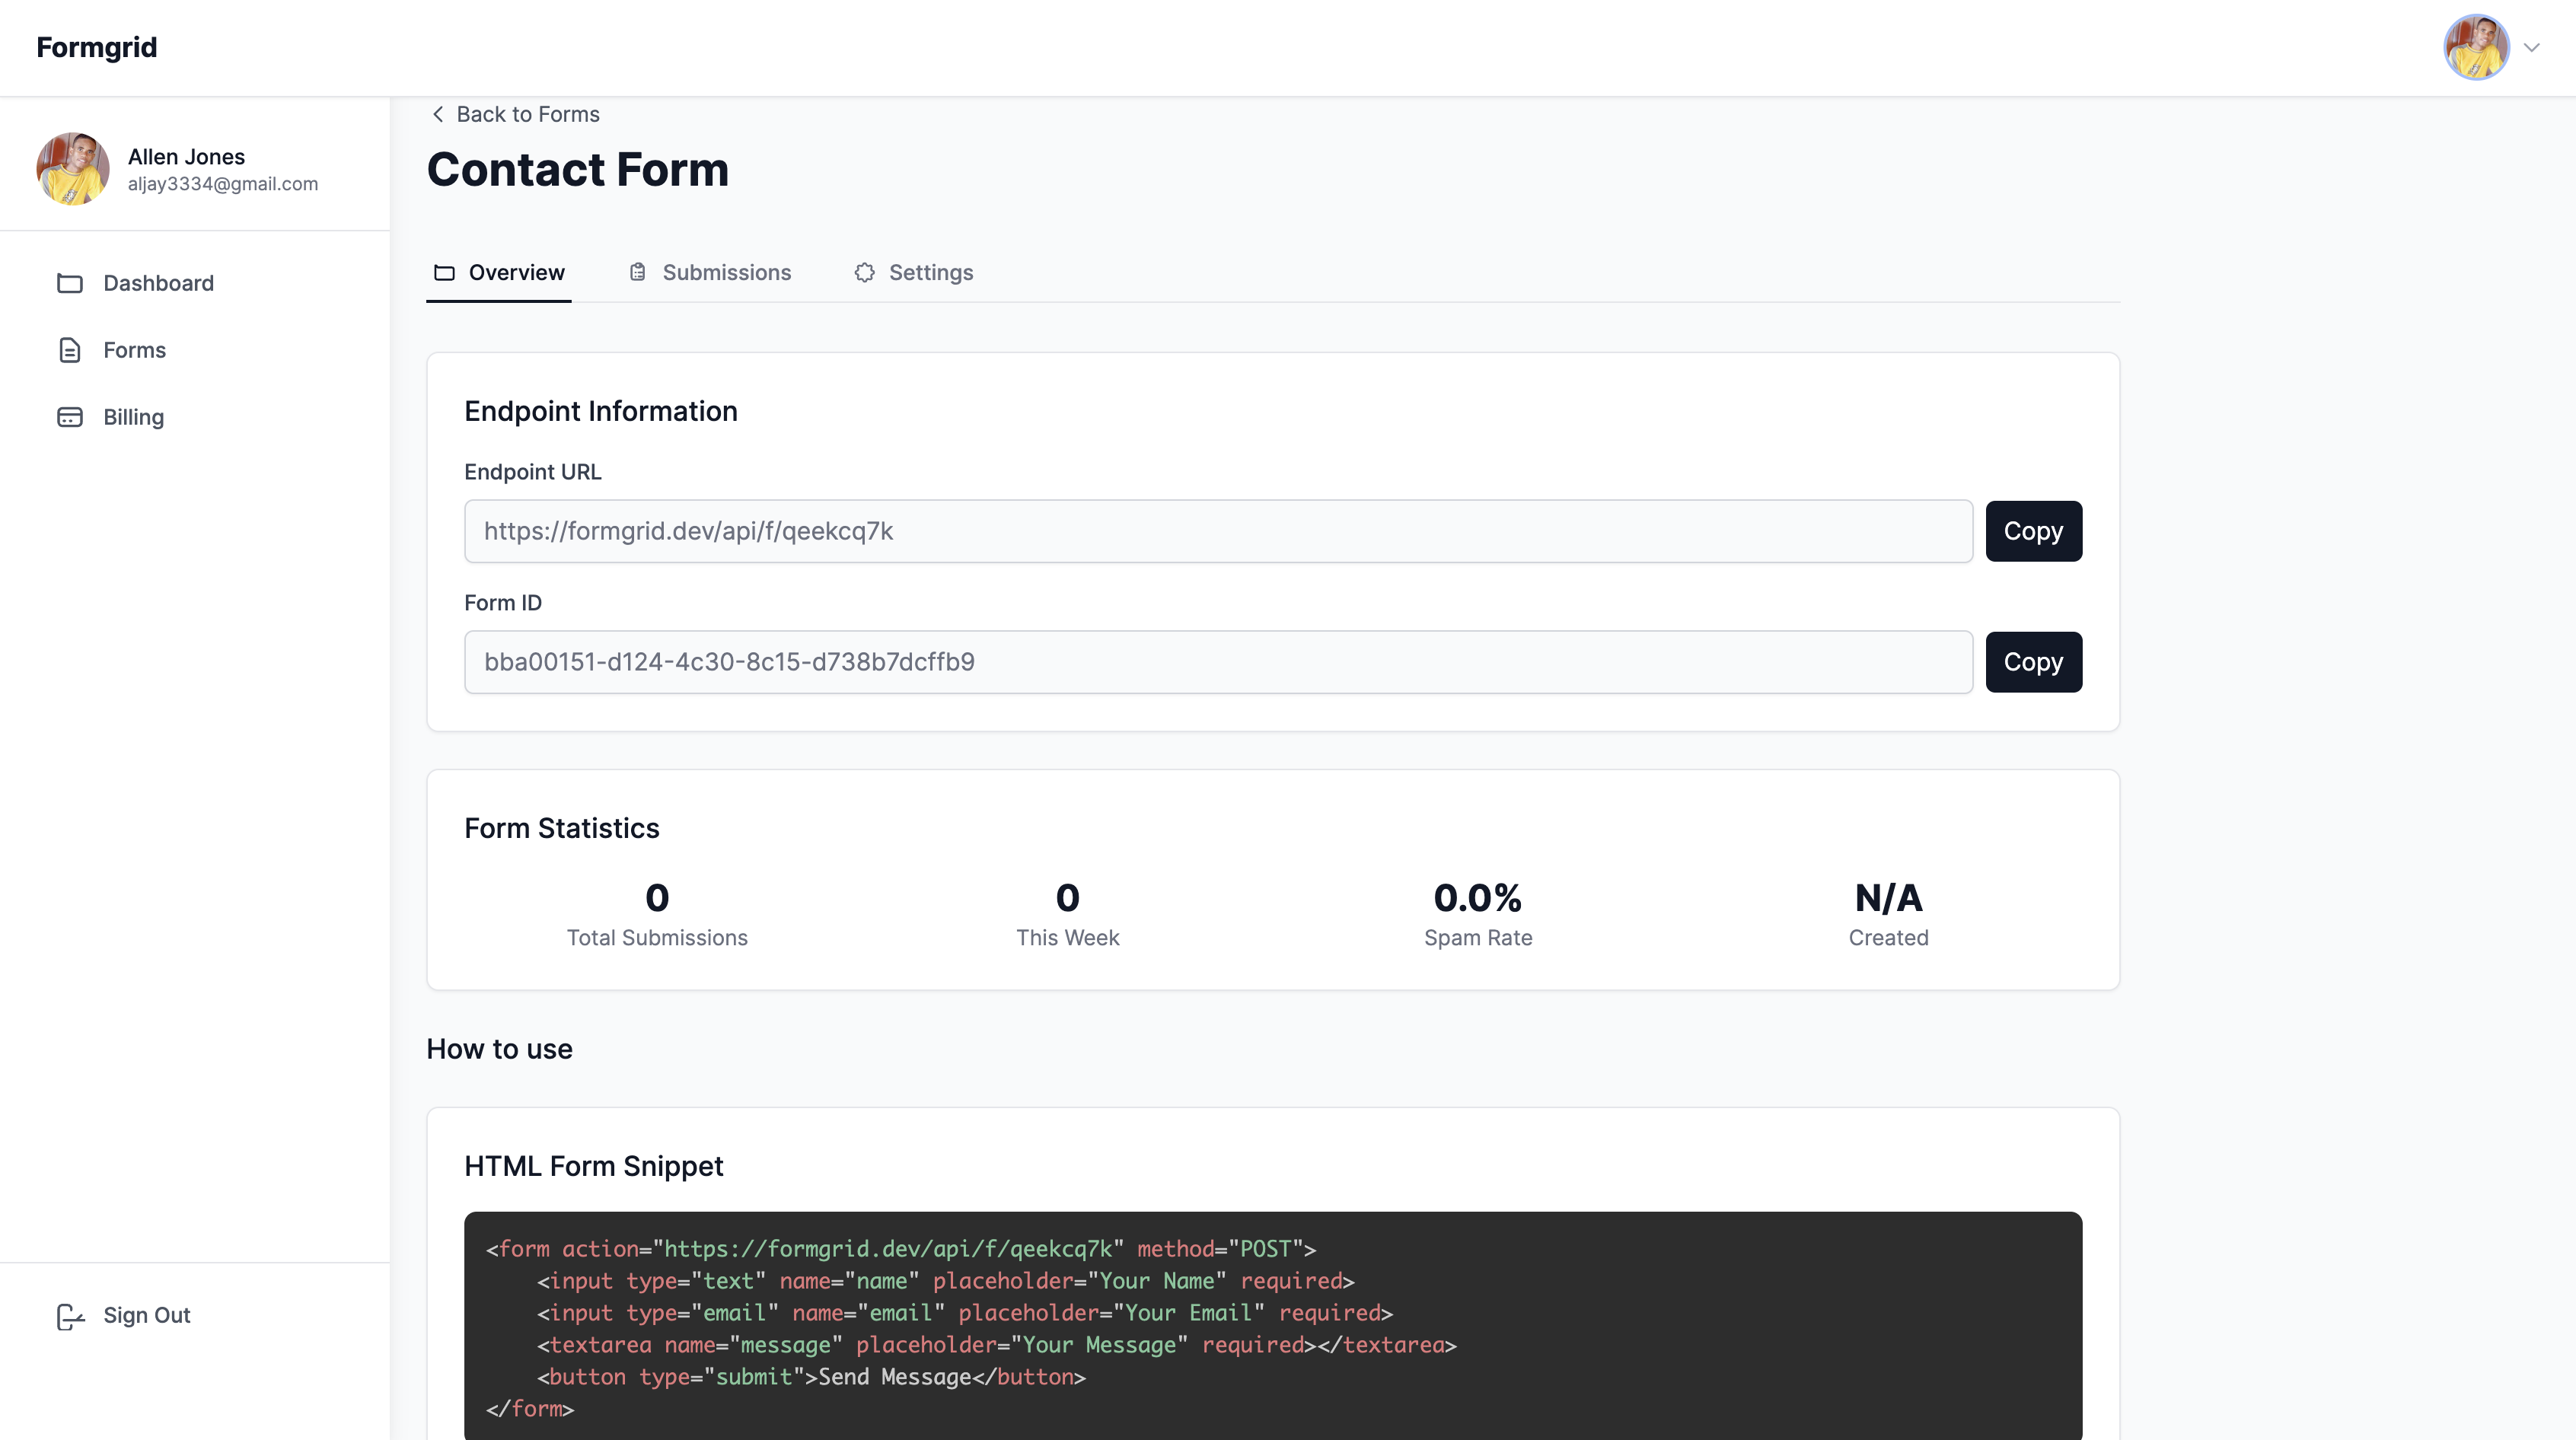
Step 3: Copy your endpoint URL
Go to the Overview tab and copy your endpoint:
https://formgrid.dev/api/f/your-form-id
Step 4: Add the form to your landing page
Here is a complete email capture form ready to drop into any landing page:
<form
  id="lead-form"
  action="YOUR_FORMGRID_ENDPOINT_URL"
  method="POST"
>
  <input
    type="hidden"
    name="_subject"
    value="New Lead Signup"
  />

  <input
    type="email"
    name="email"
    placeholder="Enter your email address"
    required
  />

  <button type="submit">
    Get Early Access
  </button>

  <!-- Honeypot spam protection -->
  <input
    type="text"
    name="_honey"
    style="display:none"
    tabindex="-1"
    autocomplete="off"
  />

</form>

<p id="form-status"></p>

<script>
  const form = document.getElementById('lead-form');
  const status = document.getElementById(
    'form-status'
  );

  form.addEventListener('submit', async (e) => {
    e.preventDefault();
    status.textContent = 'Submitting...';

    try {
      const res = await fetch(form.action, {
        method: 'POST',
        body: new FormData(form)
      });

      if (res.ok) {
        form.style.display = 'none';
        status.textContent =
          'You are on the list. We will be in touch!';
      } else {
        status.textContent =
          'Something went wrong. Please try again.';
      }
    } catch {
      status.textContent =
        'Network error. Please try again.';
    }
  });
</script>
Replace YOUR_FORMGRID_ENDPOINT_URL with your
actual endpoint from Step 3.
Step 5: Test it
Fill out the form yourself and submit. Within seconds, you should receive a notification email.
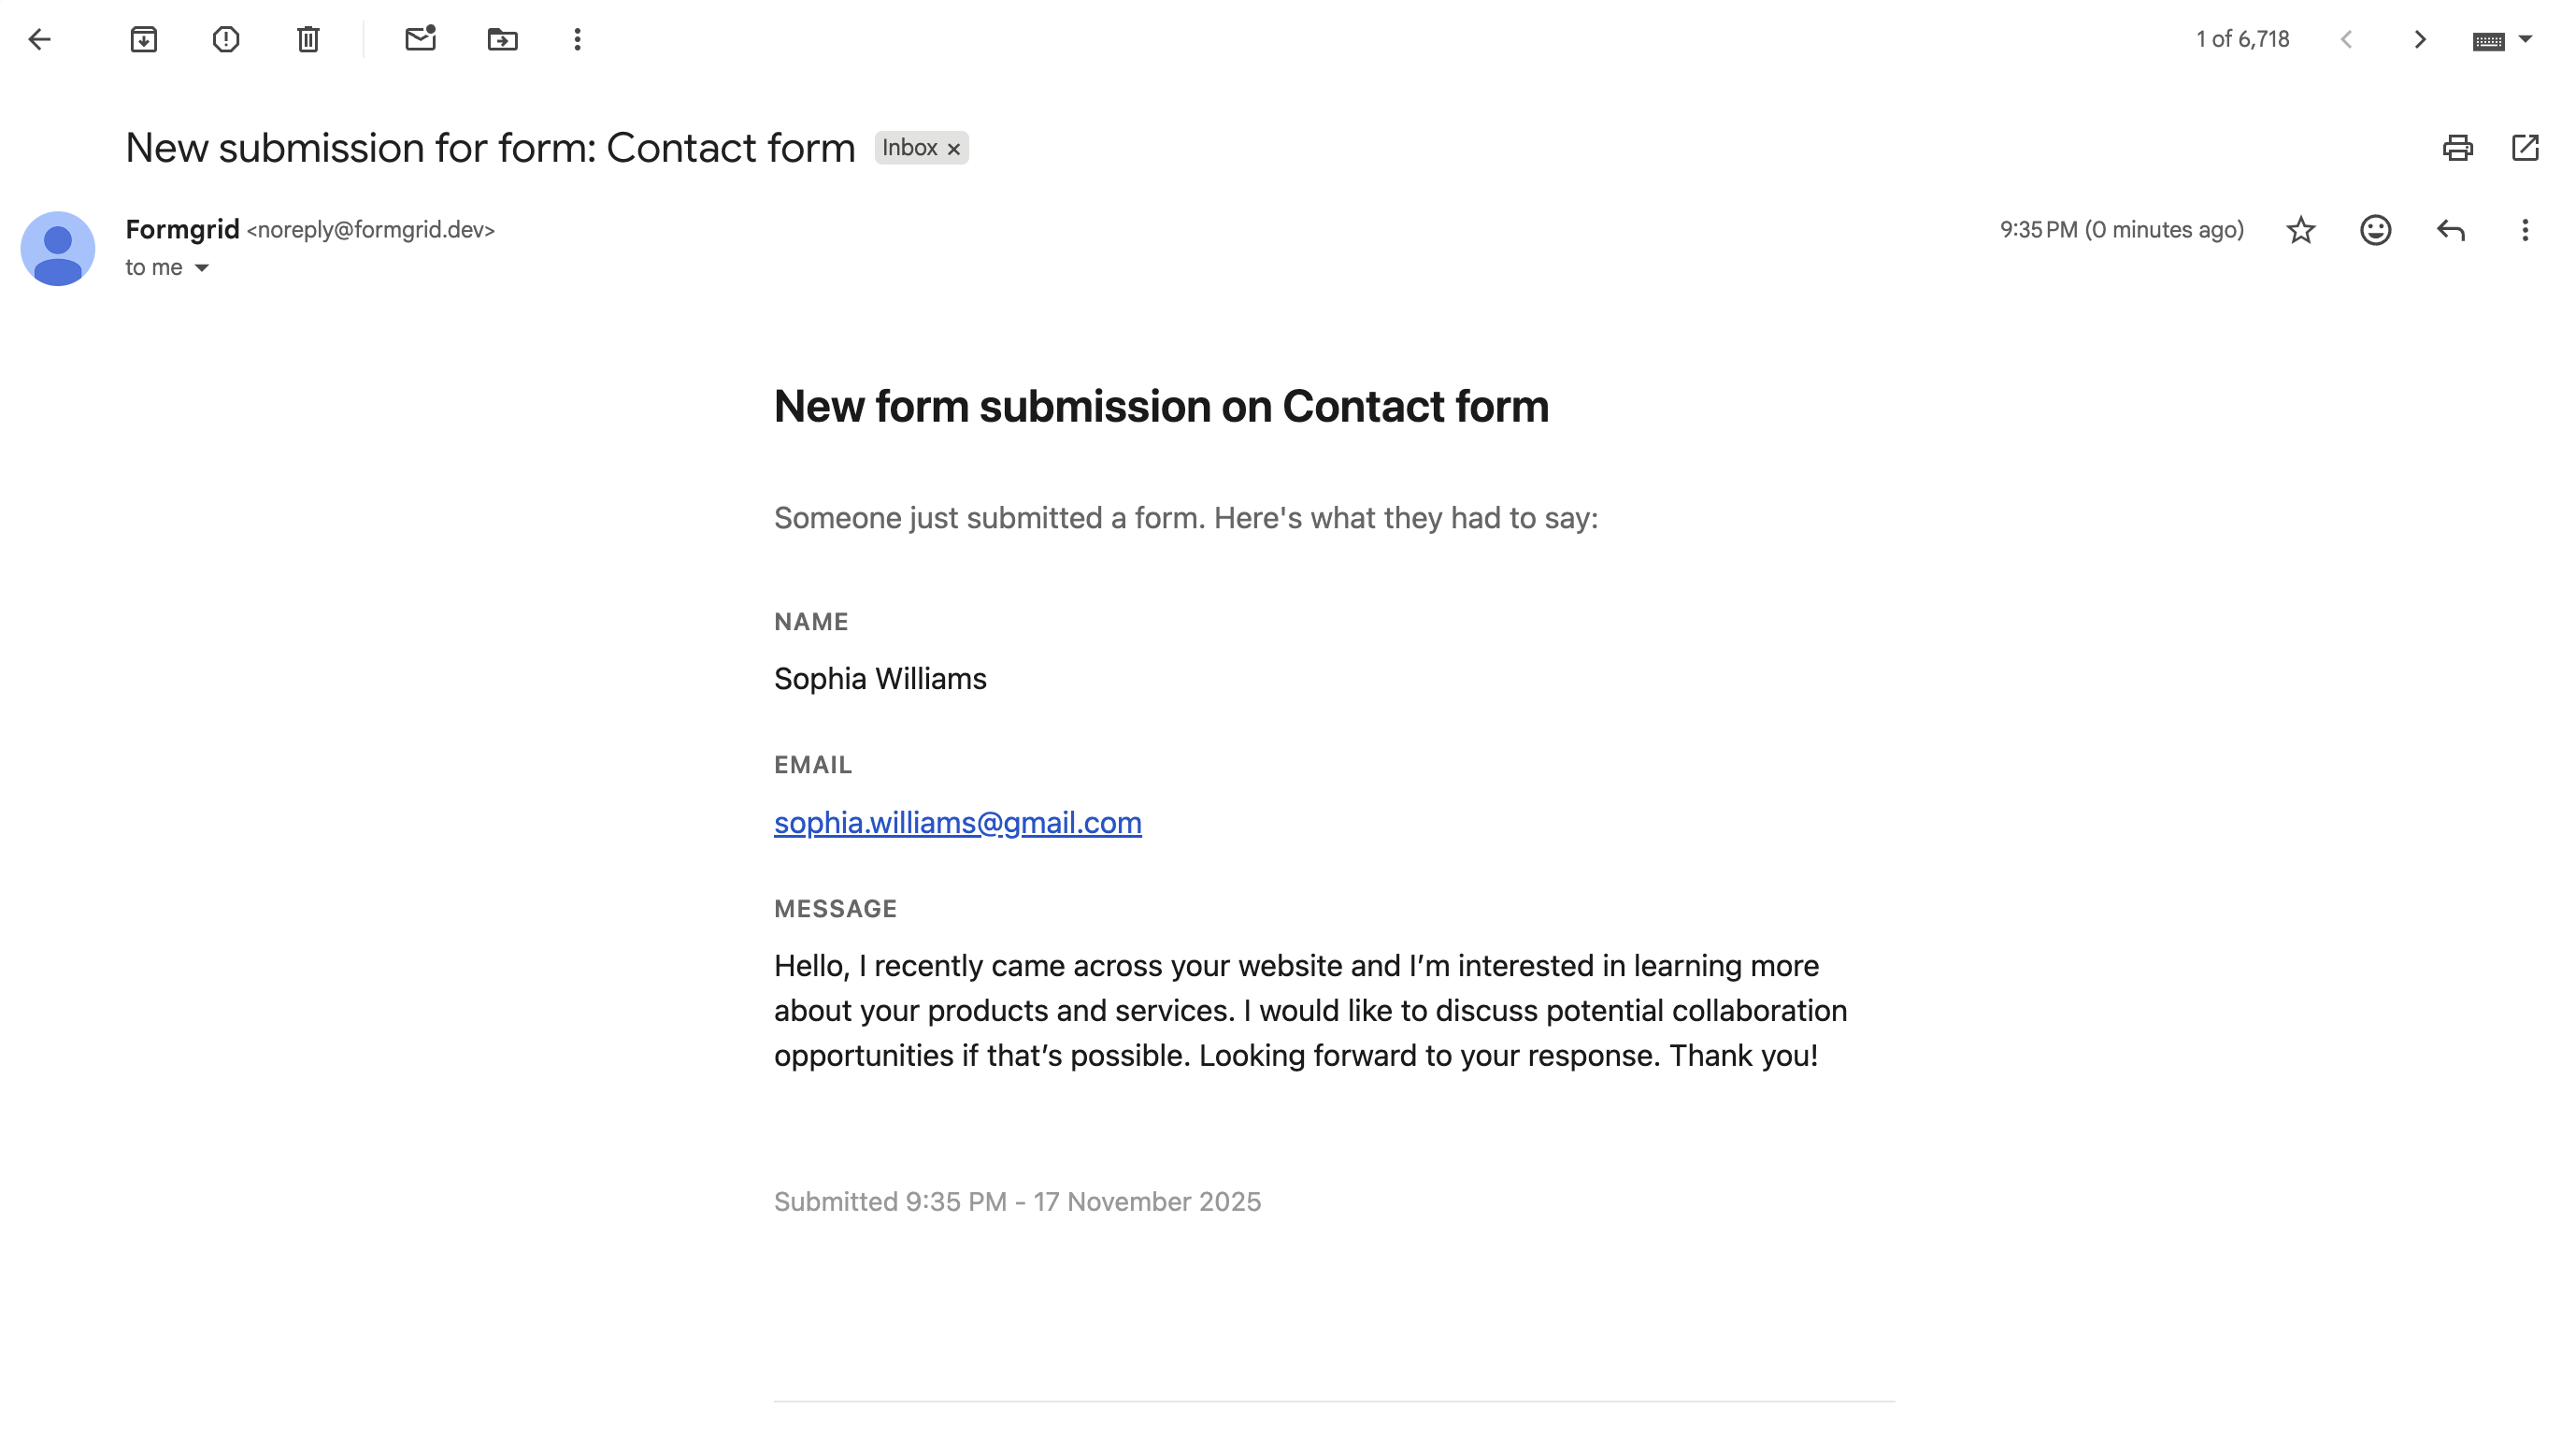
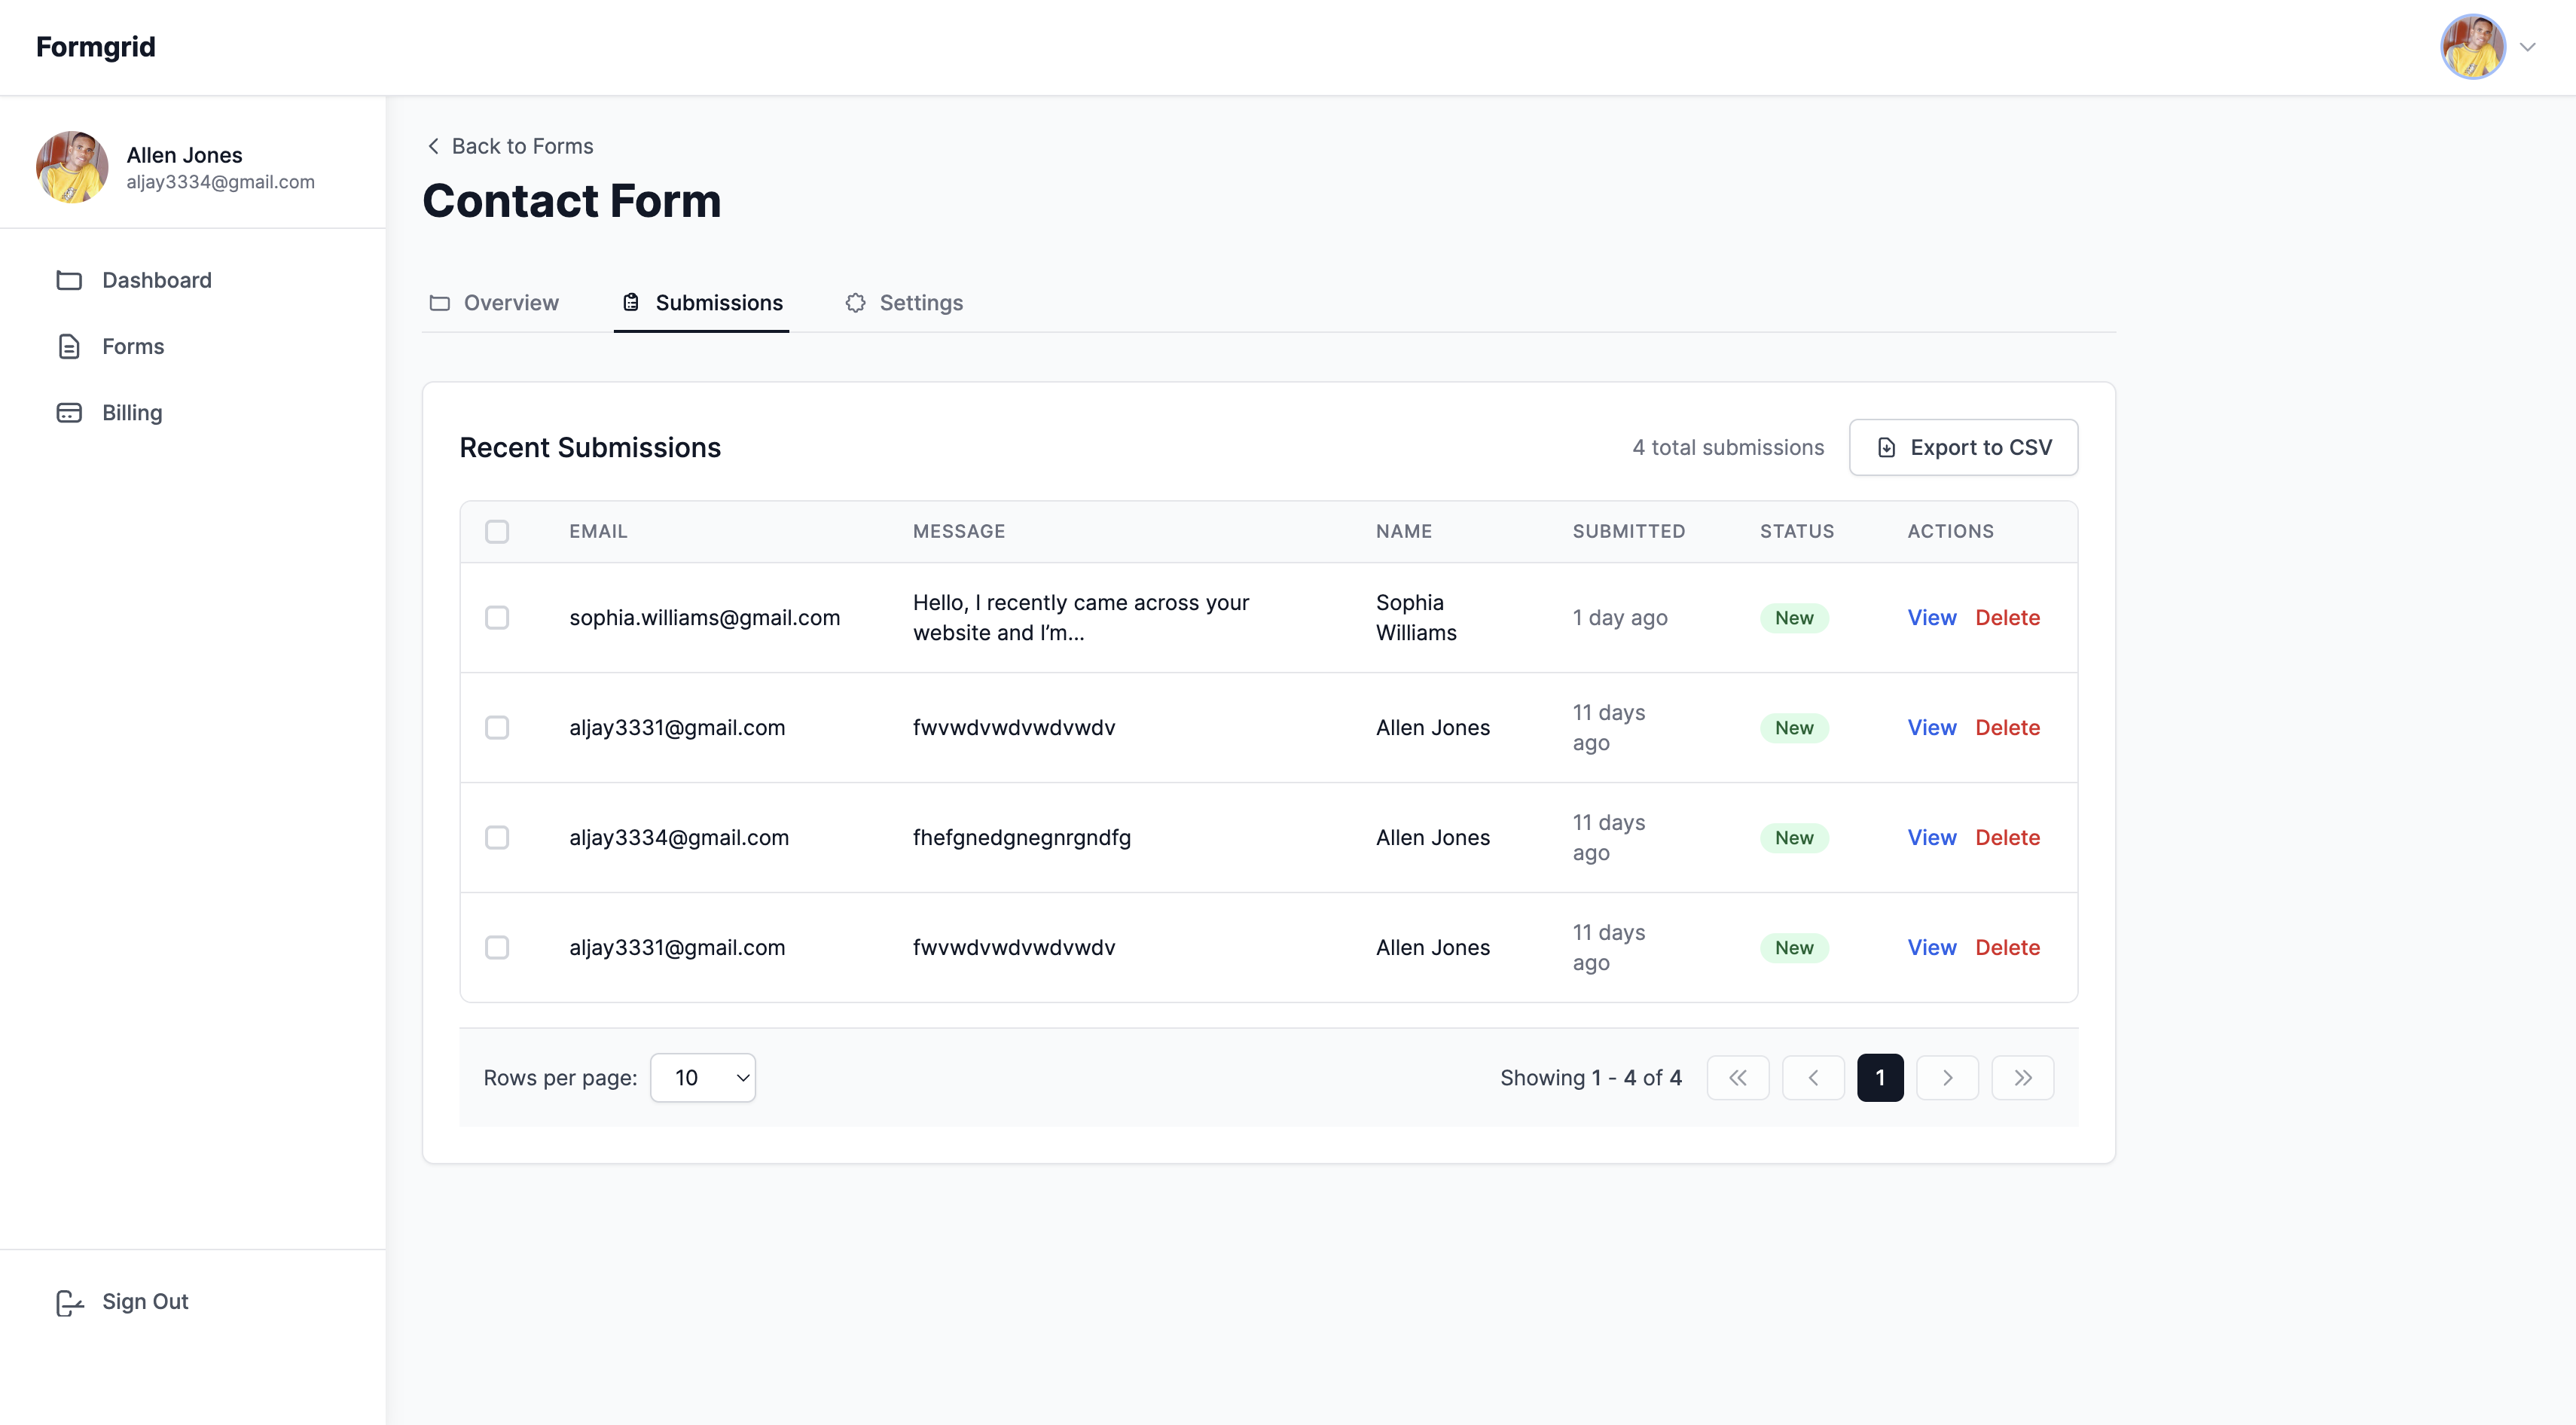
Check your Formgrid dashboard, and you will see the submission logged there too.
What If I Want to Capture More Than Just Email
You can add any fields you need. Here is a version that captures name, email, and company:
<form
  id="lead-form"
  action="YOUR_FORMGRID_ENDPOINT_URL"
  method="POST"
>
  <input
    type="text"
    name="name"
    placeholder="Your name"
    required
  />

  <input
    type="email"
    name="email"
    placeholder="Work email"
    required
  />

  <input
    type="text"
    name="company"
    placeholder="Company name"
  />

  <select name="role">
    <option value="">Select your role</option>
    <option value="developer">Developer</option>
    <option value="designer">Designer</option>
    <option value="founder">Founder</option>
    <option value="other">Other</option>
  </select>

  <!-- Honeypot -->
  <input
    type="text"
    name="_honey"
    style="display:none"
    tabindex="-1"
    autocomplete="off"
  />

  <button type="submit">
    Request Access
  </button>

</form>
Every field value appears in your notification email and your dashboard are automatically.
Spam Protection Included
Formgrid includes two layers of spam protection out of the box.
The honeypot field is invisible to real users, but bots fill it in automatically. Any submission with that field filled is rejected silently.
Rate limiting blocks the same IP address from submitting too many times in a short window. This stops bot floods before they reach your inbox.
You never see spam submissions. Only real leads.
Deploy Your Landing Page for Free
Once your form is working, deploy your landing page on any of these free platforms:
GitHub Pages: Push to a repo and enable Pages in settings. Free forever.
Netlify: Drag and drop your HTML file at netlify.com/drop. Goes live instantly.
Cloudflare Pages: Connect your GitHub repo and deploy on every push.
Your Formgrid endpoint works regardless of where you host. No platform lock-in.
Final Thoughts
Adding a working email capture form to your landing page does not require a backend. It does not require a server. It does not require any infrastructure.
Point your form at Formgrid. Get submissions in your inbox. Done.
Full disclosure: I built Formgrid. This post shows the exact workflow I recommend to everyone who asks how to add a form to their landing page.
Comments
Leave a comment