If you've ever received a form submission email that looks like this:
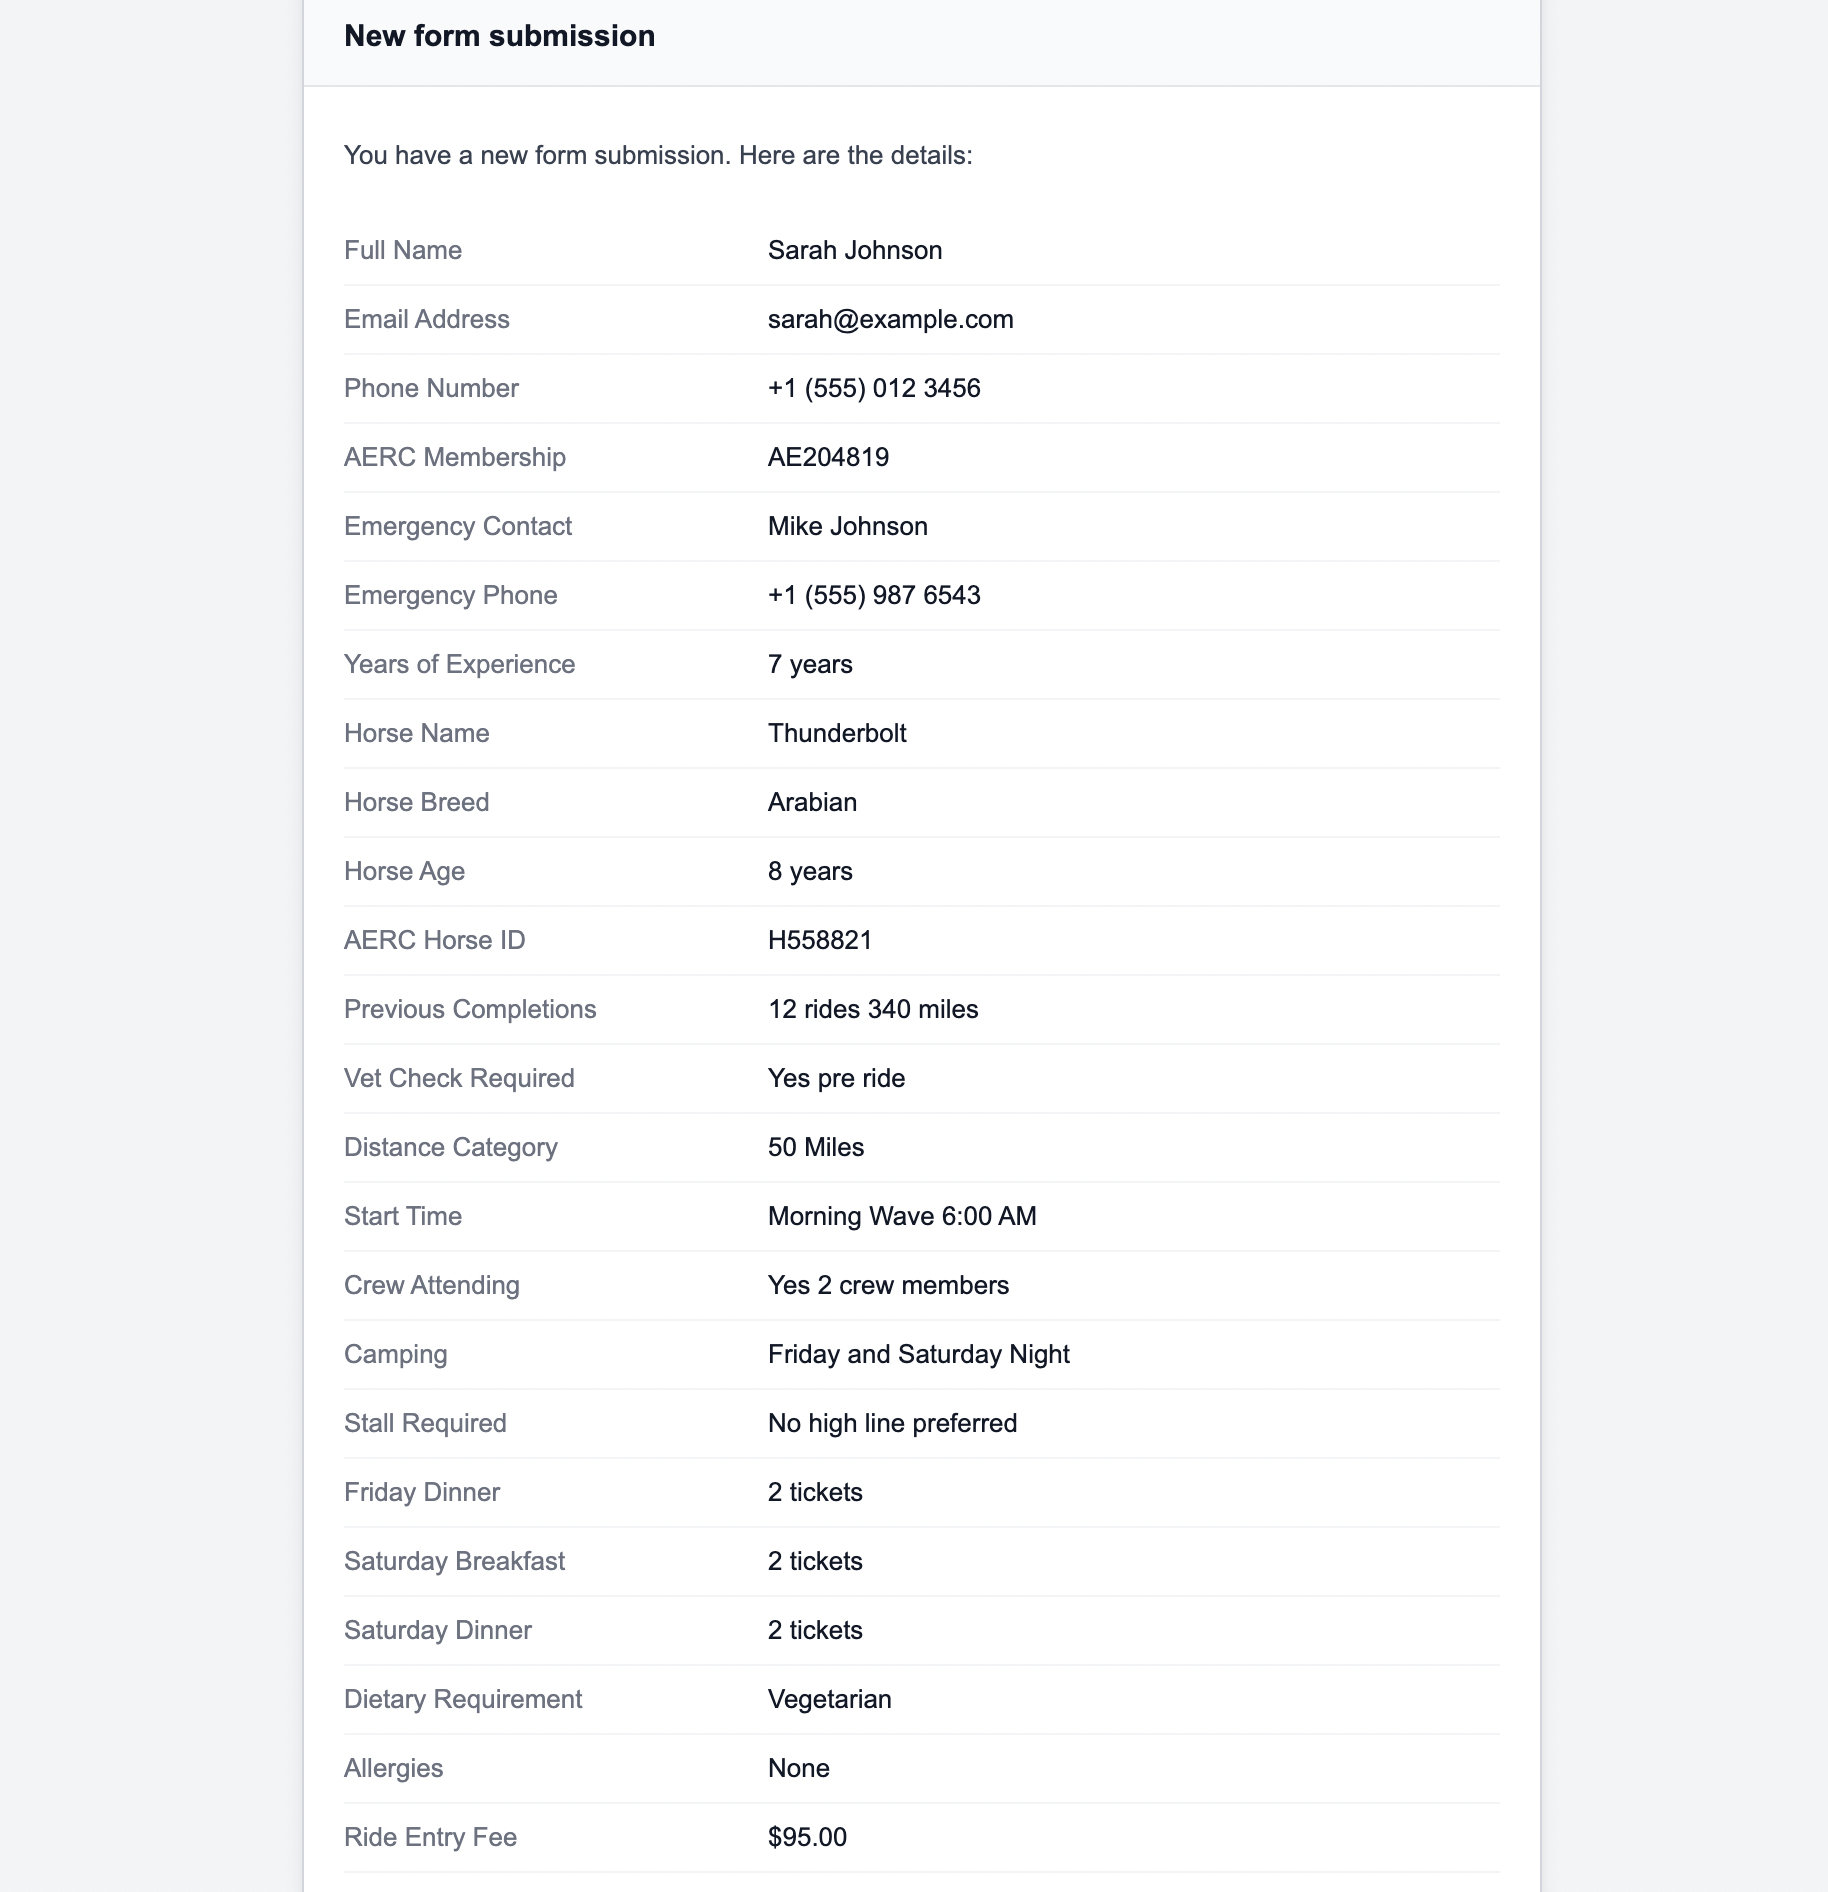
You know exactly how frustrating it is. Raw field data dumped into an email with no structure, no labels, and no context. If you're the one reading those emails or worse, forwarding them to a colleague or client, it's a nightmare.
The problem gets worse when your form has many fields. Registration forms, event entries, client intake forms, and job applications. These forms can have 20, 30, or even 40 fields. When all of that arrives as one unformatted block of text, the person reading it has to hunt for the information they need every single time.
This guide shows you how to fix that completely using Formgrid's custom email template feature so every submission email arrives clean, organized, and readable by anyone.
Why Default Form Emails Look So Bad
Most form backends send notification emails by simply dumping whatever data they received into the email body. They don't know your form's structure. They don't know which fields are important. They don't know that your recipient needs to see Attendee Information before Session Selection, before Payment Details.
They just send everything in one flat list or worse, as raw URL-encoded data.
This is fine for a simple 3-field contact form. But the moment your form gets complex, the default email becomes unreadable.
Here are the most common complaints:
Internal fields showing up: hidden fields
like _next, _gotcha, and _subject appear
in the email even though they're not real data.
No section headers: All fields listed in one flat list with no grouping or context.
No formatting: Long text values show as one unbroken paragraph with no line breaks.
Wrong field order: Fields appear in submission order is not in a logical reading order.
Generic subject line: Every email says "New form submission" with no context about who submitted or what they selected.
All of these problems are solved with a custom email template.
What a Custom Email Template Looks Like
Instead of a raw data dump, imagine receiving this for every workshop registration:
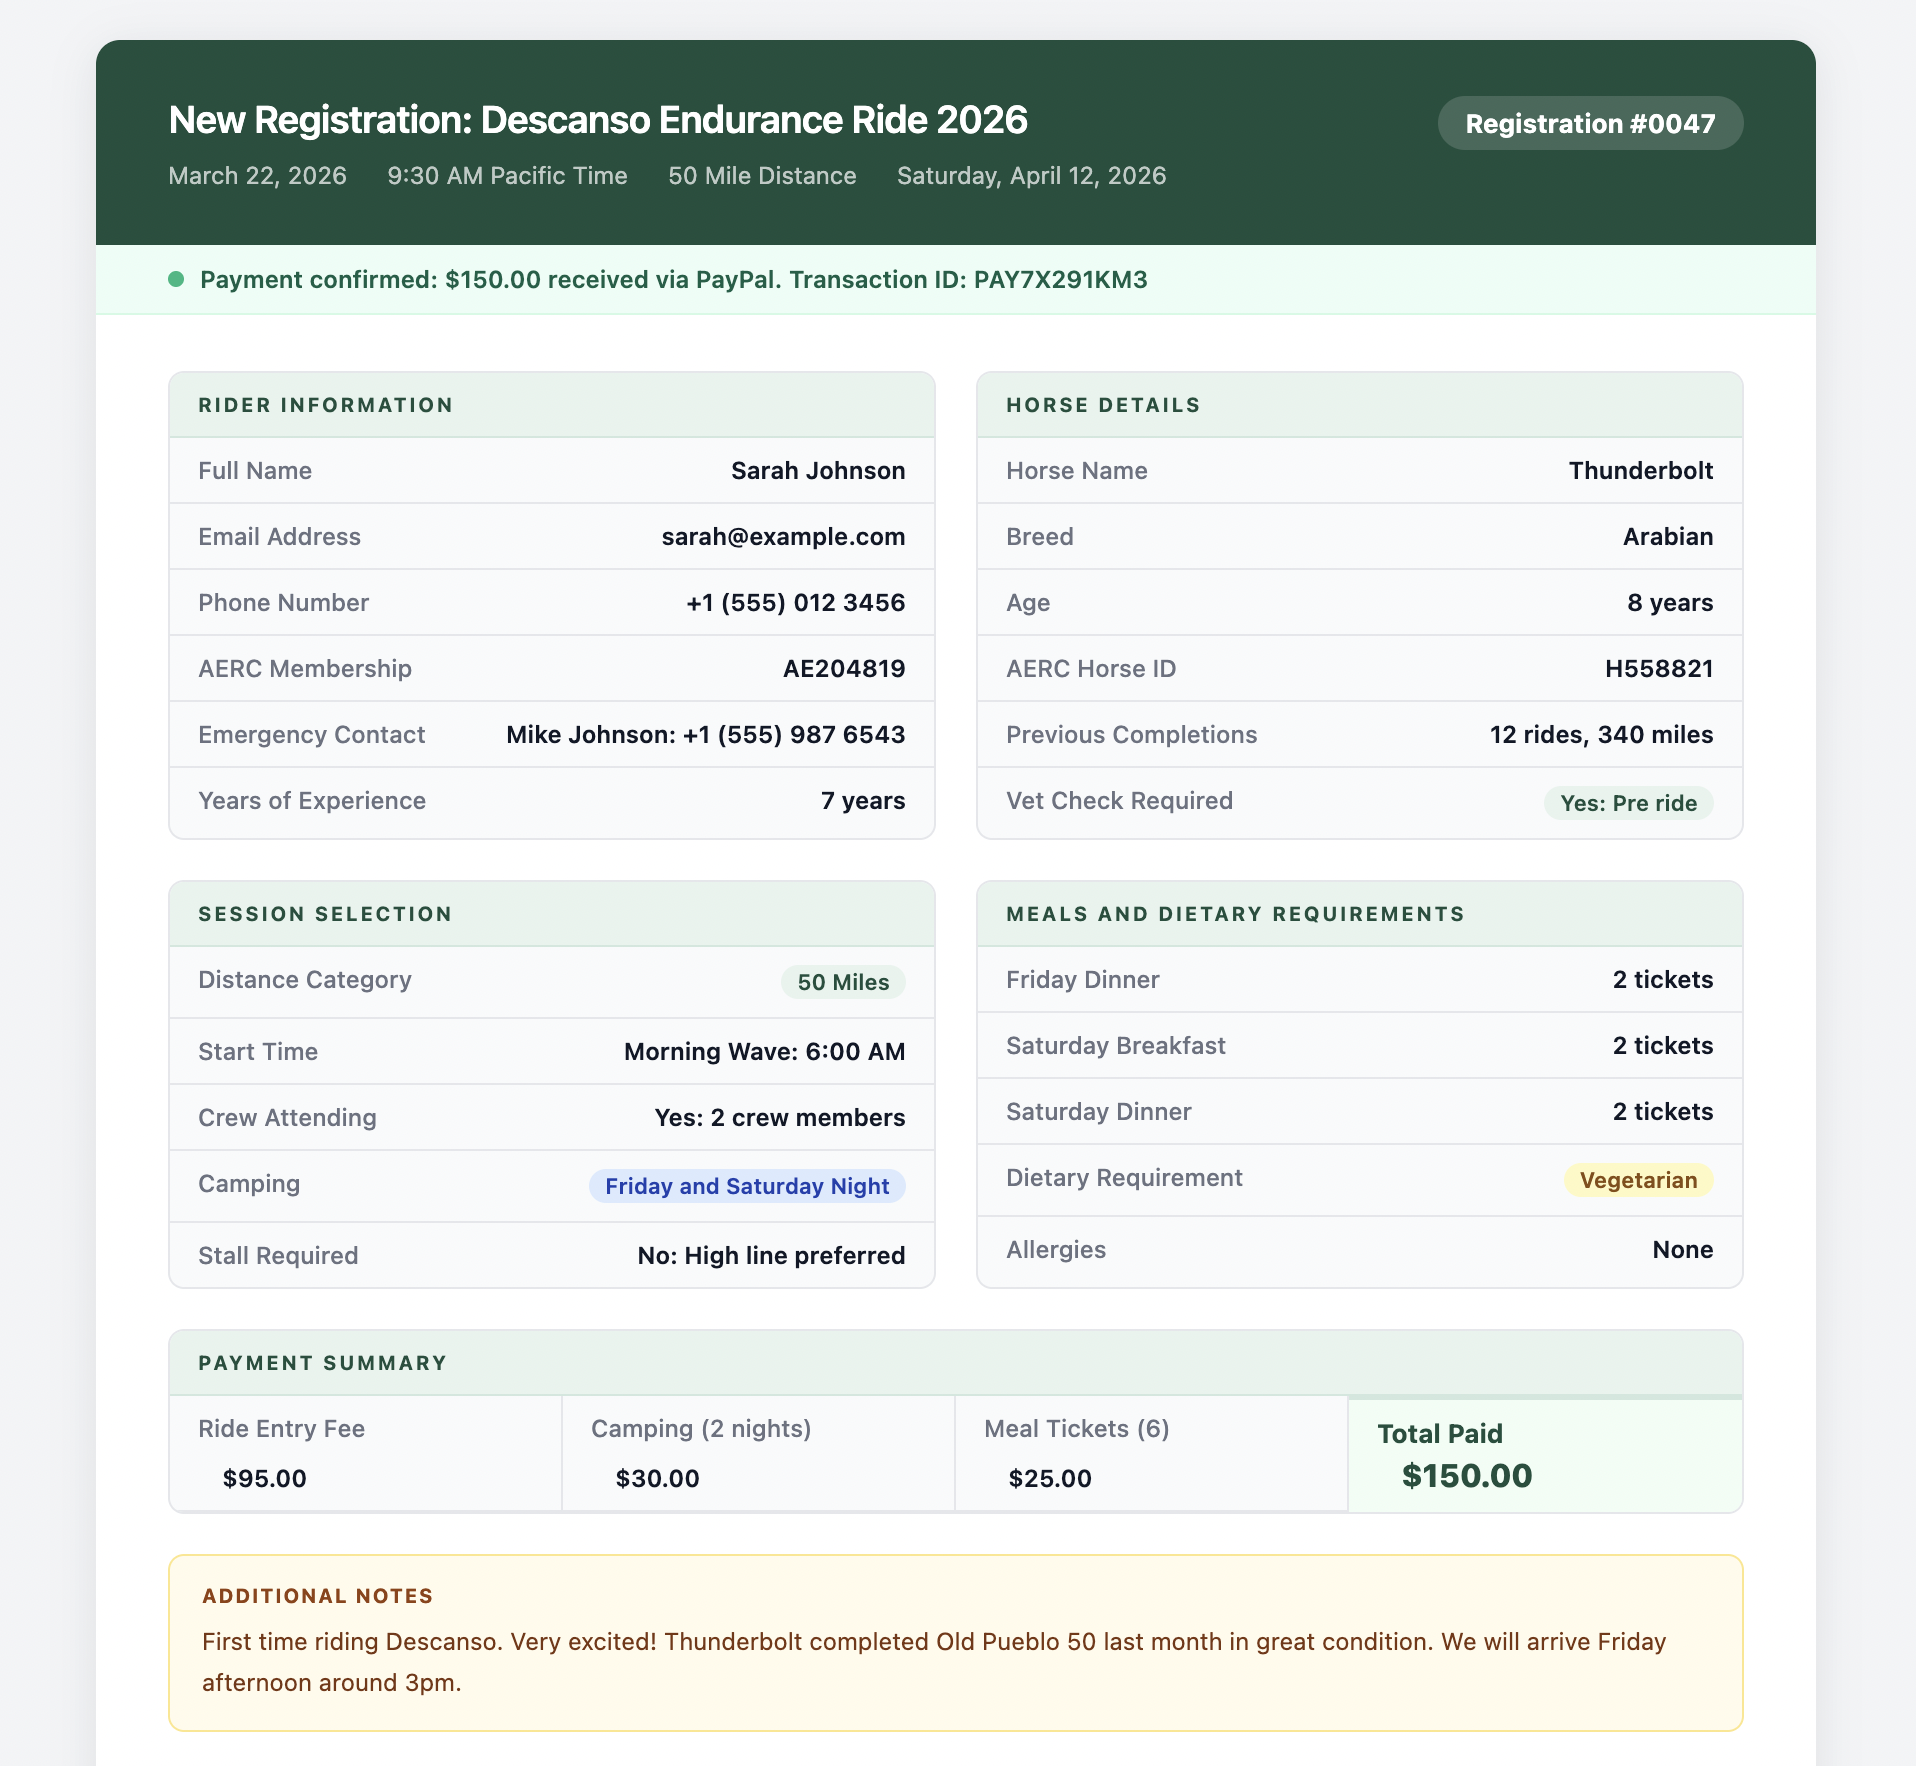
Clean. Organized. Readable by anyone. Whether they're a developer, an event coordinator, or an office manager who just needs to know who's coming and what they paid.
That's exactly what Formgrid's custom email template feature delivers.
Who Needs Custom Email Templates
Event organizers: Workshop registrations, conference entries, seminar signups. Your coordinator needs to see the attendee details in a logical order, not a random field dump.
Small businesses: Client intake forms, service booking forms, and quote request forms. Your team needs to act on submissions quickly. A clean email means faster response times.
Freelancers: Project brief forms, onboarding forms. When a new client submits their brief, you want it formatted like a document you can actually work from.
Nonprofits: Volunteer applications, membership forms, donation forms. Your coordinator needs to process applications efficiently without deciphering raw data.
Agencies: Building forms for clients. Your clients expect professional emails that match their brand and workflow.
If you're sending form submission emails to anyone who isn't a developer, custom email templates are not optional. They're essential.
How Formgrid Custom Email Templates Work
Formgrid uses Mustache templating: A simple, widely used templating language that lets you write an HTML email with placeholders that get replaced with real submission data automatically.
The Available Variables
{{ _formName }}    : name of your form
{{ _time }}        : submission timestamp
{{ fieldName }}    : any field by its exact name
{{# fields }}      : loop through all fields
  {{ _name }}      : field label inside the loop
  {{ _value }}     : field value inside the loop
{{/ fields }}      : close the loop
The {{ fieldName }} variable is the most
powerful one. It maps directly to the name
attribute of your HTML input field. So if your
form has:
<input type="text" name="attendeeName" />You can use {{ attendeeName }} anywhere in
your email template and it will be replaced
with whatever the user typed.
Two Ways to Use Custom Email Templates
Option 1: The Simple Loop (Works for Any Form)
If you just want clean, formatted emails without thinking too much about structure, use the fields loop. This works for any form automatically:
<div style="font-family: sans-serif;
            max-width: 600px;
            margin: 0 auto;">

  <h2 style="color: #1d4f3d;">
    New Submission: {{ _formName }}
  </h2>

  {{# fields }}
  <div style="margin-bottom: 16px;
              border-bottom: 1px solid #eee;
              padding-bottom: 16px;">
    <p style="margin: 0;
              font-size: 12px;
              color: #888;
              text-transform: uppercase;">
      {{ _name }}
    </p>
    <p style="margin: 4px 0 0;
              font-size: 15px;
              color: #333;">
      {{ _value }}
    </p>
  </div>
  {{/ fields }}

  <p style="font-size: 12px; color: #999;">
    Submitted: {{ _time }}
  </p>

</div>
This renders every field cleanly with its label above and value below. No internal fields, no raw data, no mess. Just clean readable output for every submission automatically.
Option 2: Sectioned Template (For Complex Registration Forms)
If your form has multiple sections, like a workshop registration with attendee details, session selection, dietary requirements, and payment. You can group fields into sections with clear headers:
<div style="font-family: sans-serif;
            max-width: 600px;
            margin: 0 auto;
            color: #1f2937;">

  <h2 style="color: #1d4f3d;
             border-bottom: 2px solid #e8f3ee;
             padding-bottom: 10px;">
    New Registration: {{ _formName }}
  </h2>

  <h3 style="color: #1d4f3d;">
    Attendee Information
  </h3>
  <p><strong>Name:</strong> {{ attendeeName }}</p>
  <p><strong>Email:</strong> {{ email }}</p>
  <p>
    <strong>Company:</strong> {{ company }}
  </p>
  <p><strong>Phone:</strong> {{ phone }}</p>

  <h3 style="color: #1d4f3d;
             margin-top: 24px;">
    Session Selection
  </h3>
  <p>
    <strong>Workshop:</strong> {{ workshopName }}
  </p>
  <p><strong>Date:</strong> {{ workshopDate }}</p>
  <p><strong>Format:</strong> {{ format }}</p>

  <h3 style="color: #1d4f3d;
             margin-top: 24px;">
    Dietary Requirements
  </h3>
  <p>
    <strong>Dietary Preference:</strong>
    {{ dietaryPreference }}
  </p>
  <p>
    <strong>Allergies:</strong> {{ allergies }}
  </p>

  <h3 style="color: #1d4f3d;
             margin-top: 24px;">
    Payment
  </h3>
  <p>
    <strong>Ticket Type:</strong> {{ ticketType }}
  </p>
  <p>
    <strong>Total:</strong> {{ totalAmount }}
  </p>
  <p>
    <strong>Payment Method:</strong>
    {{ paymentMethod }}
  </p>

  <h3 style="color: #1d4f3d;
             margin-top: 24px;">
    Notes
  </h3>
  <p>{{ notes }}</p>

  <hr style="margin-top: 32px;
             border: none;
             border-top: 1px solid #e5e7eb;" />
  <p style="font-size: 12px;
            color: #9ca3af;
            margin-top: 12px;">
    Submitted: {{ _time }}
  </p>

</div>
The variable names, {{ attendeeName }},
{{ workshopName }}, {{ totalAmount }}, must
match the name attributes of your HTML form
inputs exactly.
So if your form has:
<input type="text" name="attendeeName" />
<select name="workshopName">...</select>
<input type="hidden" name="totalAmount" />
The variables {{ attendeeName }},
{{ workshopName }}, and {{ totalAmount }}
will be replaced with the actual submitted
values automatically.
This gives you complete control over the layout, grouping, and the order of every notification email.
How to Set Up Custom Email Templates
in Formgrid
Custom email templates are available on the Business plan at $29/month.
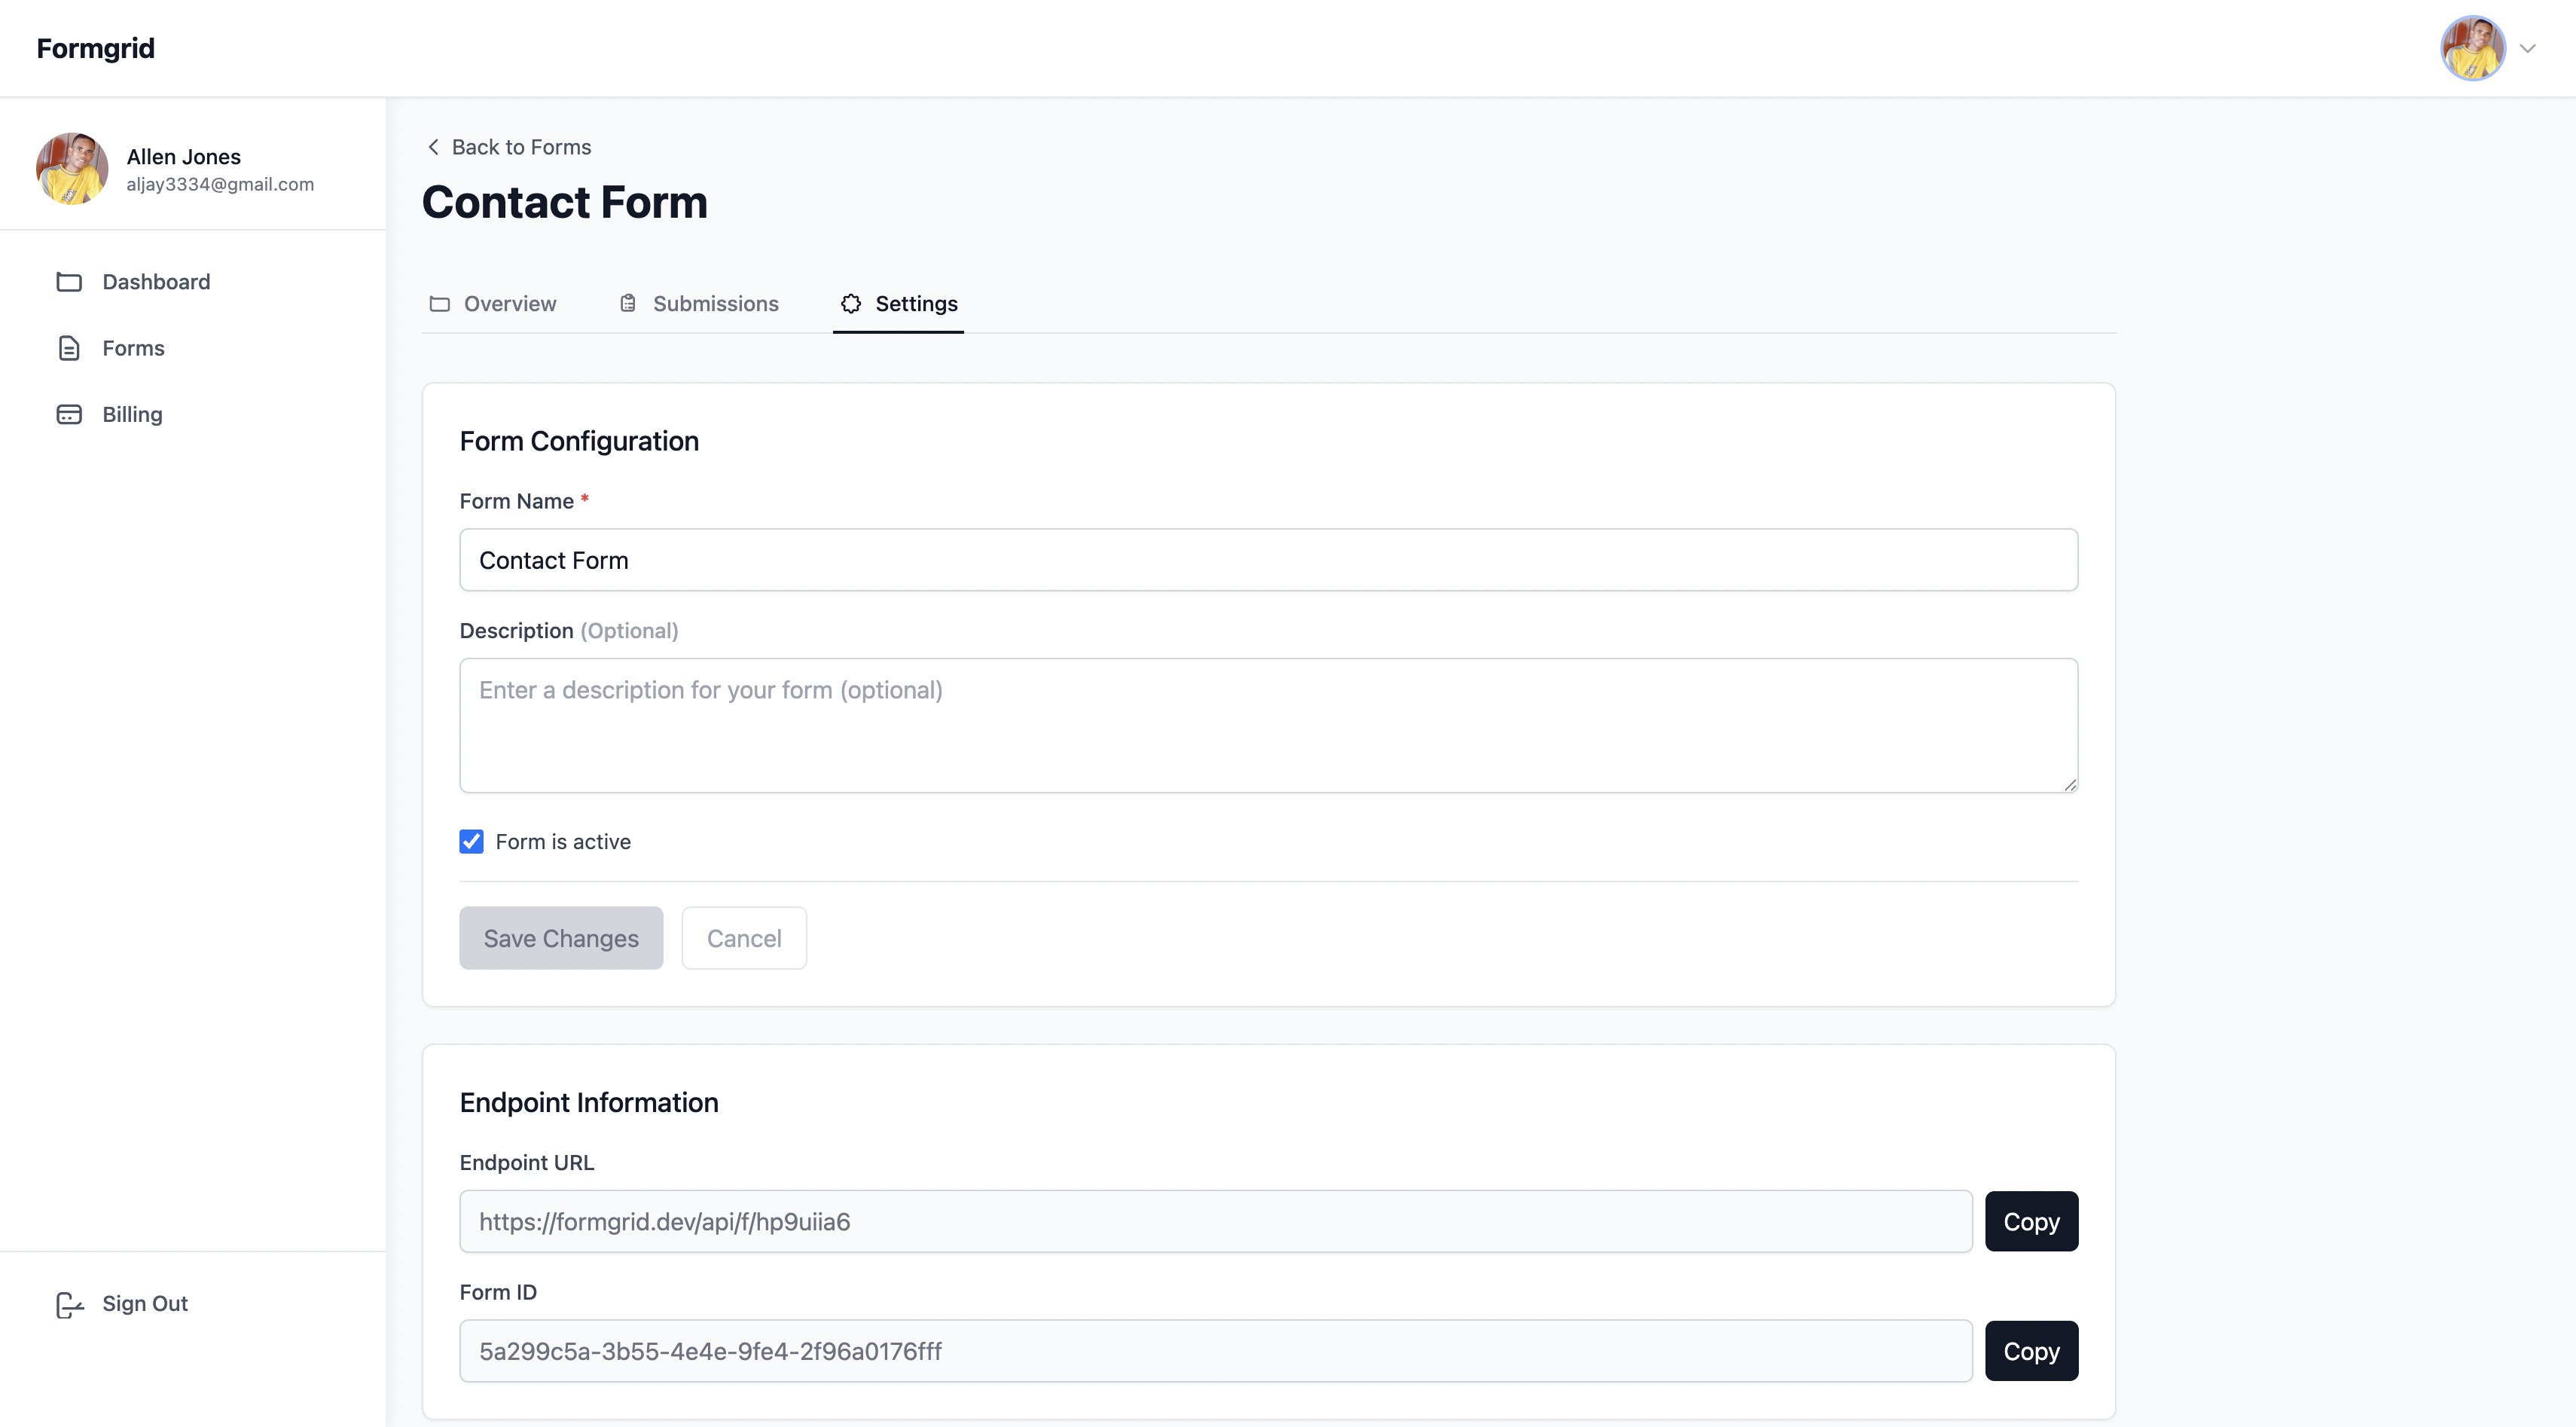
Step 1: Go to Your Form Settings
Log in to your Formgrid dashboard, open your form, and click the Settings tab.
Step 2: Find the Custom Email Template Section
Scroll down to the Custom Email Template section. If you're on the Business plan, you'll see the full template editor. If you're on the free or Premium plan, you'll see a prompt to upgrade.
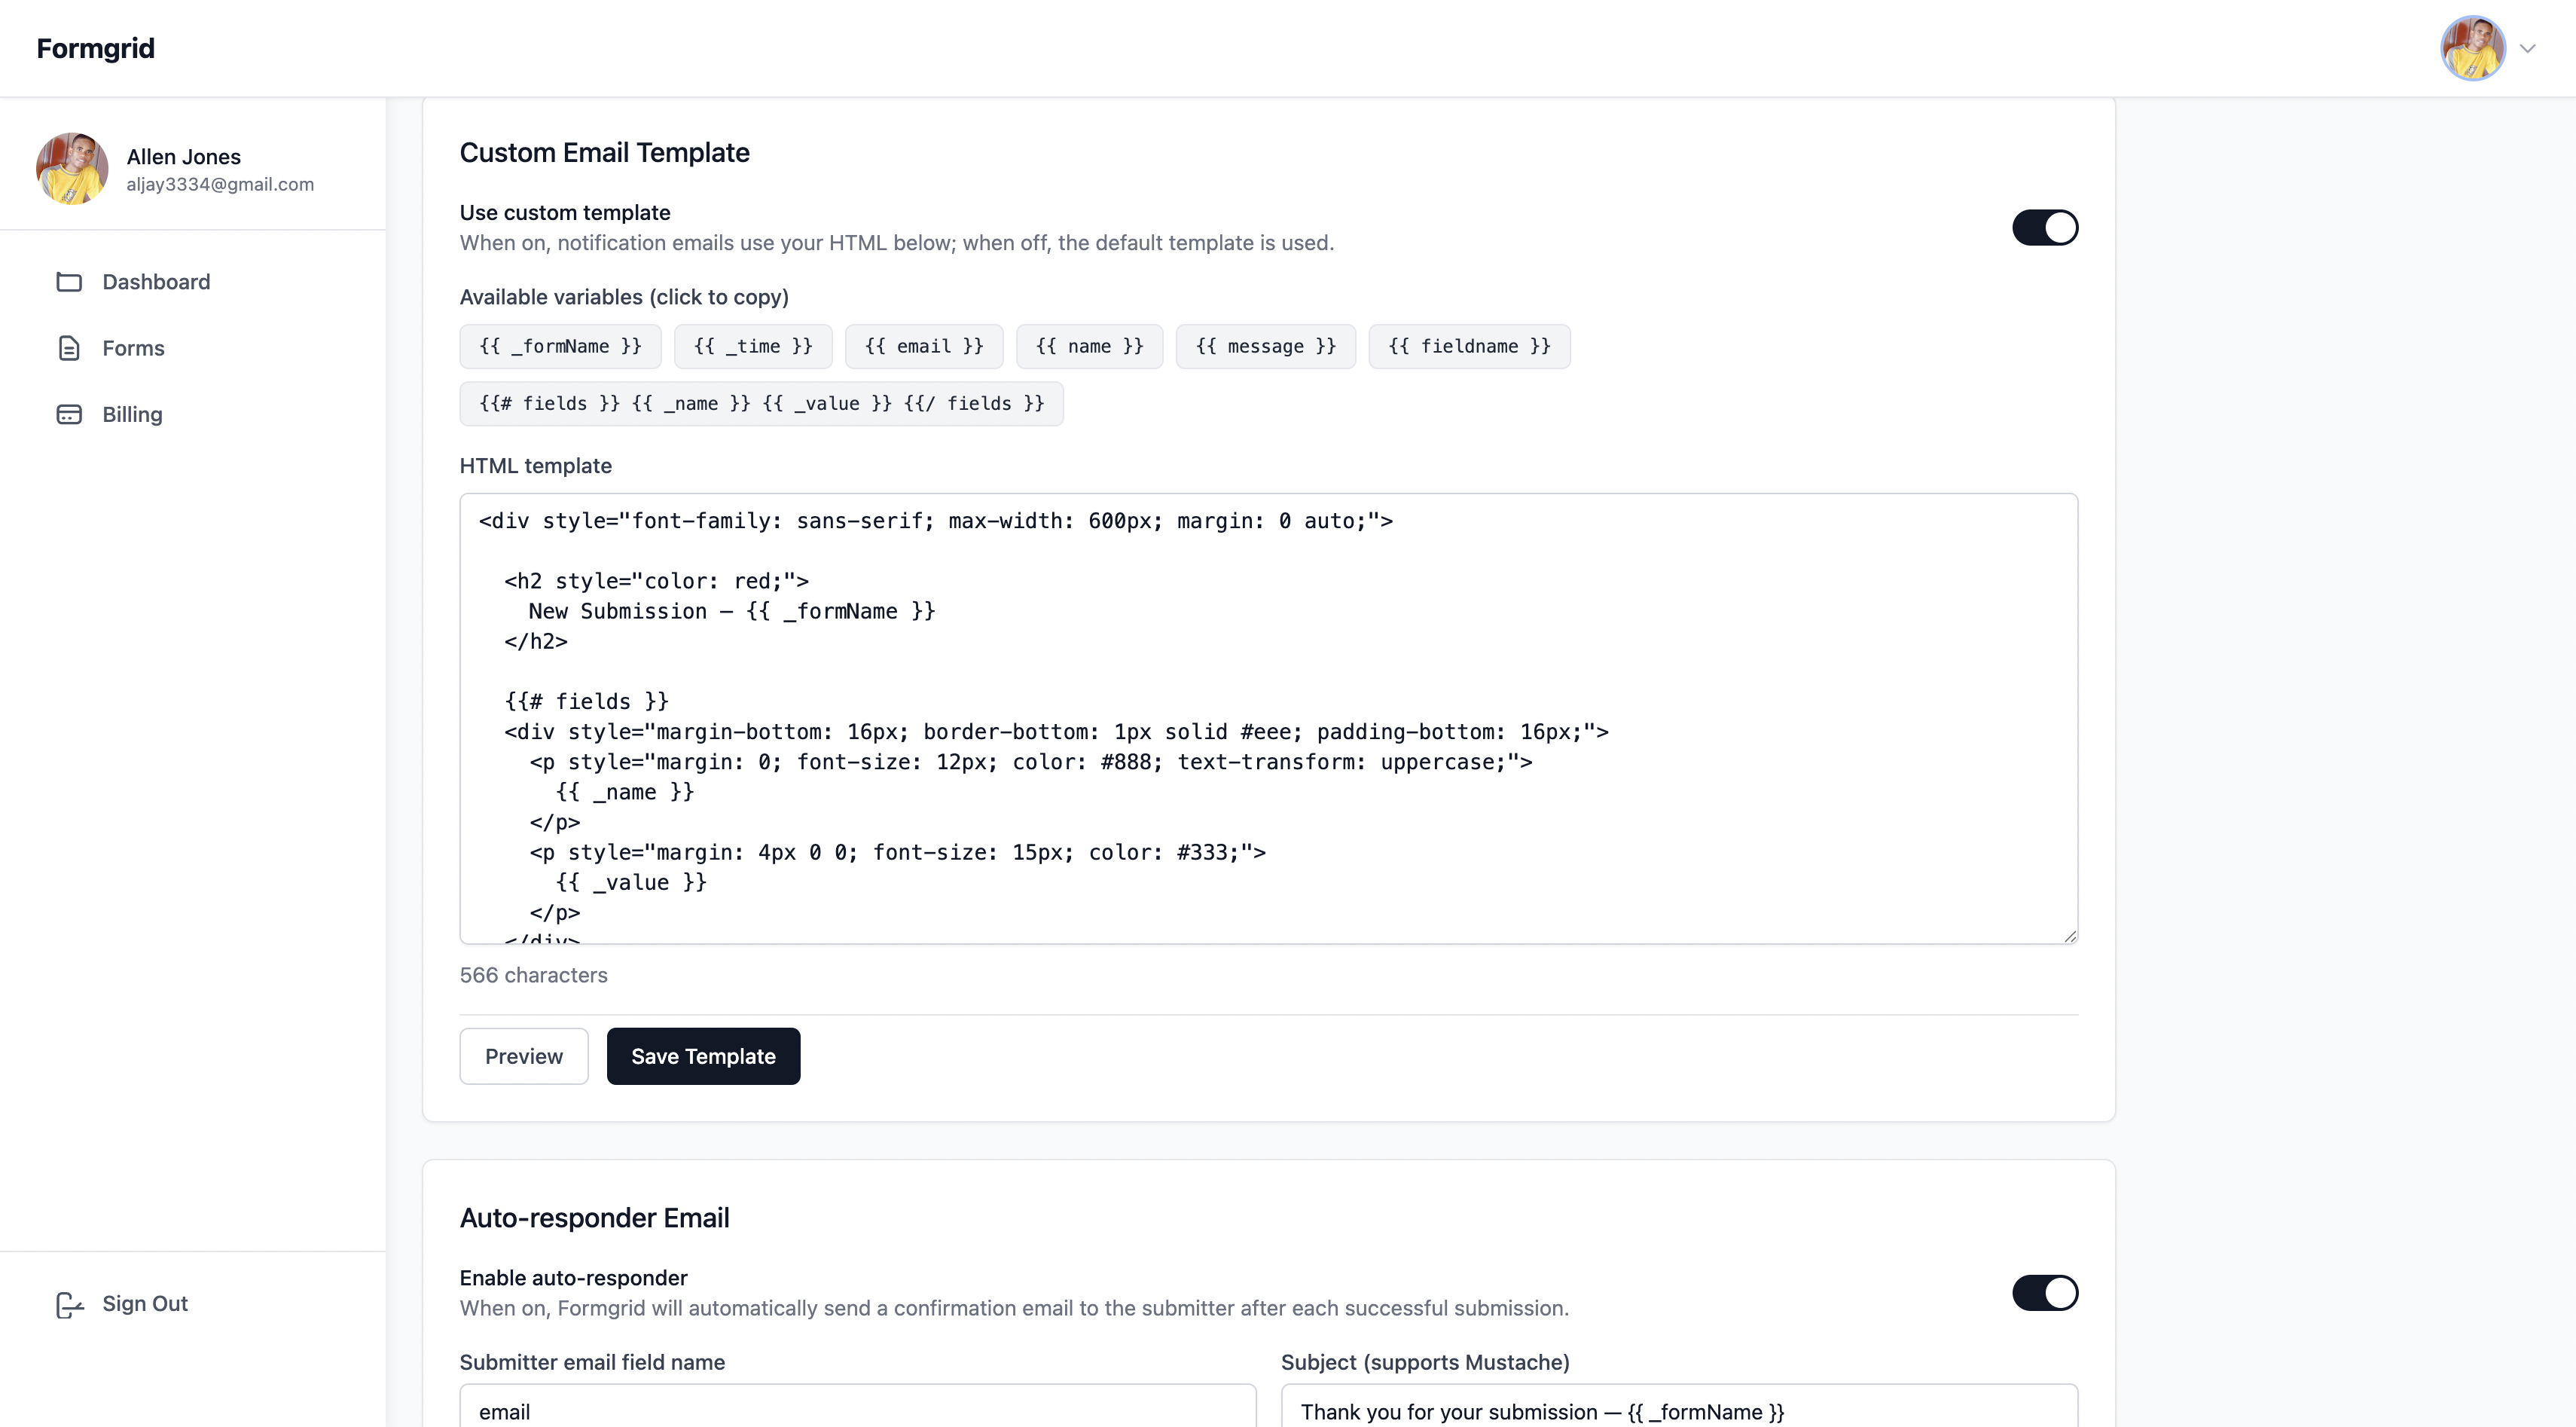
Step 3: Enable the Custom Template
Toggle the custom template on. The editor pre-populates with a starter template using the simple fields loop, a clean starting point that works for any form immediately.
Step 4: Customize Your Template
Edit the HTML to match your needs. Use the simple loop for basic forms or build a sectioned template for complex registration forms.
The available variables panel shows every variable you can use. Click any variable chip to copy it to your clipboard instantly.
Step 5: Preview and Save
Click Preview to see exactly how your email will look with sample data substituted in. When you're happy, click Save Template.
From this point on every submission to your form will use your custom template, clean, organized, and formatted exactly the way you designed it.
Step 6: Test It
Submit a test entry on your form and check your inbox. Your notification email should arrive formatted exactly as you designed it.
Custom Subject Lines
You can also control the email subject line using the _subject hidden field in your
HTML form:
<input
  type="hidden"
  name="_subject"
  value="Workshop Registration: {{ attendeeName }}"
/>
Or set it dynamically with JavaScript before submission:
document.getElementById('subjectField').value =
  'Registration - ' + name + ' - ' + ticketType;
This means every submission email has a meaningful subject line: "Workshop Registration. Sarah Johnson. Early Bird", instead of the generic "New form submission."
What Else Is Included in the Business Plan
Custom email templates are part of the Formgrid Business plan that also includes:
- 15,000 submissions/month
- Webhooks: Connect to Zapier, Make, Slack, Notion, Google Sheets, and more
- Auto-responder emails: Automatically Send confirmation emails to your form submitters
- Priority support
All for $29/month.
Final Thoughts
Default form notification emails are fine for simple contact forms. But the moment your form gets complex, with multiple sections and many fields, non-technical recipients, a raw data dump in your inbox, it becomes a real problem.
Custom email templates solve this completely. Your emails arrive formatted, organized, and readable by anyone. Whether they're a developer, an event coordinator, or an office manager, processing registrations.
With Formgrid.dev you get:
✅ Full HTML email template control
✅ Mustache variables for any field
✅ Sectioned layouts for complex forms
✅ Custom subject lines
✅ Preview before saving
✅ Works with any HTML form on any website
Start free and upgrade to Business when you're ready for custom templates.
👉 Try Formgrid free at formgrid.dev
Full disclosure: I built Formgrid. Written as honestly as I could, let you know in the comments if anything looks off.
Comments
Leave a comment