Replace Framer's default form handler with a custom endpoint and get every submission in Google Sheets automatically, in real time, no Zapier account required.
Framer is one of the fastest-growing website builders in 2026. Its visual editor, component system, and performance have made it a favourite among designers and developers who want beautiful sites without writing everything from scratch.
But Framer's built-in form handling has a significant gap.
By default, Framer sends form submissions to your email inbox. That works for a handful of enquiries a month. But the moment you need your team to see submissions in real time, filter entries by type, track patterns over time, or keep everything organised without searching through emails, an inbox is not enough.
The usual workaround is Zapier, connect Framer to Google Sheets through a Zap, and submissions flow across automatically. It works, but it adds a monthly subscription on top of what you already pay, introduces a delay between submission and spreadsheet row, and creates a dependency on a third service that can break independently of both Framer and Google Sheets.
Short Version
Point your Framer form's action URL at a Formgrid endpoint instead of Framer's default handler. Share a Google Sheet with Formgrid's service account email, paste the sheet URL into your Integrations tab, and click Connect. Every submission then lands as a new row in your spreadsheet within seconds, no Zapier, no OAuth setup, one setting changed in Framer.
Set it up now, or keep reading for the full walkthrough with screenshots.
Who This Is For
This guide is for designers and developers who have built their site in Framer and want form submissions to go straight to Google Sheets without adding another monthly subscription.
Framer designers who built a contact form, enquiry form, or booking request form, and want every submission organised in a spreadsheet automatically. You already built the form, you should not need a separate tool just to collect the data properly.
Indie hackers and solopreneurs who use Framer for their product landing page or waitlist, and want submissions in a shared spreadsheet without paying for Zapier on top of everything else.
Small business owners who collect client enquiries, service requests, or event registrations through a Framer form, and want every entry in a spreadsheet their team can access without logging into a separate tool.
Agencies managing multiple Framer sites for clients who want a reliable form backend that sends submissions to a Google Sheet so the client can see them in real time.
If you have a Framer form and want submissions in Google Sheets, this guide gets you there in one sitting.
The Problem With Framer's Native Form Handling
Framer's built-in form component is clean and easy to use. You drag a form onto the canvas, add your fields, and publish your site. Submissions arrive in your inbox.
That is where Framer's job ends.
There is no submission dashboard, no way to see all your entries in one place without searching your email, no Google Sheets sync, no lead pipeline, no way to track which enquiries you followed up on and which ones went cold.
For a simple contact form on a portfolio, that is fine. For a business form collecting real leads from real potential customers, it falls short almost immediately.
The standard workaround, Zapier, adds cost, complexity, and another point of failure. You pay $19.99 a month for Zapier just to move data from one place to another.
Formgrid solves this in one step.
What You Get With Formgrid
Once your Framer form is connected to formgrid.dev and your Google Sheet is linked, here is what happens on every submission.
Every entry from your Framer form appears as a new row in your spreadsheet automatically. No manual export, no logging into a dashboard every day, no copy and paste.
Column headers are created automatically from your form field names on the very first submission. Name your fields clearly and Formgrid handles the rest.
The integration works in real time. The moment someone submits your form, the row appears in Google Sheets within seconds, not the next time a Zap runs, not on a schedule, instantly.
You also get email notifications on every submission, so you are not dependent on checking Sheets. Spam protection is built in through honeypot fields and rate limiting, so fake submissions do not pollute your data. Every submission is also saved to your Formgrid dashboard as a backup, so if anything ever goes wrong with your sheet you still have a full record.
What You Will Need
A Formgrid account. Google Sheets sync is included on the Premium plan. Sign up free at formgrid.dev, no credit card required.
A Framer site with a form. Any Framer form works, whether it is a contact form, a service enquiry form, a waitlist signup, or a booking request form.
A Google account. You will need access to Google Sheets to create the spreadsheet that will receive your submissions. Any standard Google account works.
How This Works
Framer forms support a custom form action URL. Instead of letting Framer handle the submission and forward it to your email, you point the form at a Formgrid endpoint URL.
Formgrid receives the submission, saves it to your dashboard, sends you an email notification, and writes a new row to your connected Google Sheet instantly.
The key change on the Framer side is a single setting: the form action URL. Point it at your Formgrid endpoint instead of leaving it on Framer's default handler. Everything else happens inside Formgrid.
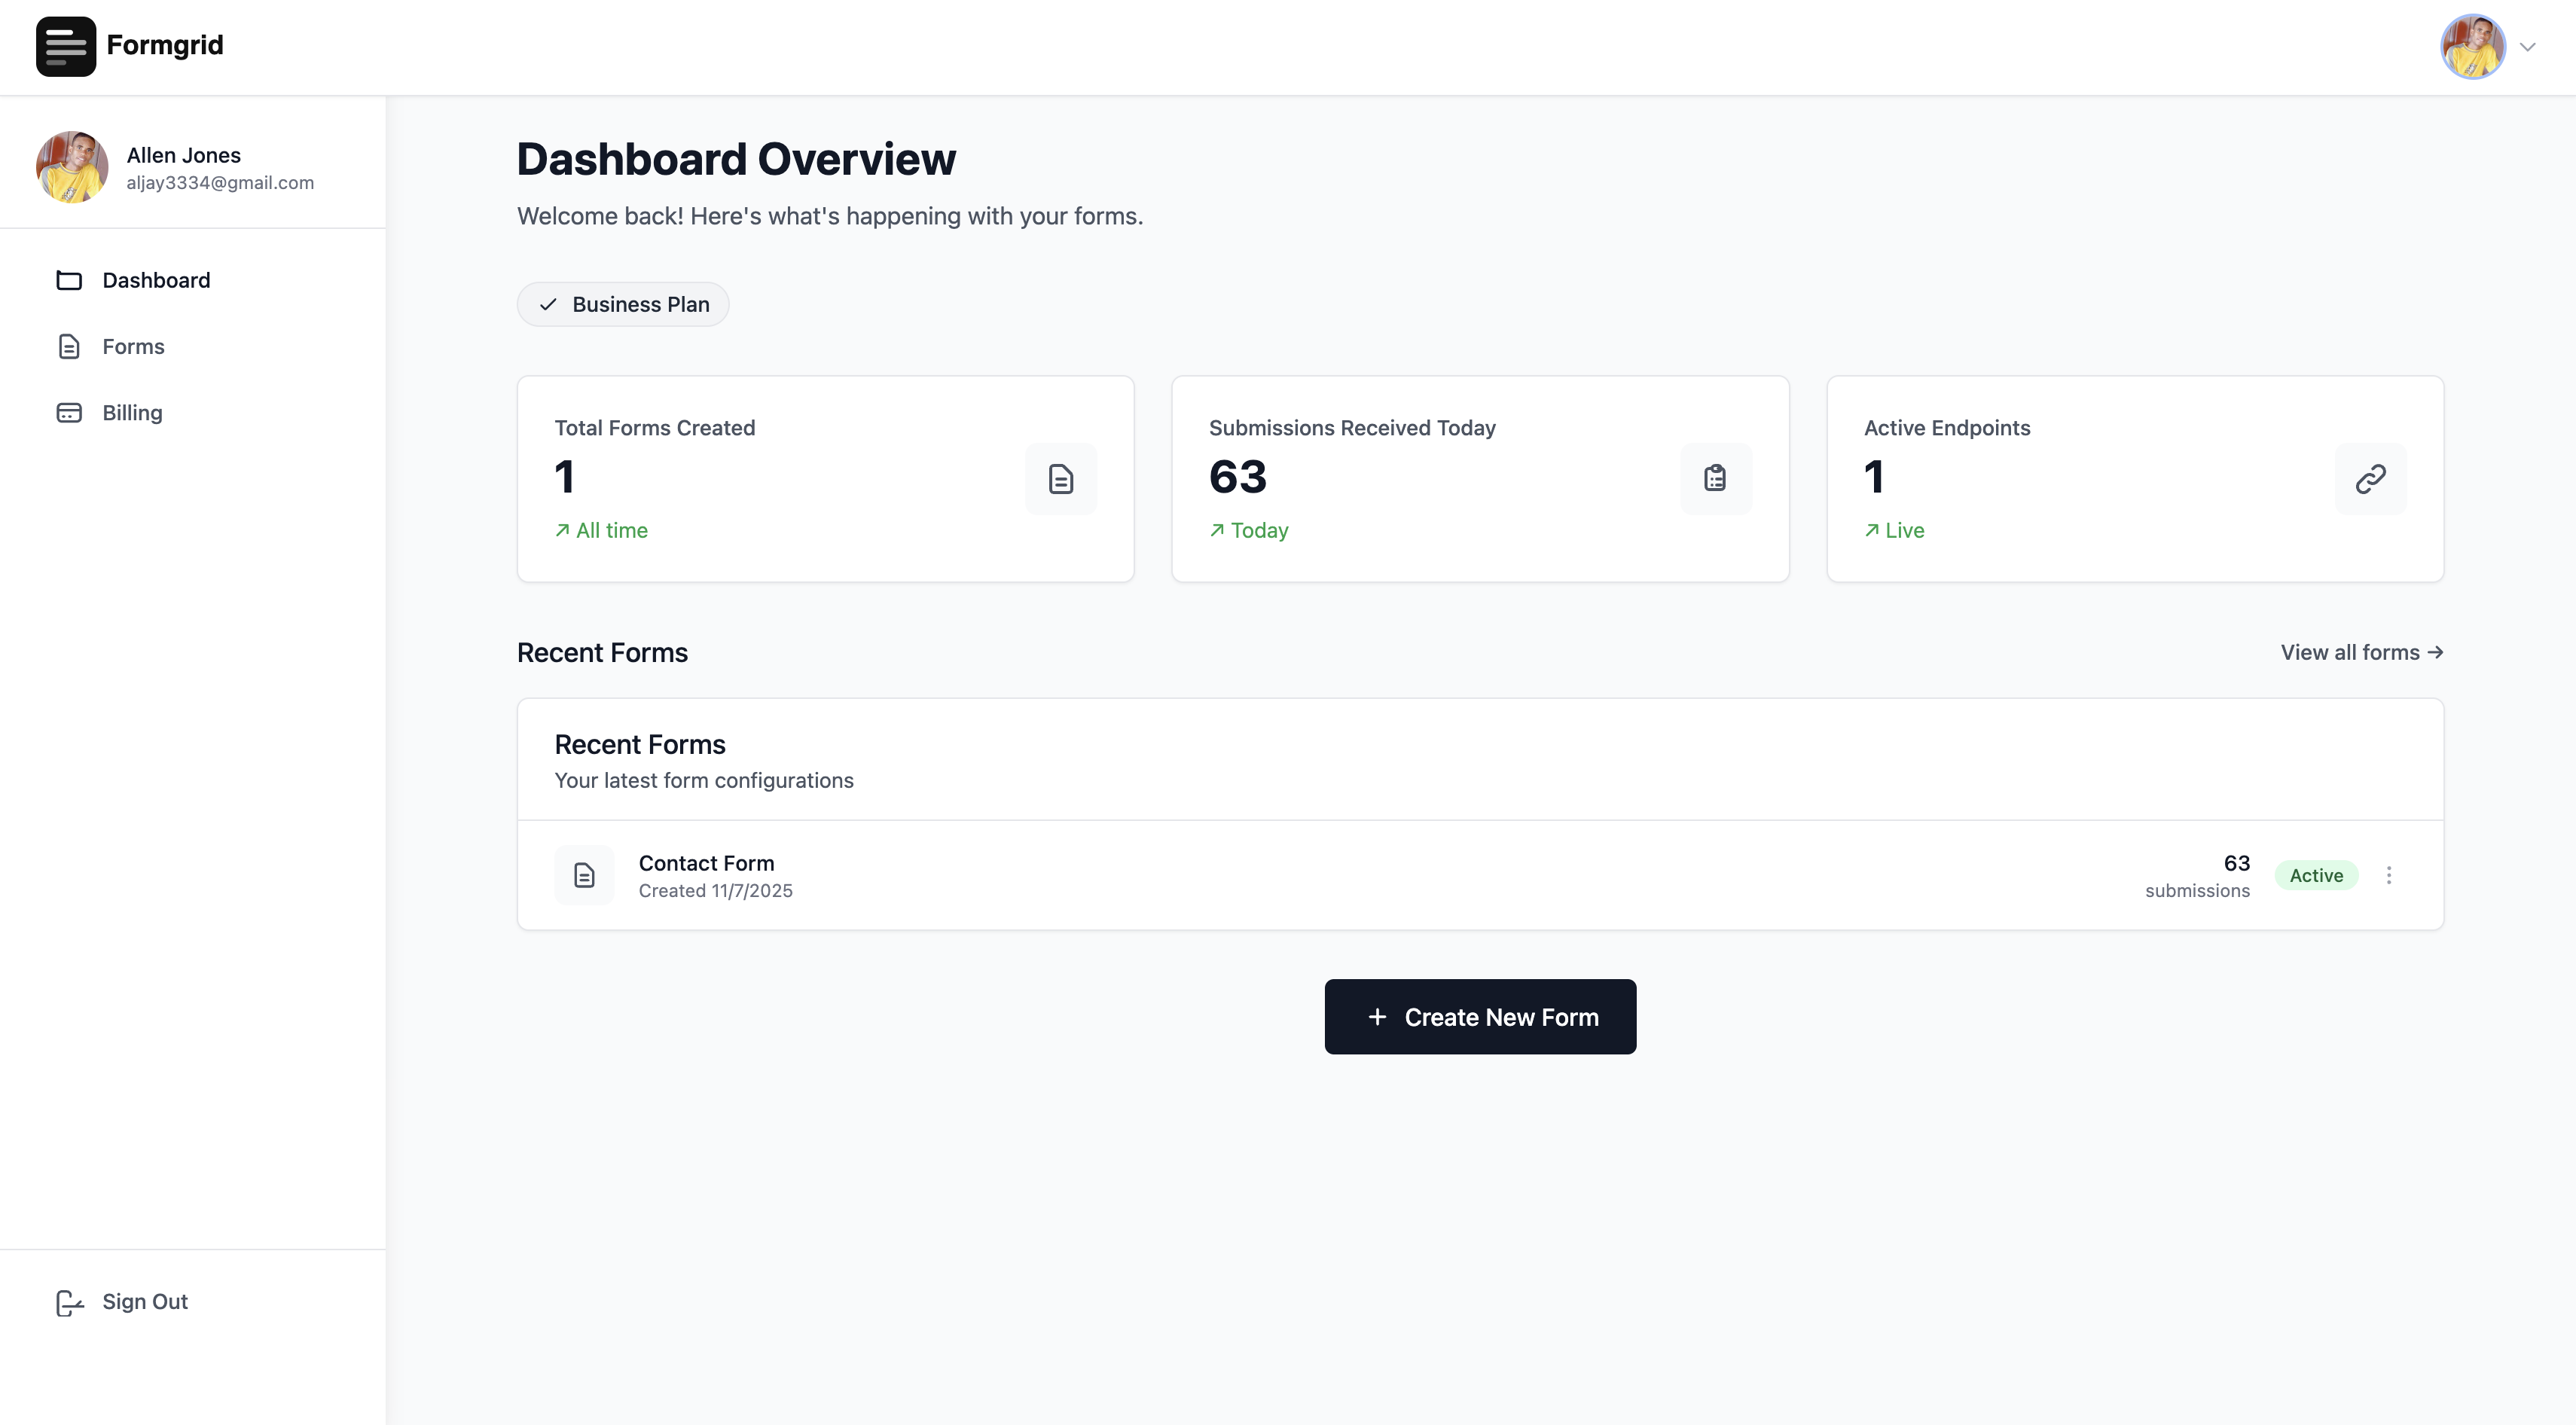
Part One: Set Up Your Formgrid Form and Get Your Endpoint URL
Step 1: Create a Form in Your Formgrid Dashboard
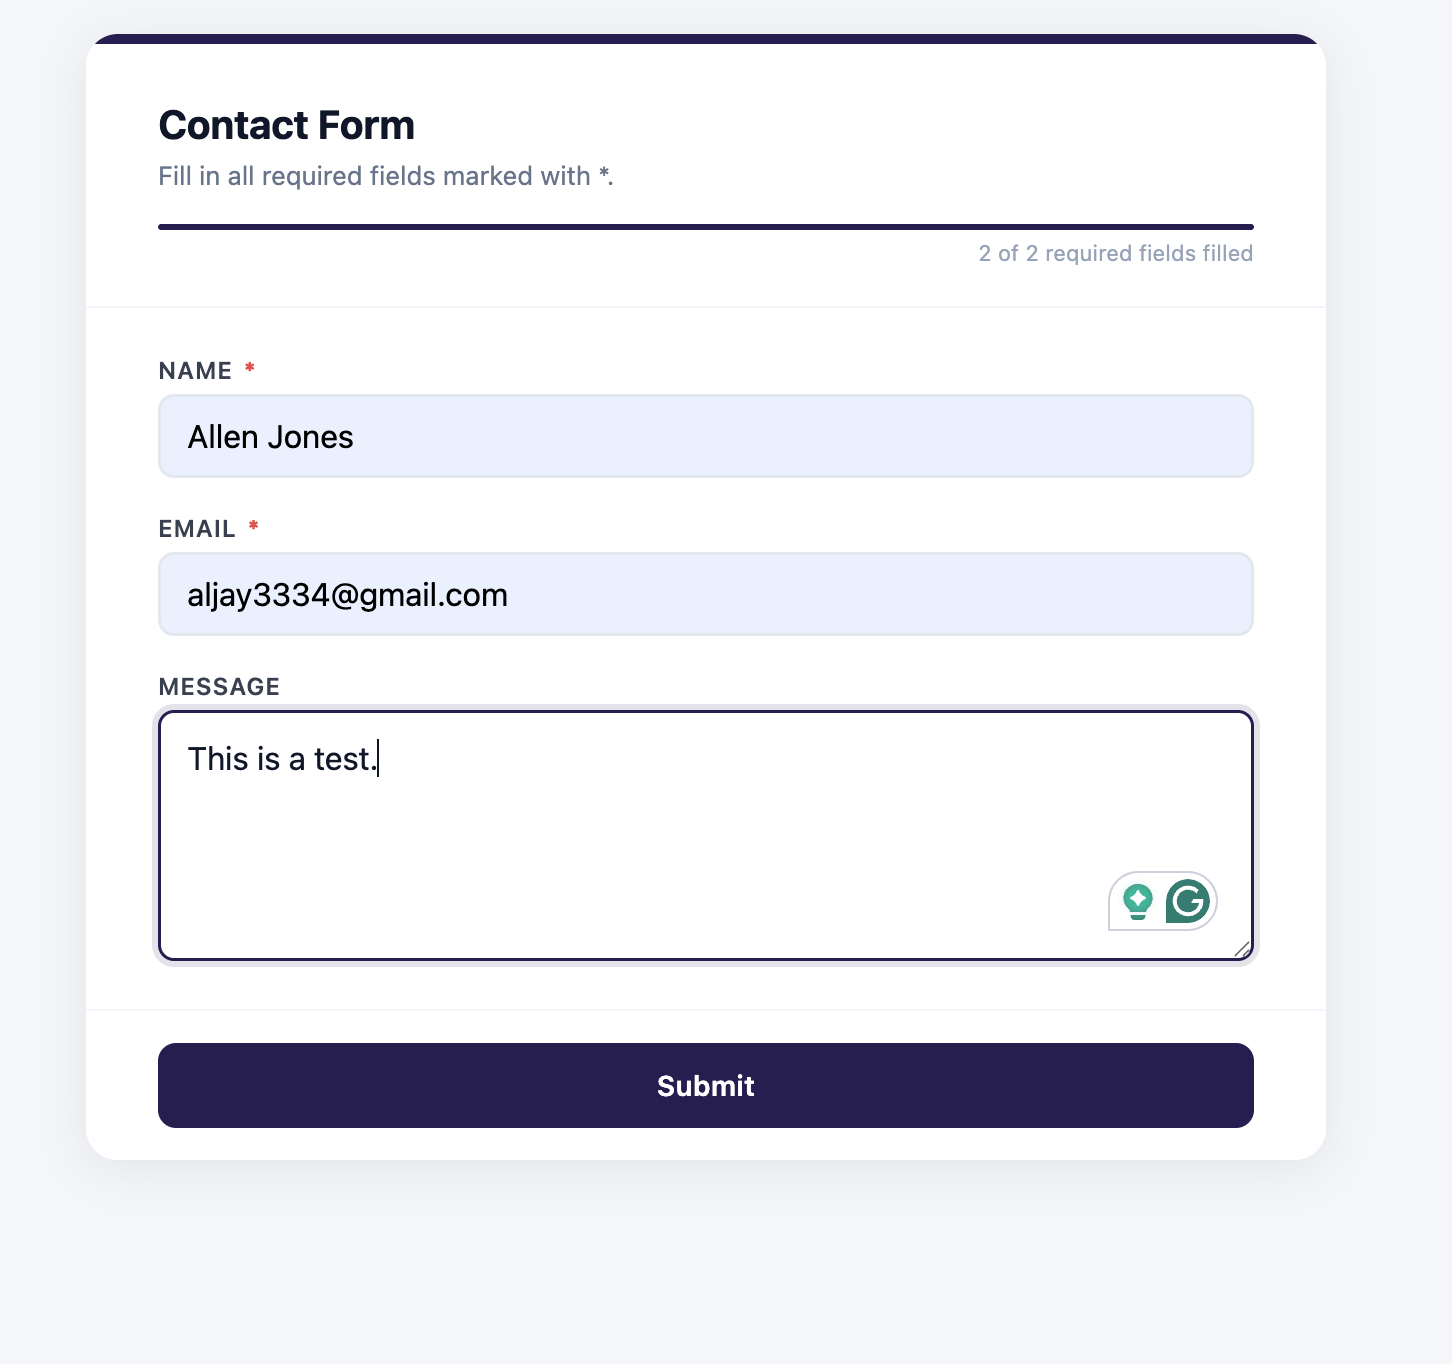
Log in to your Formgrid account at formgrid.dev. From your dashboard, create a new form and give it a name that corresponds to the Framer form you are connecting. For example, "Contact Form" or "Waitlist Signups."
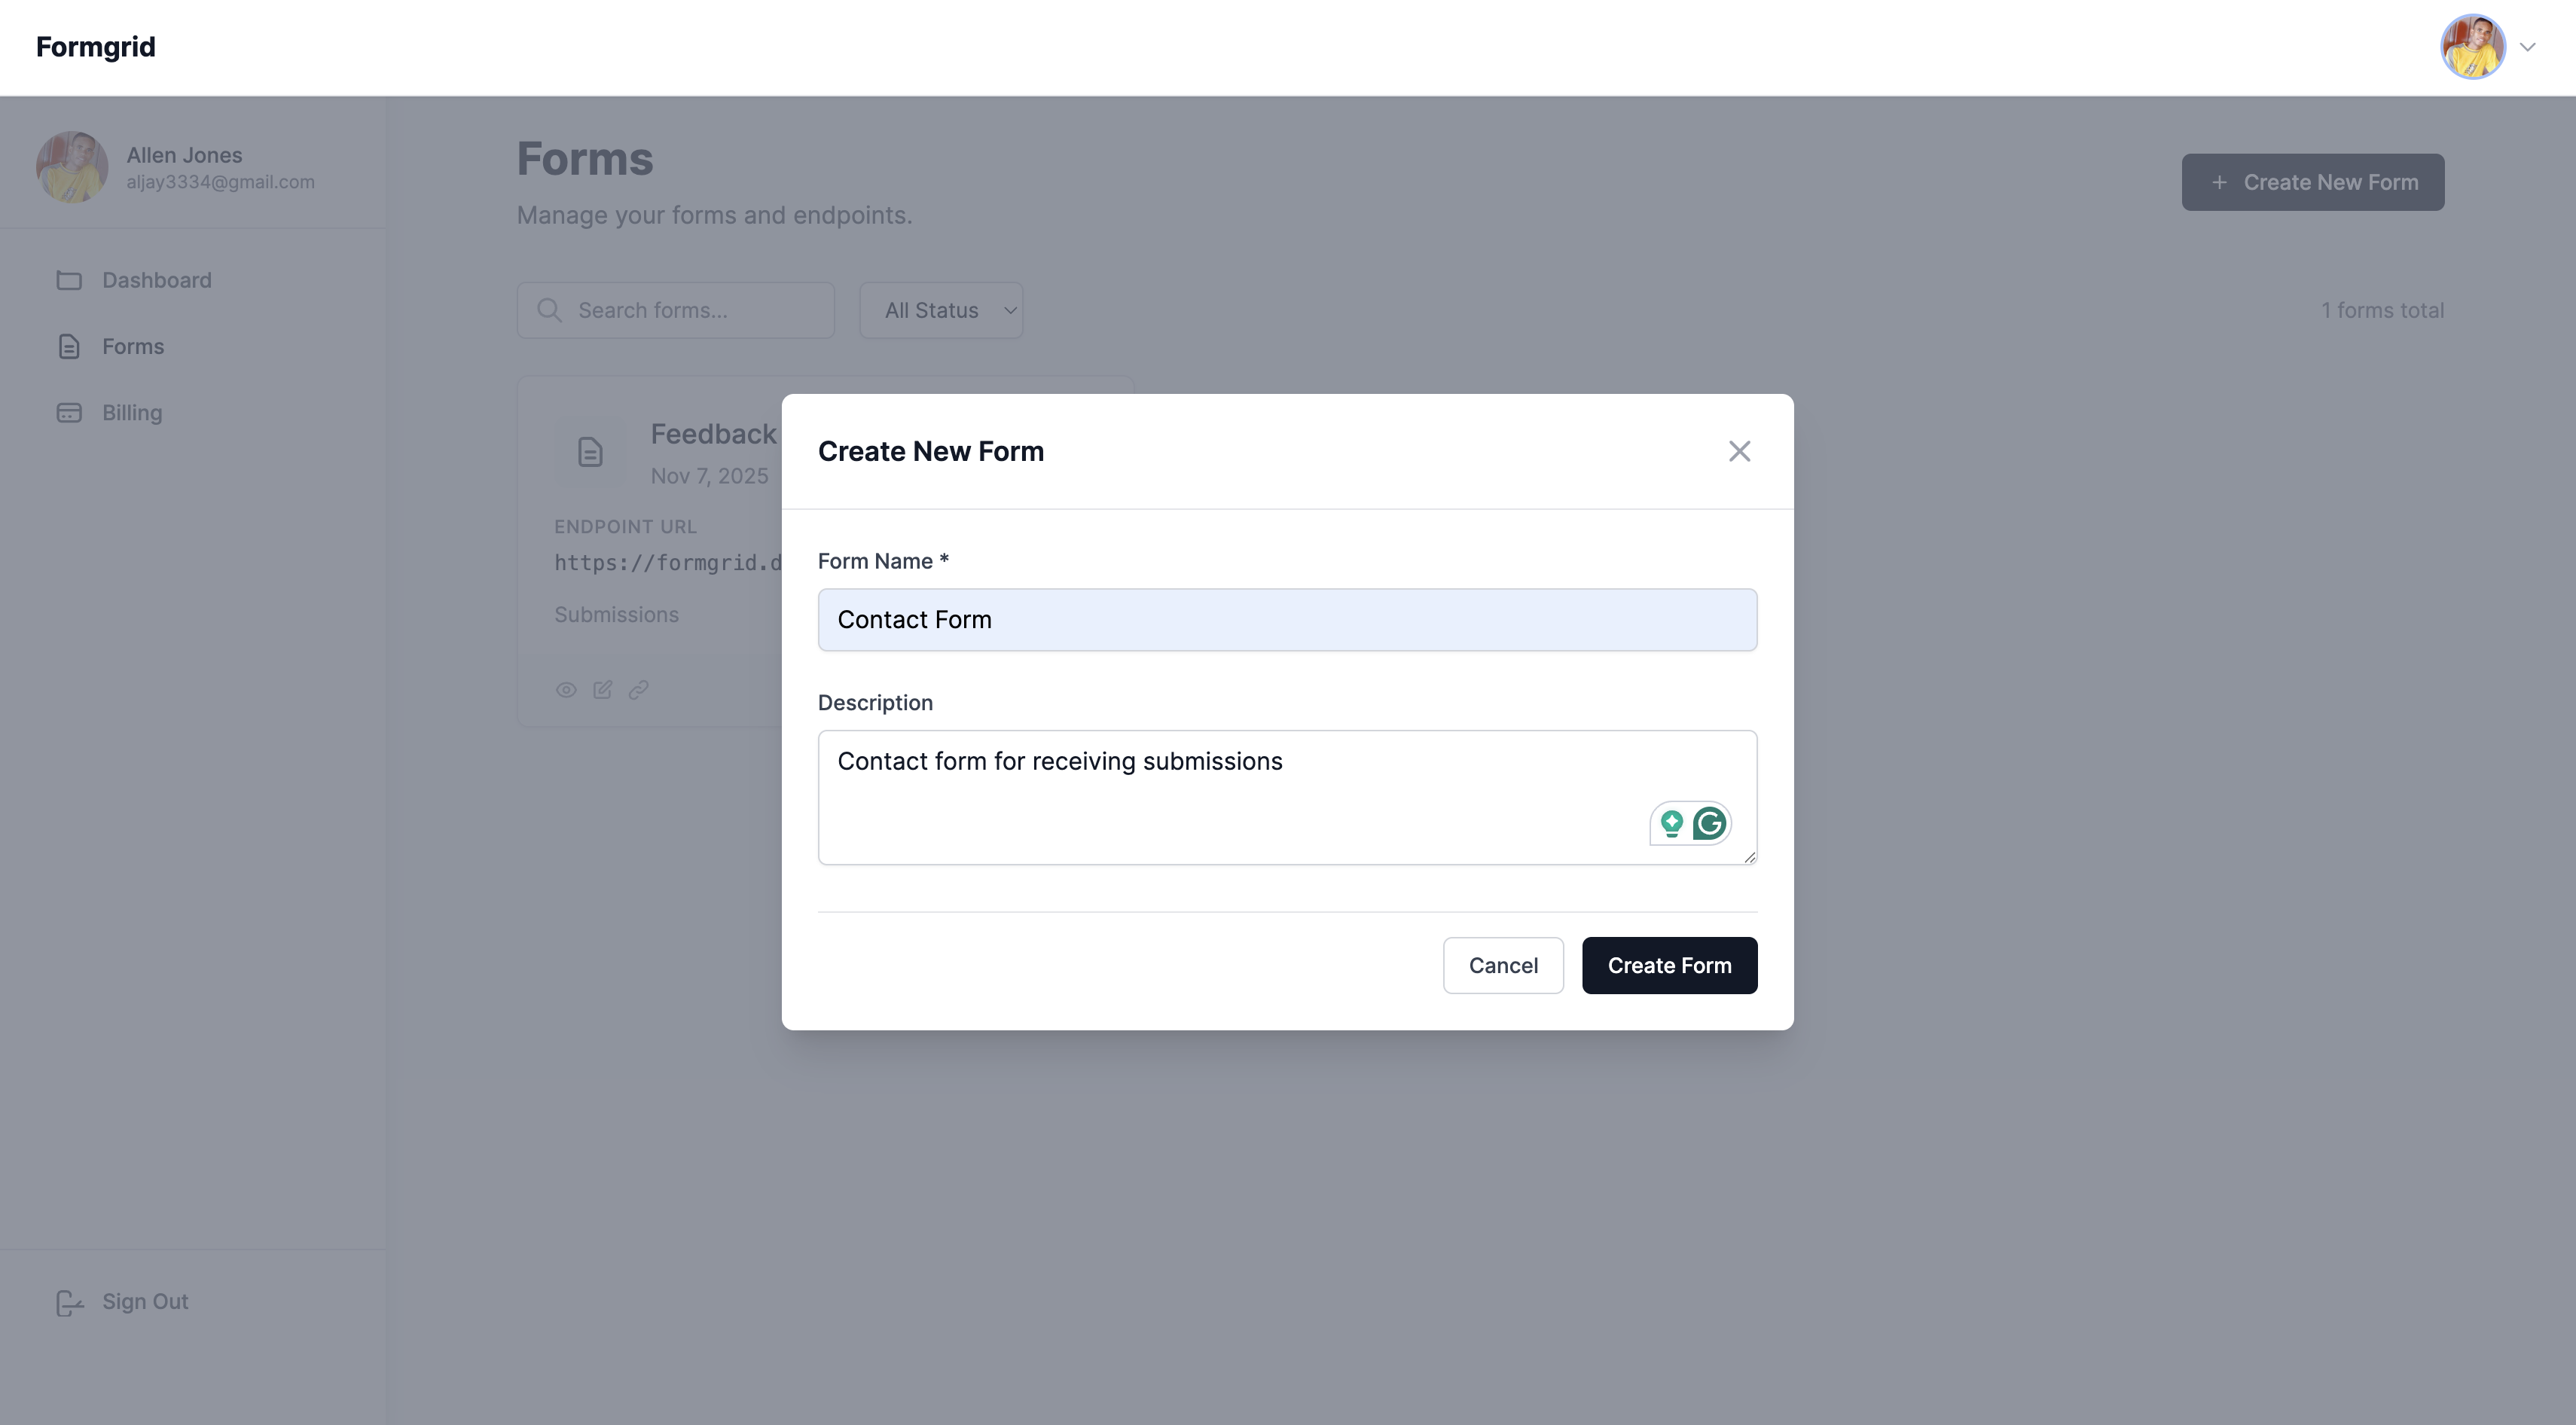
You are not building a form inside Formgrid here. You are registering a form entry in your dashboard so Formgrid knows where to route the incoming submissions from Framer. Your actual form fields remain exactly as they are in Framer.
Don't have an account yet? Create one here.
Step 2: Copy Your Formgrid Endpoint URL
Once your form is created, open it in your dashboard. You will see your unique endpoint URL displayed prominently. It will follow this format:
https://formgrid.dev/api/f/your-form-idCopy this URL. You will need it in the next section when you update your Framer form settings.
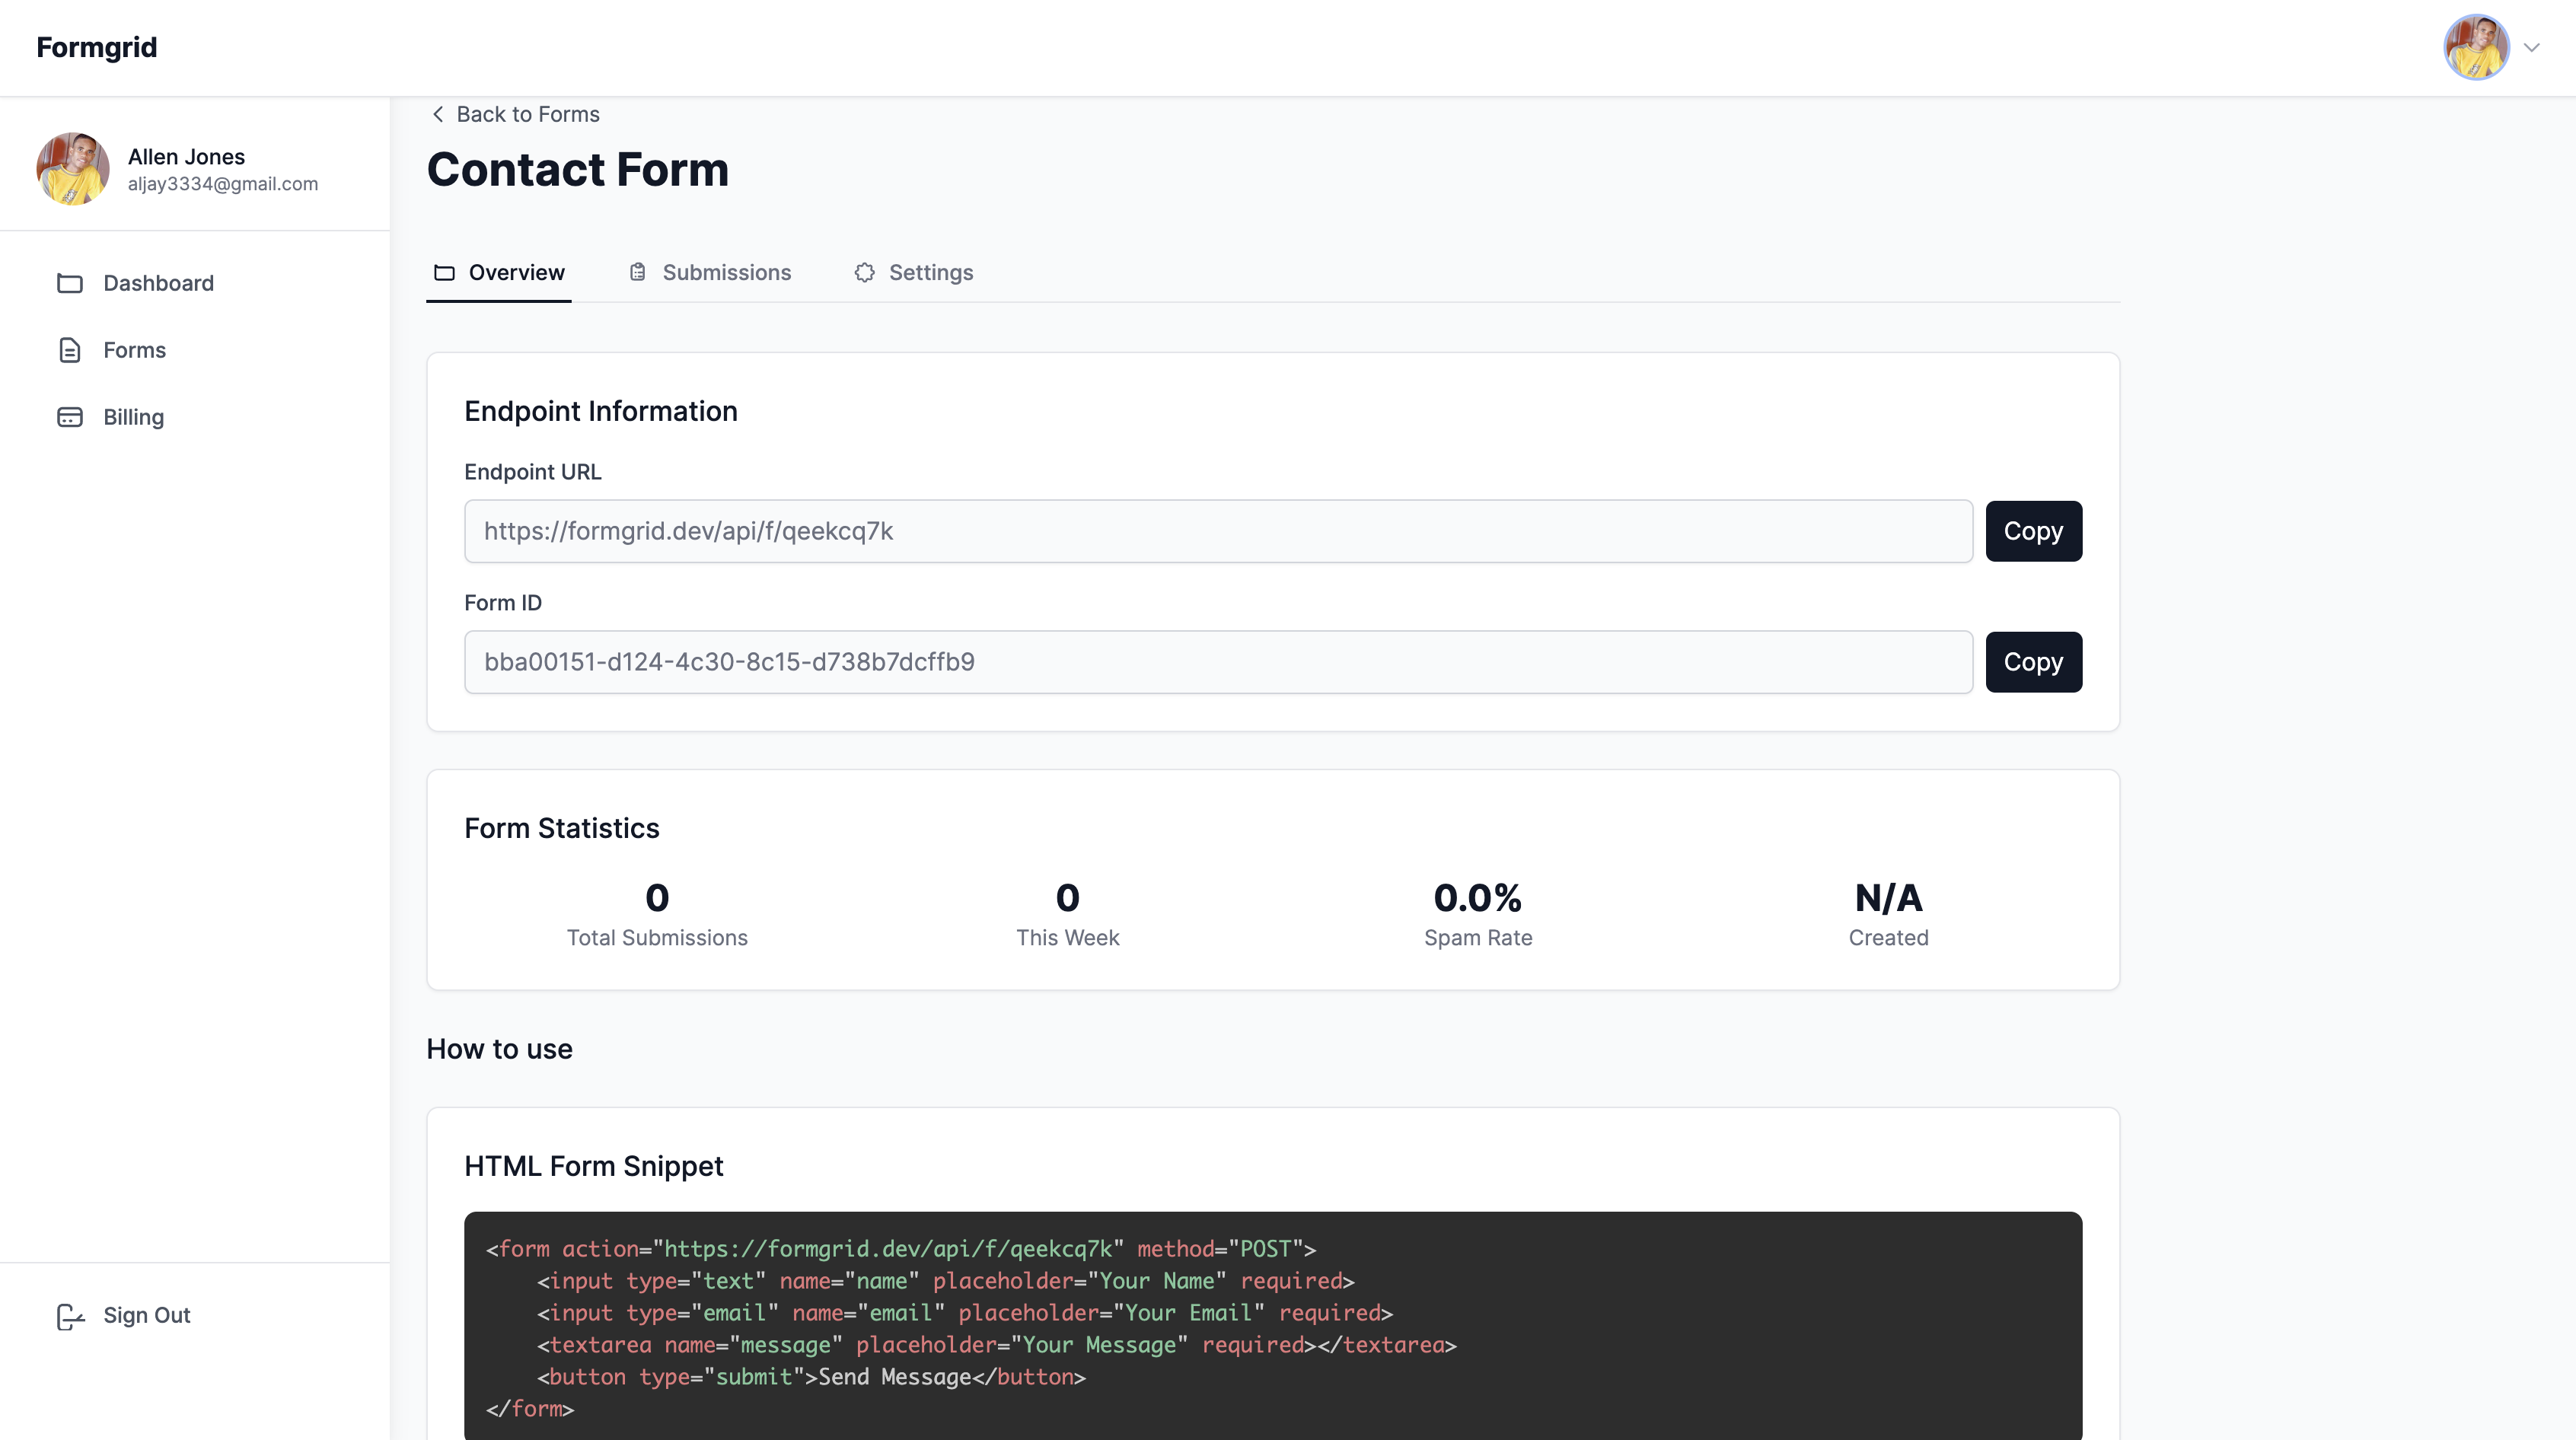
This URL is permanent. It does not change when you update your form settings, connect integrations, or make any other changes inside Formgrid. Set it once in Framer and you never need to touch it again.
Part Two: Connect Your Framer Form to Formgrid
Step 3: Open Your Framer Canvas
Log in to your Framer account and open the project containing the form you want to connect. Click on your form component in the canvas to select it.
Step 4: Set the Form Action URL
With your form selected, open the properties panel on the right side of the Framer editor.
Look for the Action field under your form settings. This is where Framer sends the form data when someone submits it.
Replace any existing value with your Formgrid endpoint URL:
https://formgrid.dev/api/f/your-form-idSet the Method to POST if it is not already set.
Step 5: Check Your Field Names
Formgrid uses the name attributes of your form fields to create the column headers in your Google Sheet. In Framer, each input field has a name property you can set in the properties panel.
Click on each input field and confirm it has a clear, descriptive name. Fields named "name," "email," "phone," and "message" produce clean, readable column headers in your spreadsheet. Review and update any unclear field names before moving on.
Step 6: Publish Your Framer Site
Once you have updated the form action URL and reviewed your field names, publish your Framer site to push the changes live. The Formgrid endpoint will not receive any submissions until your site is published.
Step 7: Submit a Test Entry
Before connecting Google Sheets, confirm that submissions are reaching Formgrid correctly. Visit your live Framer site, fill in your form with test data, and submit it.
Open your Formgrid dashboard and check the submissions list for your form. The test entry should appear within a few seconds.
If the submission does not appear, go back to your Framer form settings and confirm the action URL is set correctly and the method is POST. Also confirm you published the site after making the change, unpublished changes in Framer do not take effect on the live site.
Connect your form now. No credit card required.
Part Three: Connect Google Sheets
Step 8: Open the Integrations Tab in Formgrid
In your Formgrid dashboard, open the form you just connected and click the Integrations tab at the top of the page.
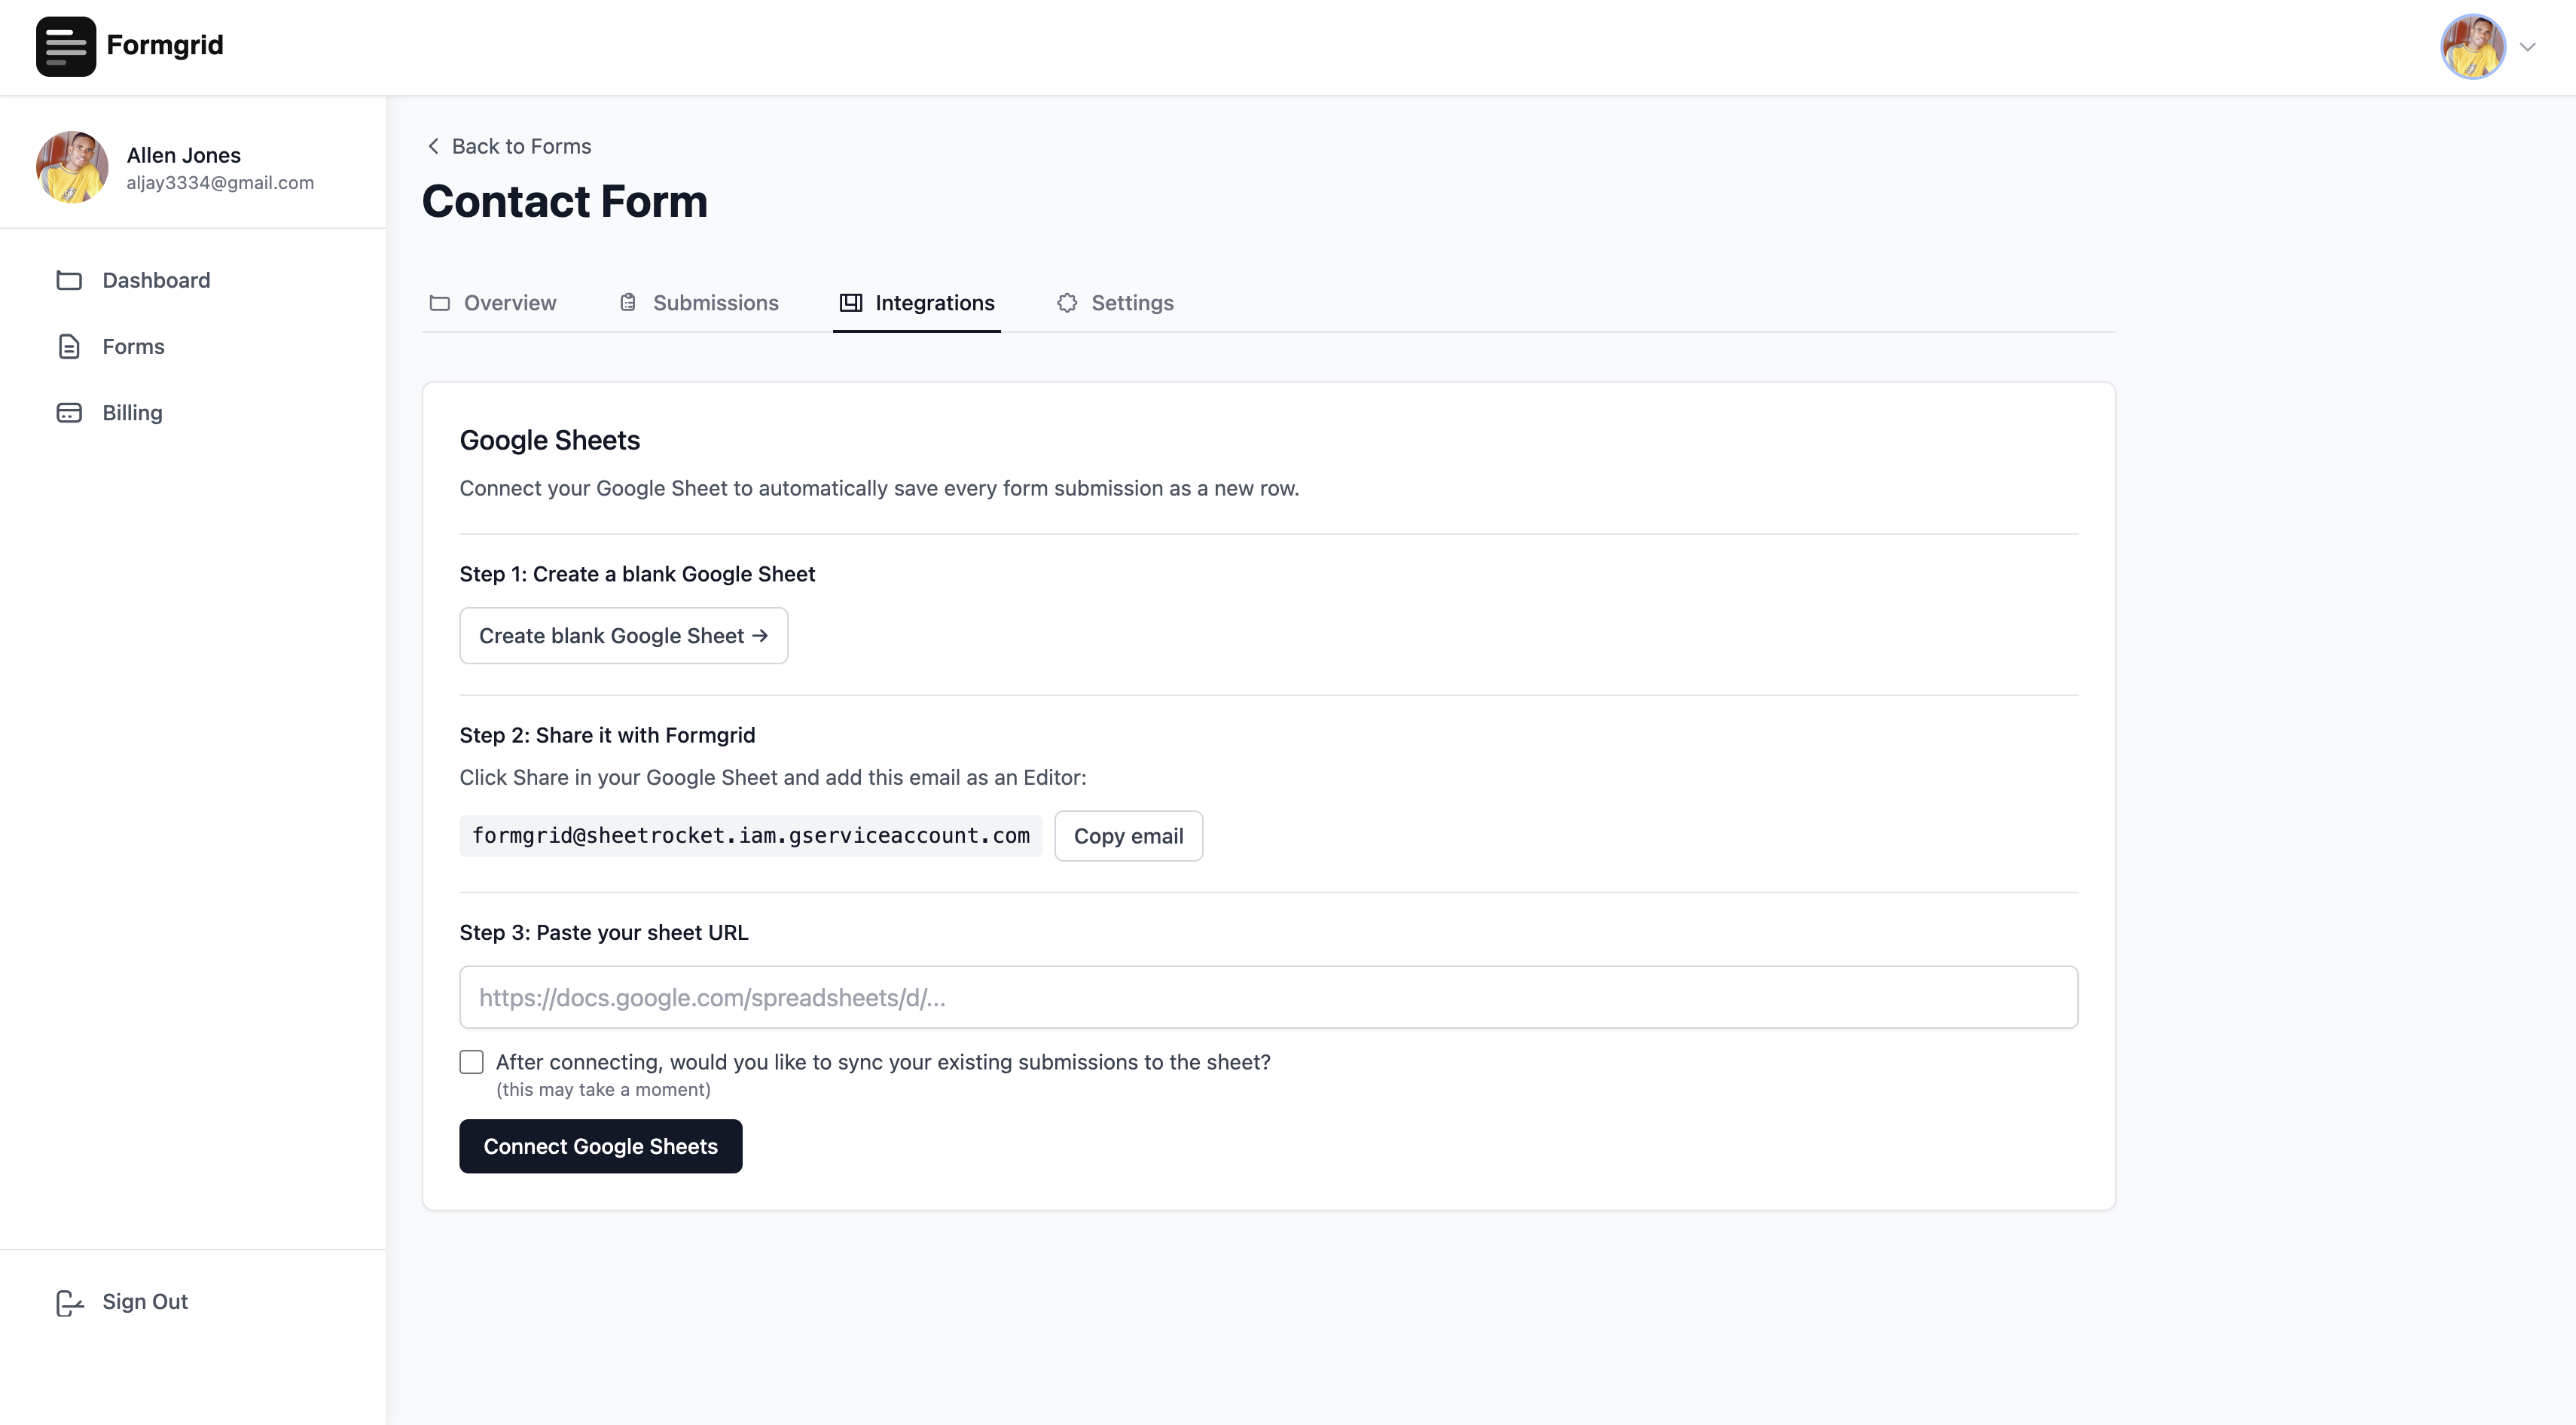
You will see the Google Sheets integration section, ready to connect.
Step 9: Create a Blank Google Sheet
Click the Create blank Google Sheet button. This opens a fresh blank spreadsheet in Google Sheets in a new browser tab.
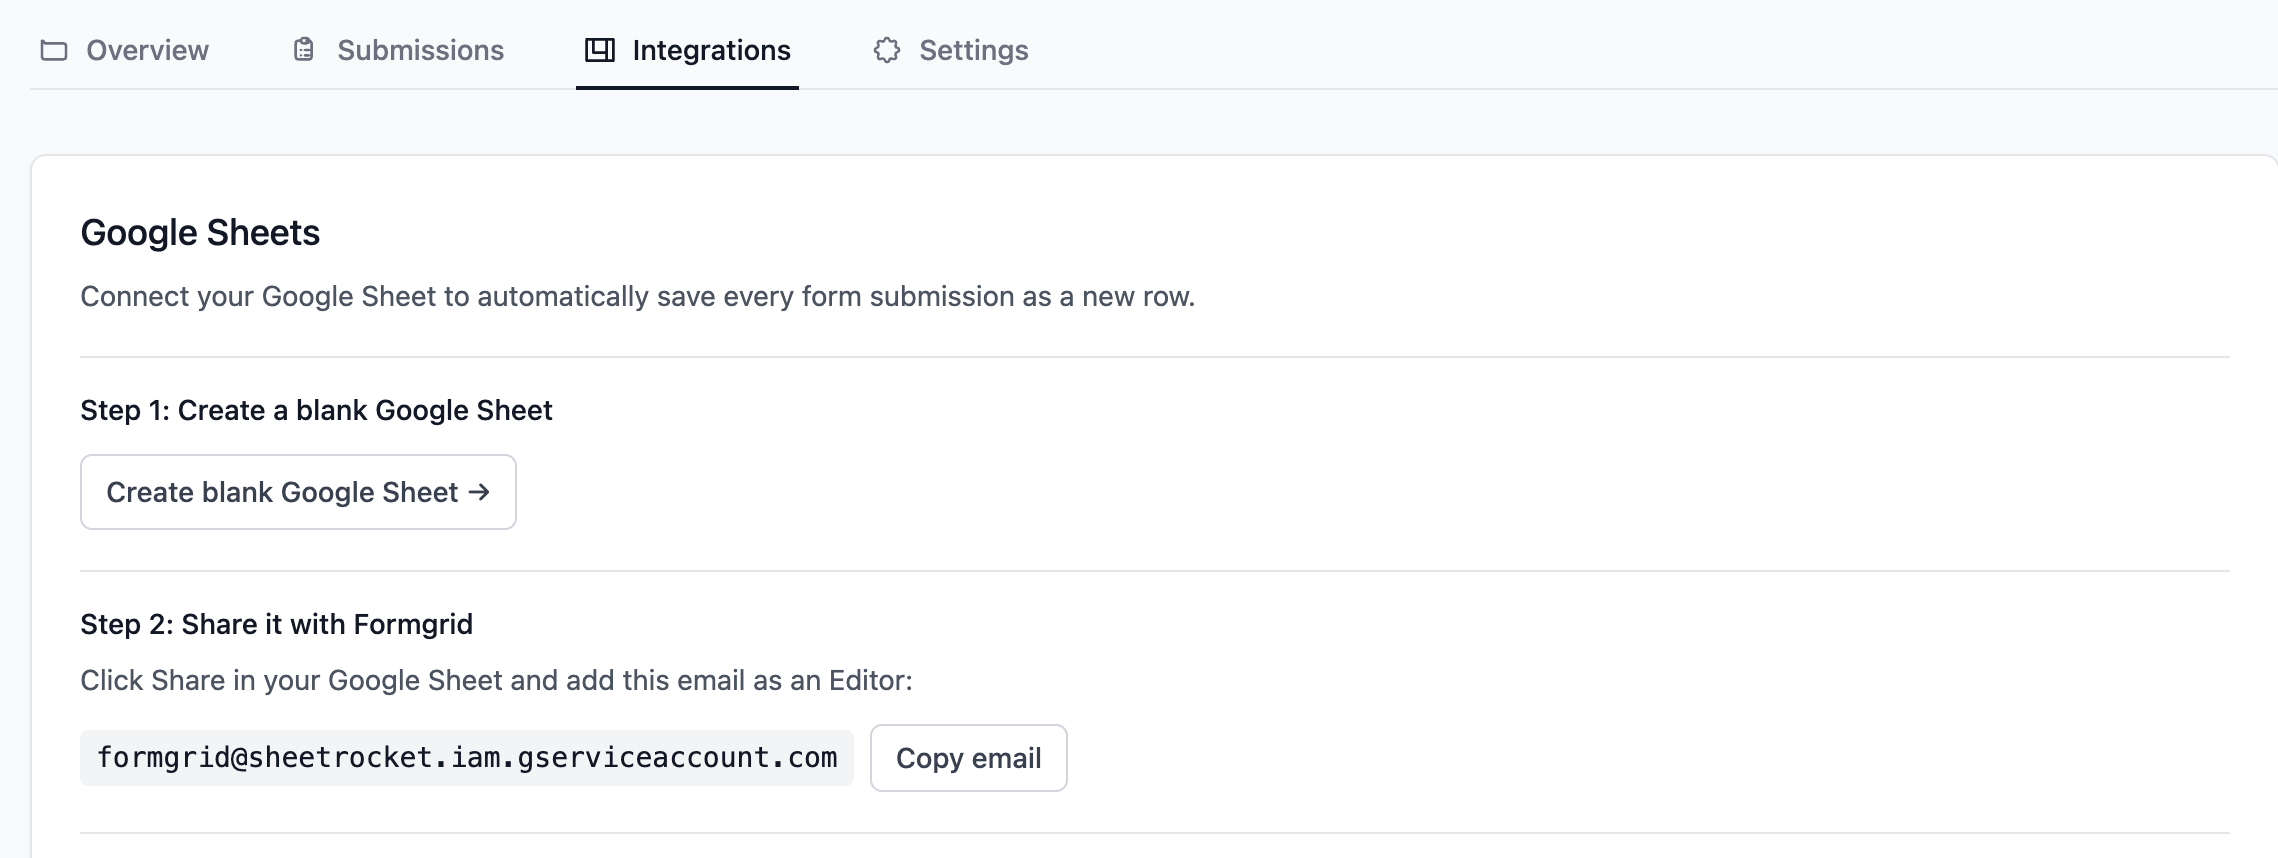
Give your sheet a clear, identifiable name. Something like "Framer Contact Form Submissions" or "Waitlist Signups 2026" works well. If you manage multiple Framer sites and plan to connect each form to its own sheet, a consistent naming convention helps you stay organised.
Do not add any column headers or set up any structure. Formgrid creates the column headers automatically from your Framer field names on the very first submission. The sheet should be empty when you connect it.
Step 10: Share the Sheet With the Formgrid Service Account
In your Google Sheet, click the Share button in the top right corner.
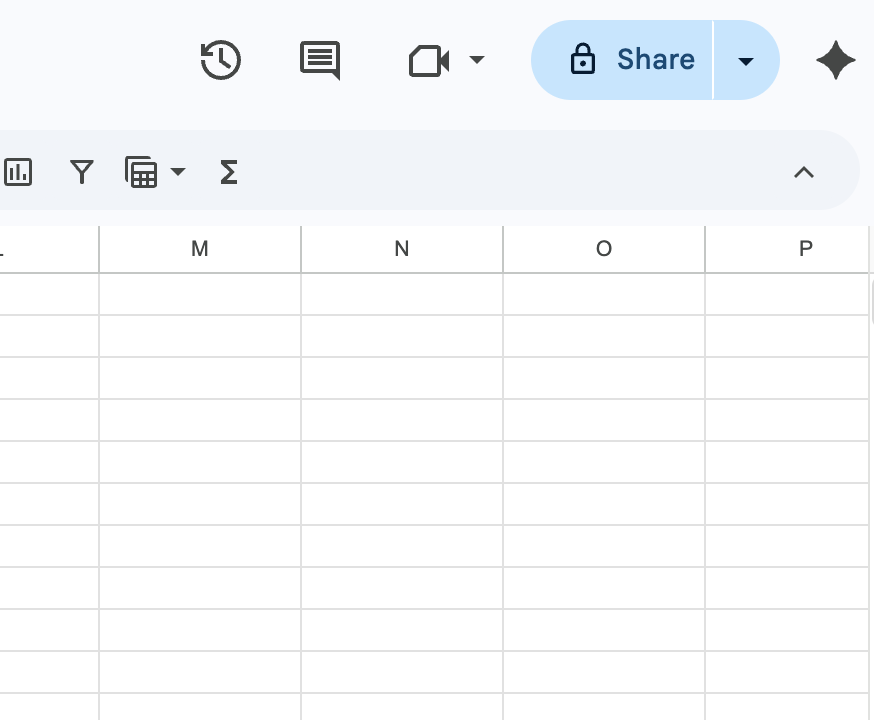
Add the Formgrid service account email address as an Editor. Go back to your Formgrid dashboard, where the service account email is displayed with a Copy button next to it.
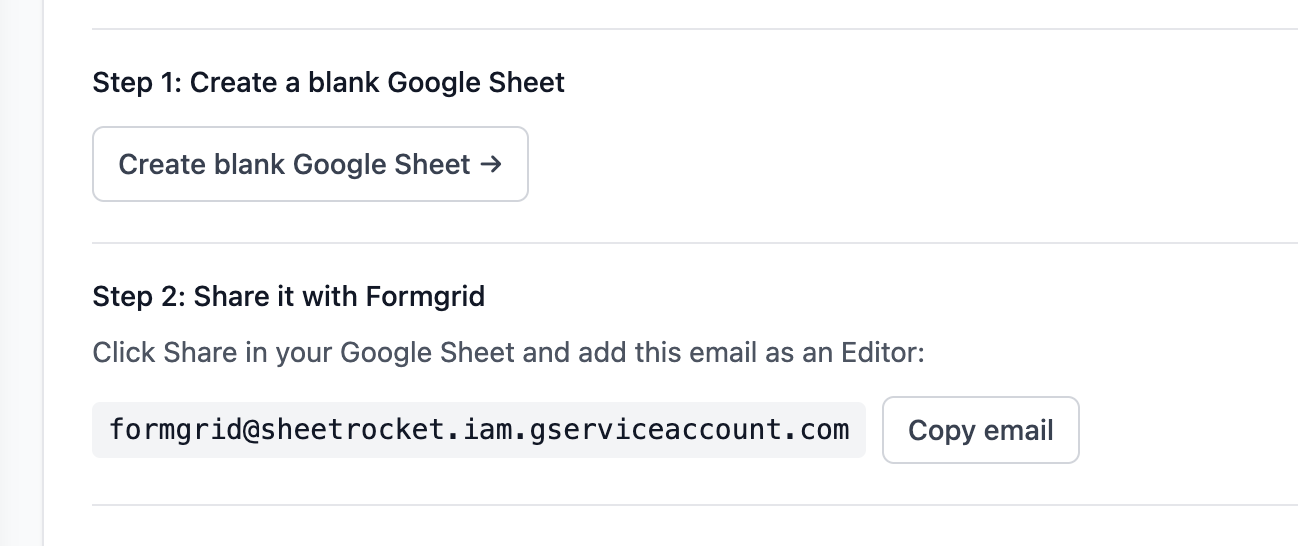
Copy it directly from there to avoid any typing errors. Paste the email into the share dialog and make sure you select Editor access, not Viewer. Formgrid needs Editor access to write new rows to your sheet, if you add it as a Viewer, the connection will fail with a permissions error.
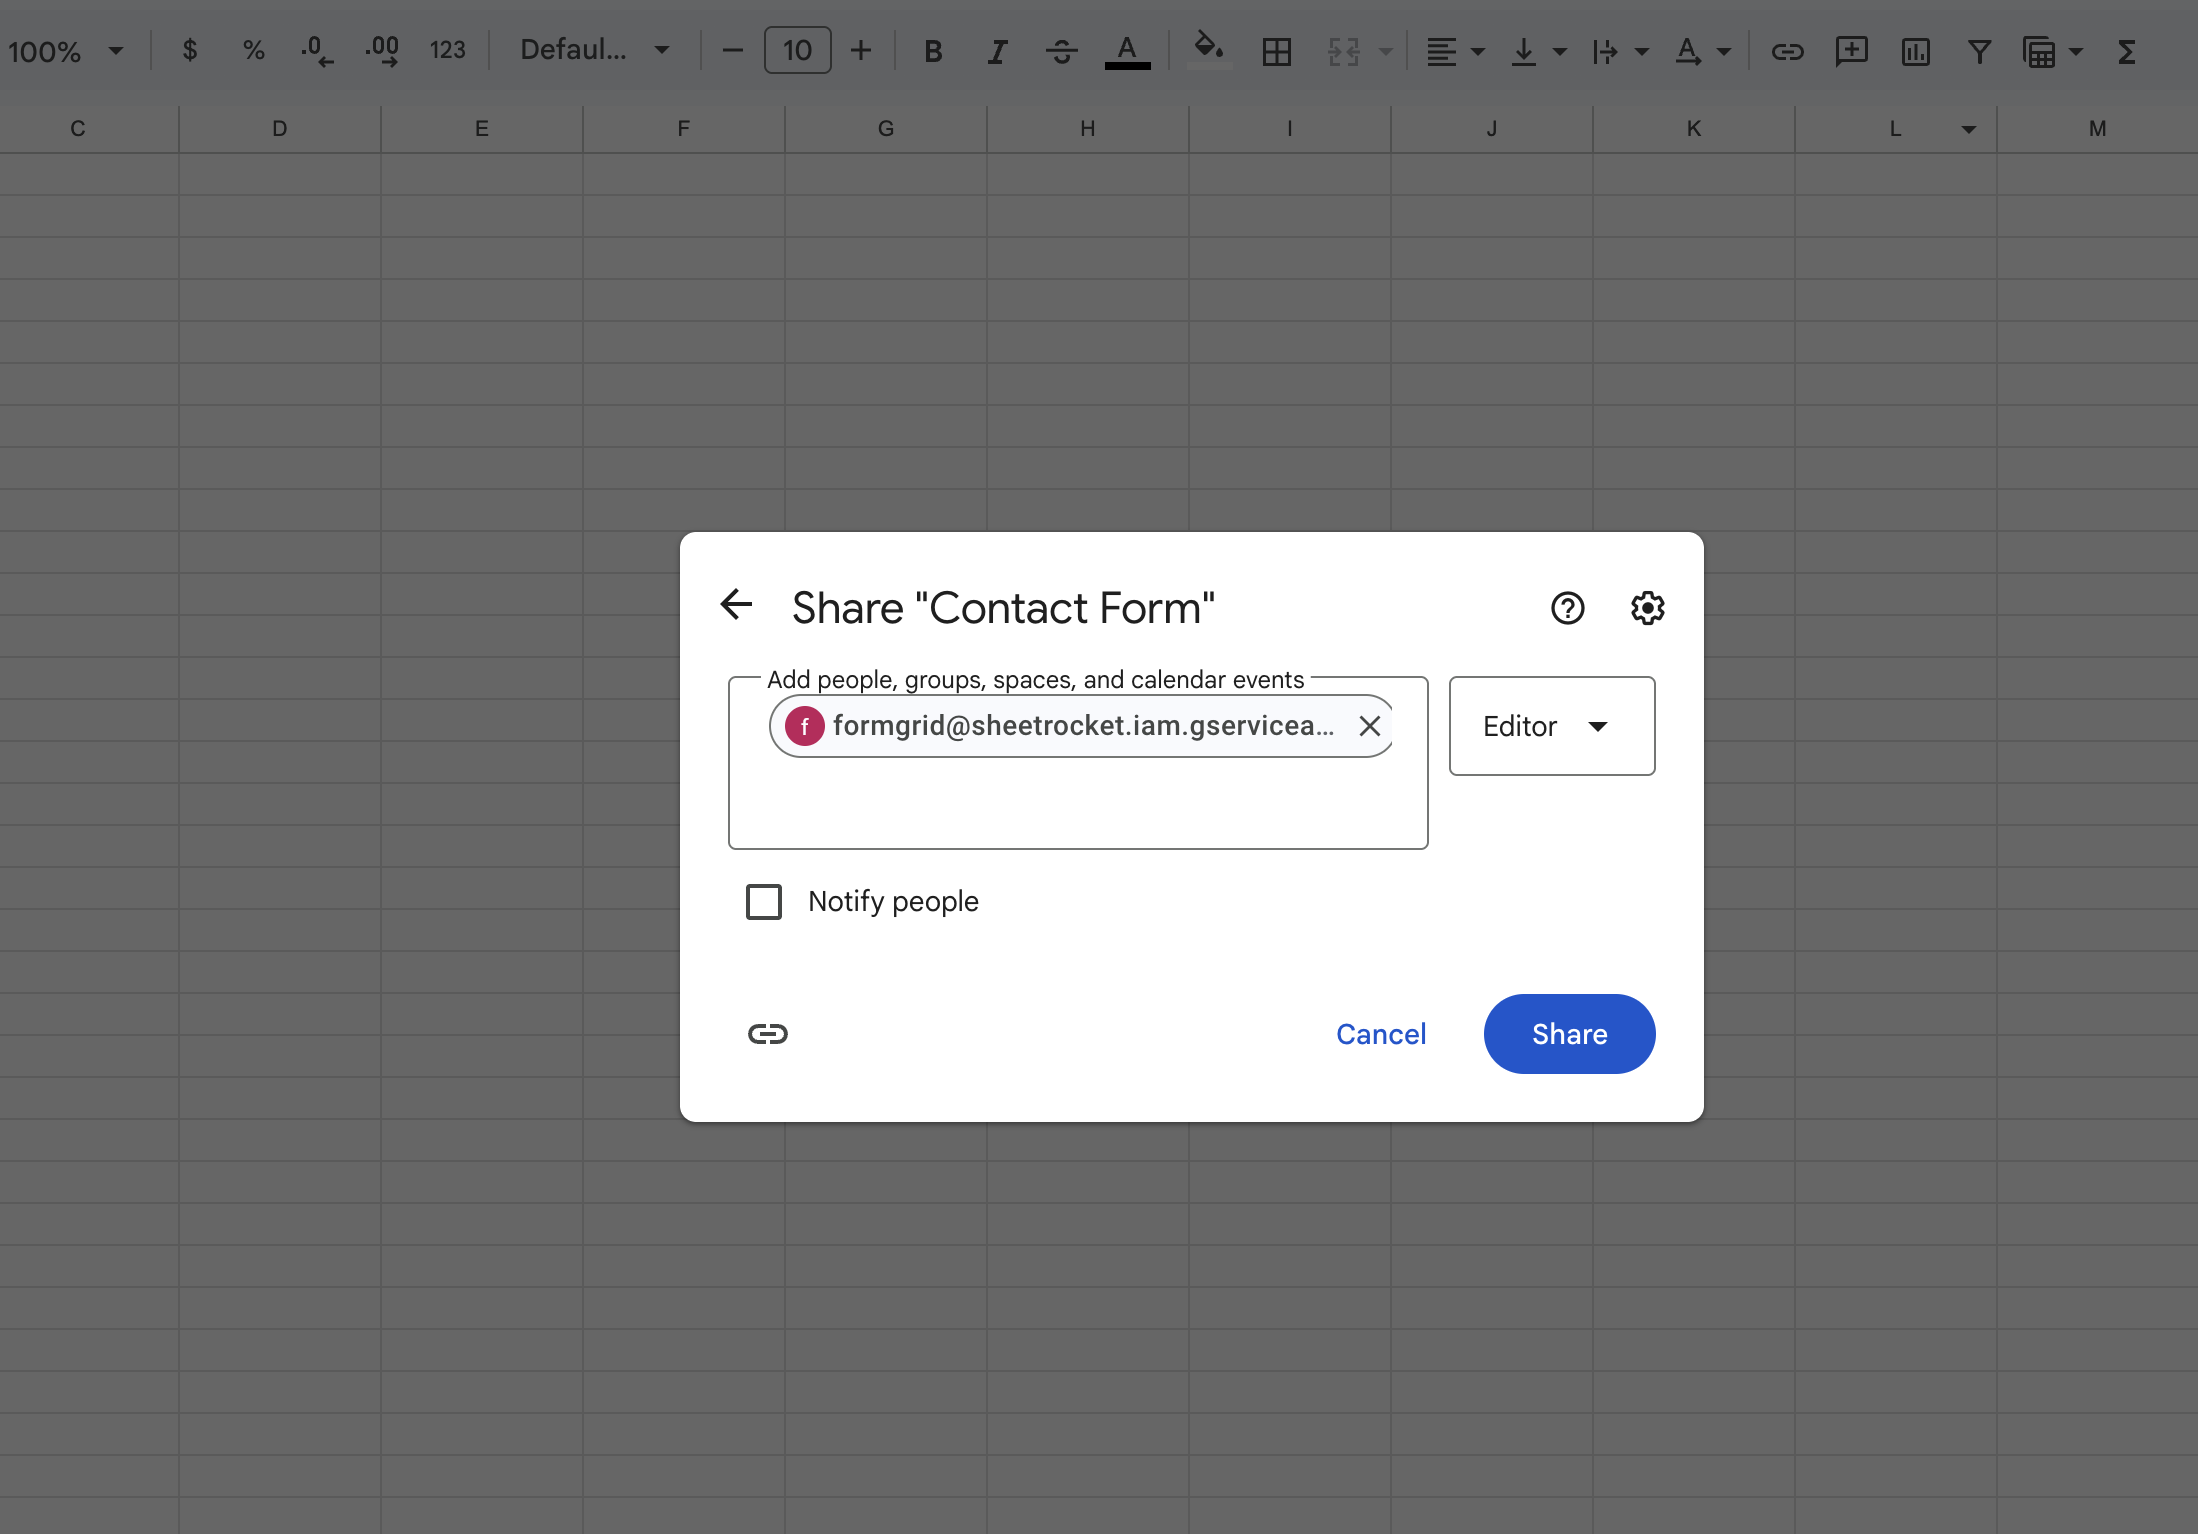
Click Send or Done to confirm.
Step 11: Paste Your Sheet URL Into Formgrid
Go back to your Formgrid dashboard. Copy the full URL of your Google Sheet from the browser address bar of the tab where your sheet is open:
https://docs.google.com/spreadsheets/d/1BxiMVs0XRA5nFMdKvBdBZjgmUUqptlbs74OgVE2upms/editPaste the full URL into the sheet URL field in your Formgrid dashboard, making sure it contains the full spreadsheet ID between /d/ and /edit.

Step 12: Choose Whether to Sync Existing Submissions
Before connecting, you will see this option:
Sync existing submissions to this sheet?

If you already have submissions, Formgrid can add them all to your
Google Sheet now, so your entire history is in one place.

[ ] Yes, sync my existing submissions
If you have been collecting Framer form submissions through Formgrid for a while and want your full history in the sheet from day one, check this box. Formgrid writes all past submissions to the sheet before it begins syncing new ones. Leave it unchecked if you only want submissions going forward.
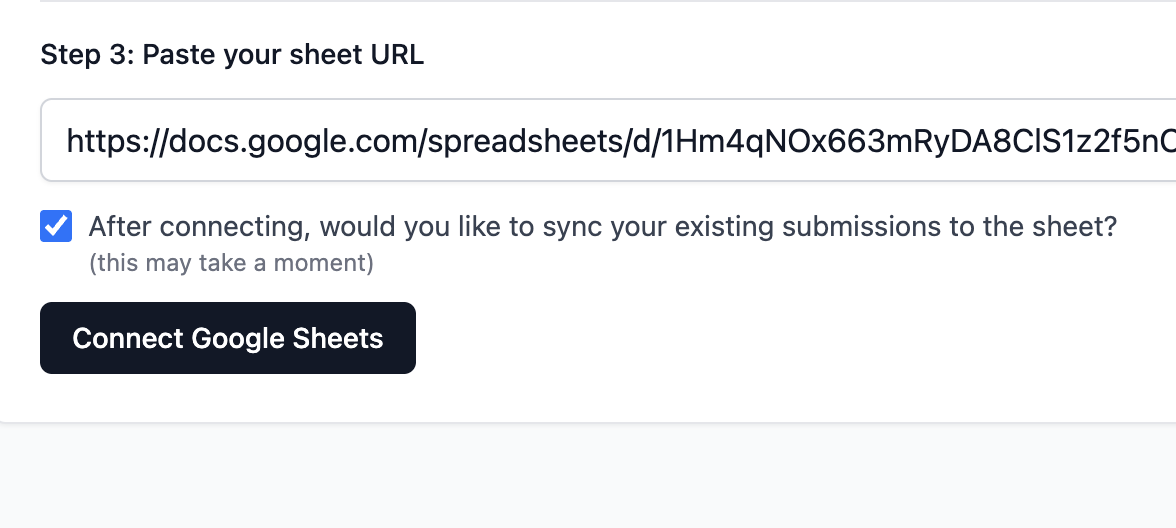
Step 13: Click Connect
Click the Connect Google Sheets button. Formgrid verifies it can access your sheet and that the service account has the correct permissions. If everything is in order, you will see a success confirmation:
Connected successfully

Your sheet is ready. Every new submission will appear as a new row automatically.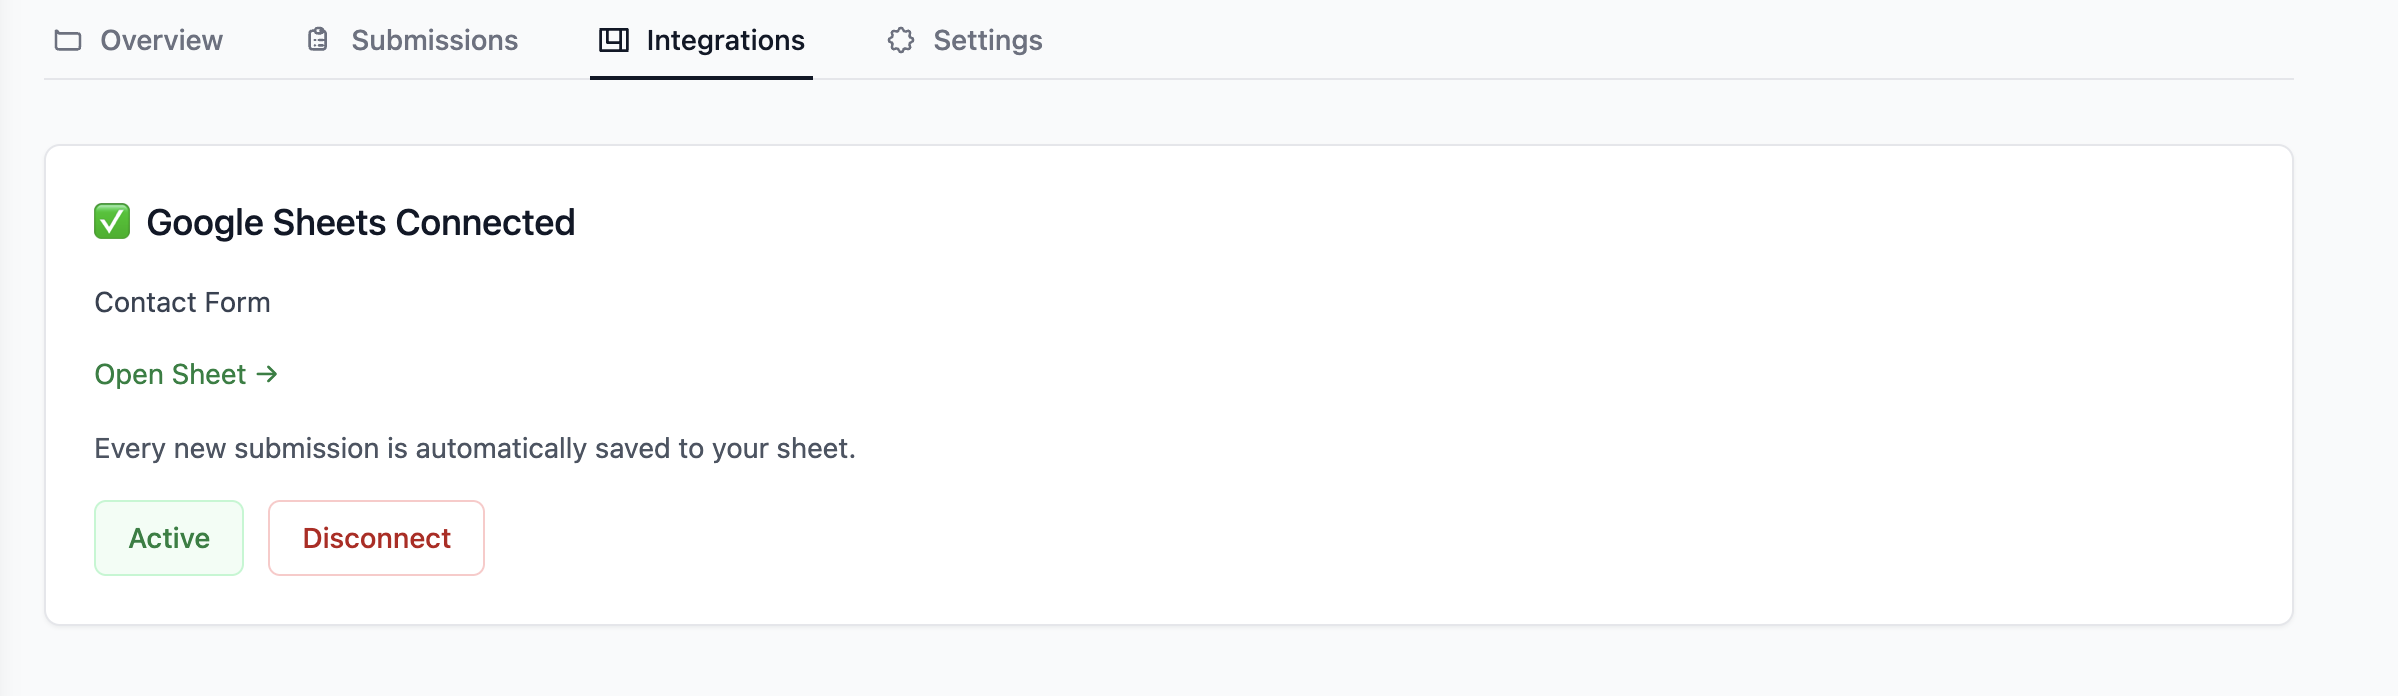
Part Four: Verify the Full Flow Is Working
Step 14: Submit Another Test Entry Through Your Framer Form
Visit your live Framer site and submit another test entry, using realistic-looking data so it is easy to identify in your spreadsheet.
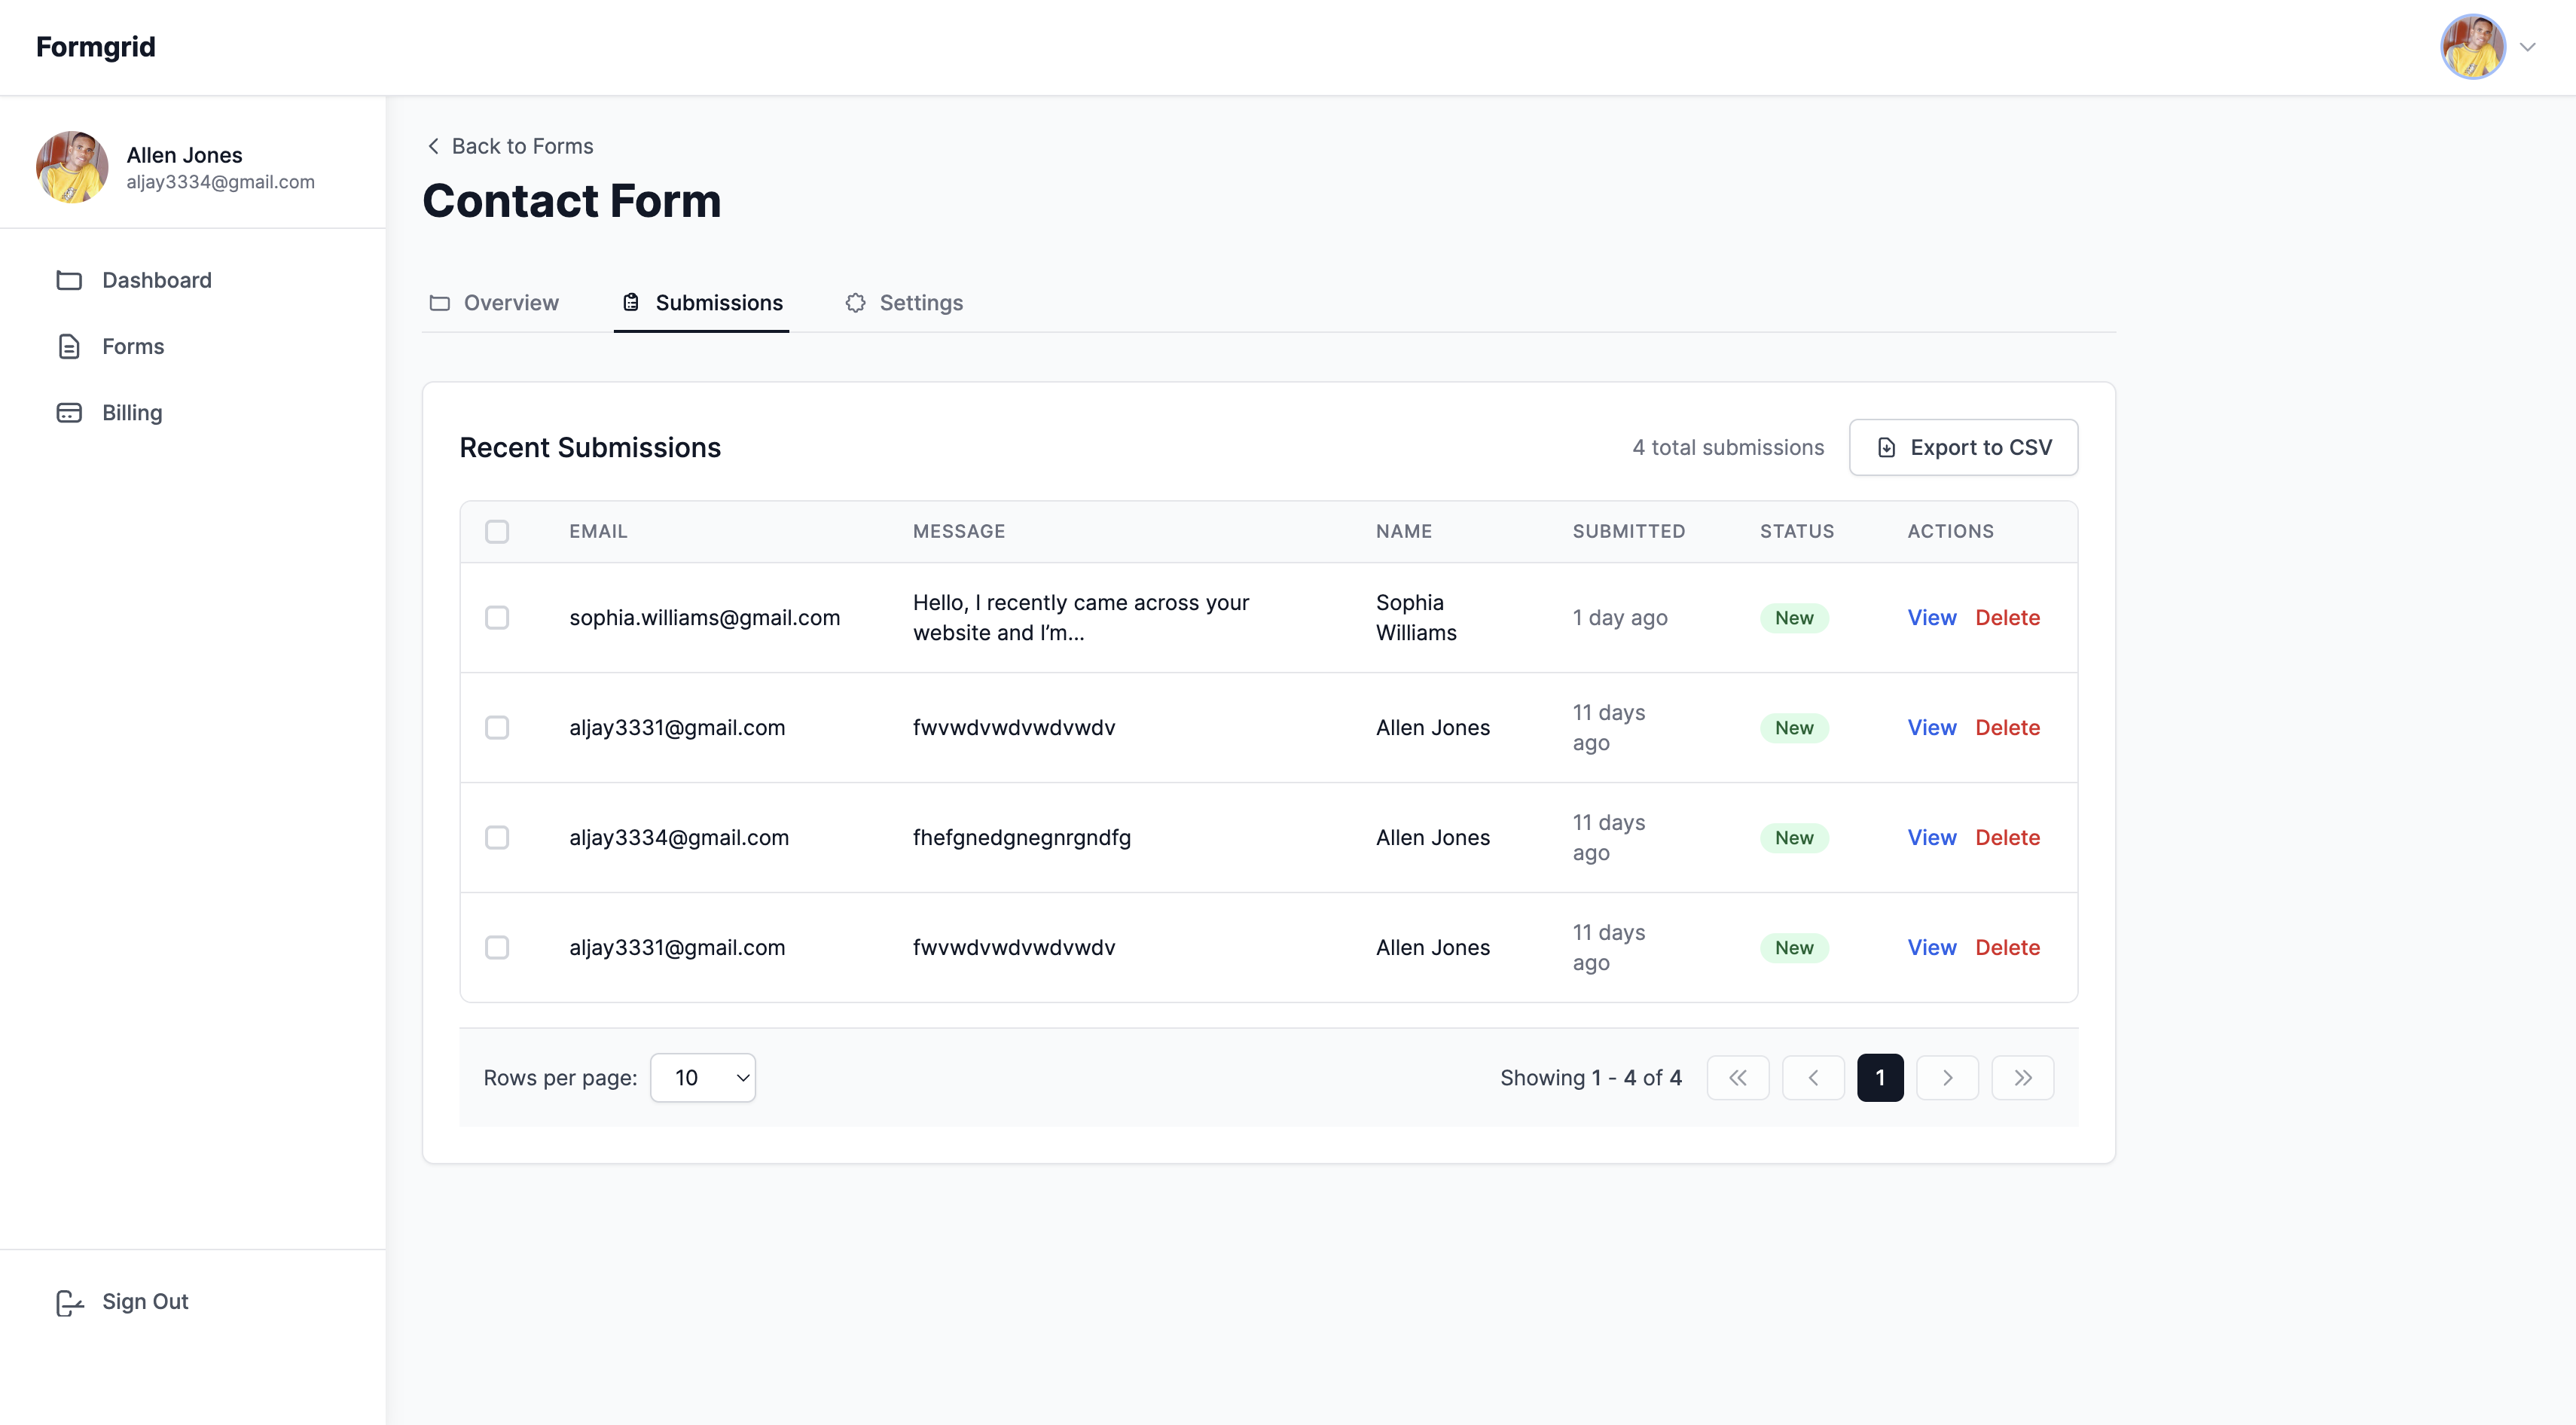
Open your Google Sheet. Within a few seconds you should see row 1 with column headers created automatically from your Framer form field names, and row 2 with your test submission data and a timestamp in the final column.
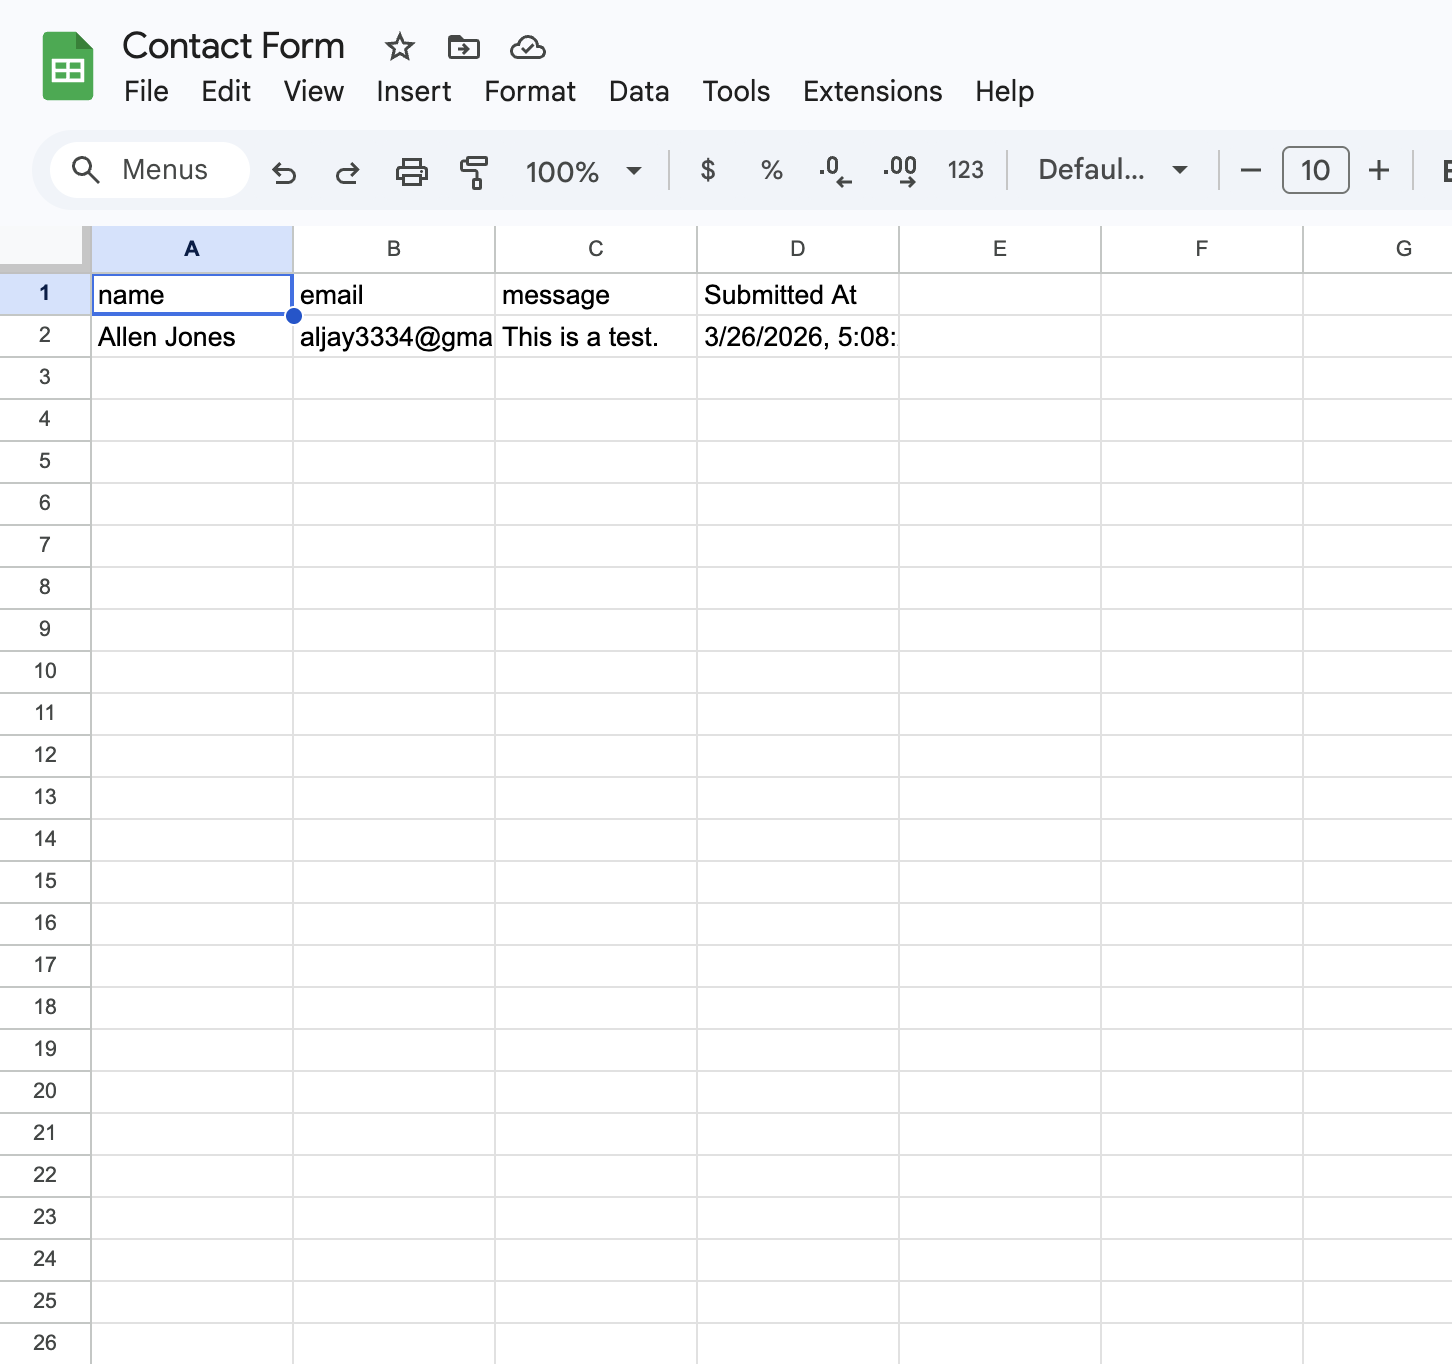
From this point forward, every submission made through your Framer form appears as a new row in your Google Sheet in real time. No logging into Formgrid, no exporting, no manual action. The data moves automatically the moment someone fills in your form.
Get this running on your own Framer site.
What Happens on Every Submission
Visitor fills in your Framer form and clicks Submit
          ↓
The browser sends a POST request to your Formgrid endpoint
          ↓
Formgrid receives and saves the submission to your dashboard
          ↓
Email notification sent to you and any other configured recipients
          ↓
A new row added to your Google Sheet instantly
          ↓
Spam protection runs in the background to filter out bot submissions
Your submission is available in three places simultaneously: your Formgrid dashboard, your email inbox, and your Google Sheet. If any one of those ever has an issue, you still have the other two as a complete record.
Managing Your Google Sheets Connection
Once connected, the Integrations tab in your Formgrid dashboard gives you full control over your connection.
Pause the integration. Use the Active toggle to pause syncing at any time. New submissions are still saved to your dashboard and email notifications still go out, but new rows are not written to your sheet. Toggle it back on to resume.
Disconnect. Removes the connection entirely. Your existing sheet data stays exactly as it is in Google Sheets. New submissions will not sync until you reconnect.
Open Sheet. Takes you directly to your connected Google Sheet with a single click.

How This Compares to Using Zapier
| Zapier Route | Formgrid Native | |
|---|---|---|
| Extra monthly cost | $19.99/month | Included with Formgrid Premium |
| Setup steps | 6 to 8 steps across two tools | 3 steps in one place |
| Real time sync | Depends on Zap frequency | Instant |
| Failure points | Two services that can break | One |
| Spam protection | None built in | Honeypot and rate limiting |
| Email notifications | Requires an extra Zap | Included |
| Submission history | In Zapier logs | In your Formgrid dashboard |
A Real Example: How a Designer Uses This Setup
Marcus runs a design studio. He uses Framer for his portfolio and has a project enquiry form on his contact page.
Before connecting Formgrid, every enquiry arrived as an email, client name, project type, budget, and timeline all in one unformatted block. He was replying from his inbox with no way to track which enquiries he had followed up on and which had gone cold.
He connected his Framer form to Formgrid and linked it to a Google Sheet. Now every new project enquiry appears instantly as a structured row in his spreadsheet, name in one column, project type in the next, budget after that, timeline at the end. He shares the sheet with his business partner, who can see new enquiries in real time without needing access to his email.
After connecting, he discovered that most of his best-paying clients were coming from LinkedIn referrals, not Instagram. He would never have known that from his inbox. The spreadsheet made the pattern visible.
Set up your own project enquiry sheet.
Troubleshooting
Submissions not appearing in Formgrid after publishing Framer
Confirm you published your Framer site after changing the form action URL, changes made in the Framer editor do not go live until you publish. Also confirm the action URL is your full Formgrid endpoint and the method is set to POST.
"Could not access this sheet" error when connecting
Formgrid does not have write access to your sheet. Open Google Sheets, click Share, and confirm the Formgrid service account email is listed as an Editor. If it is listed as a Viewer, remove it and re-add it with Editor access, then try connecting again.
Column headers are missing or showing unexpected values
Column headers come from the name attributes of your Framer form fields. If a column is missing, check that the corresponding field has a name attribute set in Framer. If a header looks incorrect, update the field name in Framer, republish, and submit a new test entry. Existing headers in your sheet will not update automatically, you would need to clear the sheet and reconnect to reflect updated field names.
Submissions appearing in Formgrid but not in Google Sheets
Open the Integrations tab and check that the Google Sheets integration is showing as Active. If it shows Paused, click the toggle to resume. If it shows Active but submissions still are not appearing, try disconnecting and reconnecting the integration.
Framer is still sending its own confirmation email
When you set a custom action URL in Framer, it takes over the form submission handling. If Framer is still sending its own notification alongside Formgrid, you can disable the Framer notification in your Framer form settings and rely on Formgrid's email notification instead.
Invalid Google Sheets URL error
Make sure you copied the full URL from your browser address bar, not just the spreadsheet title or a partial URL. The URL must contain /spreadsheets/d/ followed by a long alphanumeric string.
Still stuck? Reach out and we'll help you get it connected.
What Formgrid Includes
Free plan ($0/month) includes:
50 submissions per month Form builder with shareable link Form endpoint URL Email notifications Spam protection
Premium plan ($12/month) includes:
1,000 submissions per month Google Sheets sync Everything in the free plan File uploads up to 1GB per file CSV export Advanced spam protection Remove Formgrid branding
Business plan ($29/month) includes:
15,000 submissions per month Unlimited Google Sheets sync Everything in Premium Webhooks: connect to Zapier, Make, Slack, Notion, Airtable, and more Custom HTML email templates Auto-responder emails to form submitters Multiple notification recipients Custom email subject lines Priority support with direct access to the founder
No contracts. Cancel at any time.
👉 Start free at formgrid.dev. No credit card required.
Final Thoughts
Framer makes it easy to build beautiful forms. Formgrid makes it easy to do something useful with what those forms collect.
Connecting your Framer form to Google Sheets through Formgrid requires one change in your Framer form settings, one shared spreadsheet, and a few clicks in your dashboard. Once it is set up, every submission lands in your spreadsheet automatically and in real time, no Zapier subscription and no ongoing maintenance on your part.
If your team is currently managing Framer form submissions out of an email inbox, this setup will save you time from the first submission it processes.
Full disclosure: I built Formgrid. Written as honestly as I could. Let me know in the comments if anything is unclear or looks off.
Comments
Leave a comment